By default the WordPress registration form is pretty bland, all you can collect is an email address, username and a password.
There’s no information about the user, the country they are from, or any other information.
But what if you want to build a directory such as an internal employee directory and want said employees to sign up and enter information about themselves for team building?
That’s where custom user meta comes in and the easiest way to add custom user meta to your forms? WP User Manager (WPUM).
In this guide, I’ll show you how to create custom user meta for your forms.
Contents
Setting Up Your Registration form
Adding Fields to Registration Forms
Custom User Field Addon
How to Create Custom User Meta Fields
Editing and Collecting User Information
Deleting Fields & Groups
Conclusion
Back to top
Setting Up Your Registration form
Before you go ahead and add custom user meta fields you need to create your registration form and for this entire tutorial, you need WP User Manager (WPUM).
What is WP User Manager?
Simply, WP User Manager is one of the most straightforward to use WordPress membership plugins available.
If you’ve ever tried membership plugins before you’ll often find them cumbersome and difficult to use but WP User Manager makes the experience a breeze.
In short, it handles the following:
- User directories
- Restrict content
- Social login
- Mailchimp integration
- Custom field support
- Verify users
- And so much more.
Adding Fields to Registration Forms
The default registration form is pretty basic with just a username and password. But you can jazz that up through the use of the registration forms feature in WPUM.
- Go to Users > Registration Forms on your dashboard.
- Click the Customize Fields link that appears on the page.
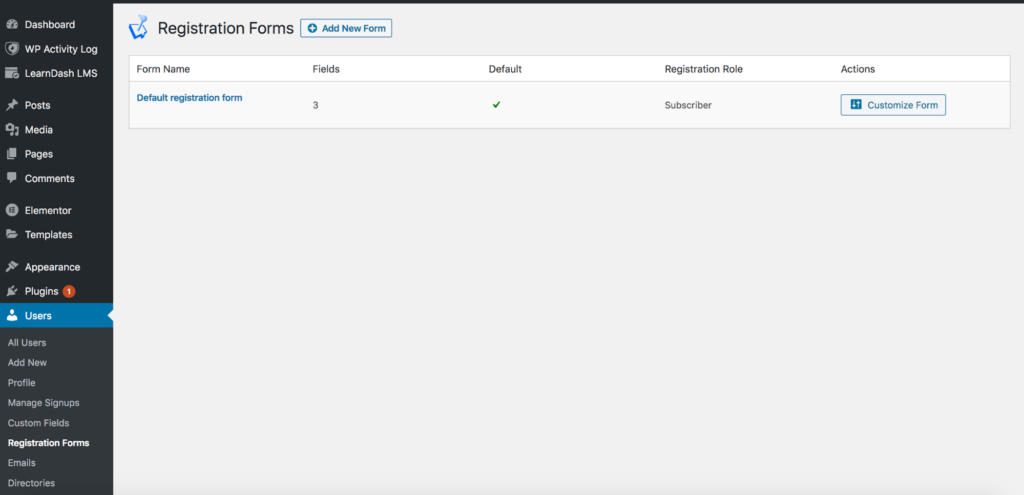
- You will be taken to a drag-and-drop forms editor with preloaded fields: username; first name; last name; website; description. Note that not all fields will be shown on the registration form, and some — like email and password — are required.
- Simply drag and drop the available fields on the left into the box on the right and save your changes.
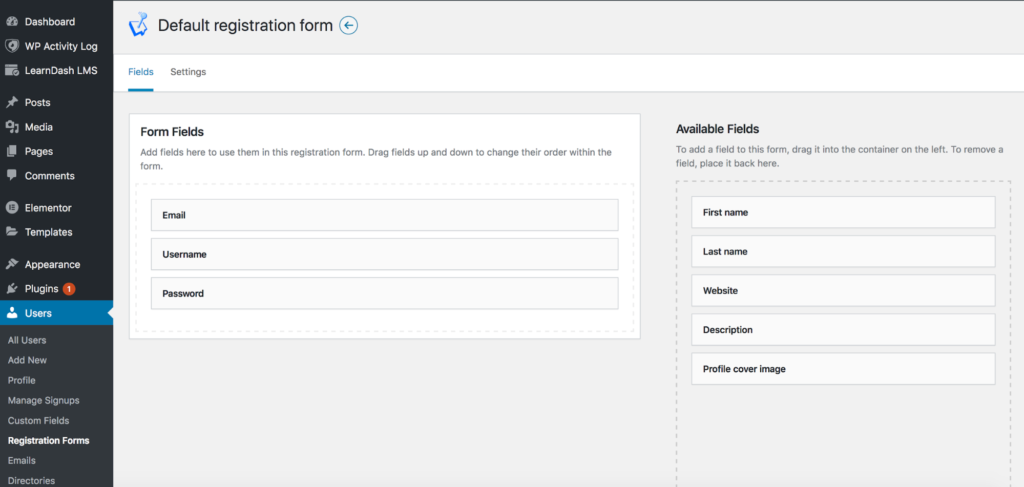
This information is now available both on the frontend and backend–on the user’s profile and in the User tab on your dashboard.
Custom User Field Addon
Although WPUM comes with the necessary user fields to create an effective registration form, you may want to include different fields in order to collect additional information or customize said categorizations. In order to do this, you will need to download the Custom Fields Addon.
- Once you have purchased and downloaded the plugin file, go to your dashboard, Plugins > Add New.
- Locate the correct downloaded zipped file.
- Click install now and activate the Custom User Field Addon.
The plugin is now ready to use!
What the Plugin Offers
Because the plugin integrates with the existing field editor, you should have no problem familiarizing yourself with the new options.
There are two categories of fields to choose from: Standard or Advanced.
Selecting a field from these categories will add them to your field list. You can also create field groups, which allow you to categorize your fields based on their purpose. For instance, if you need to create fields for users assigned as Editors, you can create a field group specifically for them and so on.
Both new fields and field groups will display in the frontend and backend of your site depending on your level of access.
On the frontend, users will be able to access the new field groups assigned to their user role on their account page. The new field group will show up as a separate tab on the left.
Only if the admin allows it will new custom fields created using the addon be displayed on the frontend. On the back end, administrators have access to both the added fields and groups. Admins can also edit and add user information from the backend.
How to Create Custom User Meta Fields
Now let’s start taking advantage of those new features!
- To start, go to the custom fields editor. Dashboard > Users > Custom Fields. You will see that your default fields are in their own group called Primary.
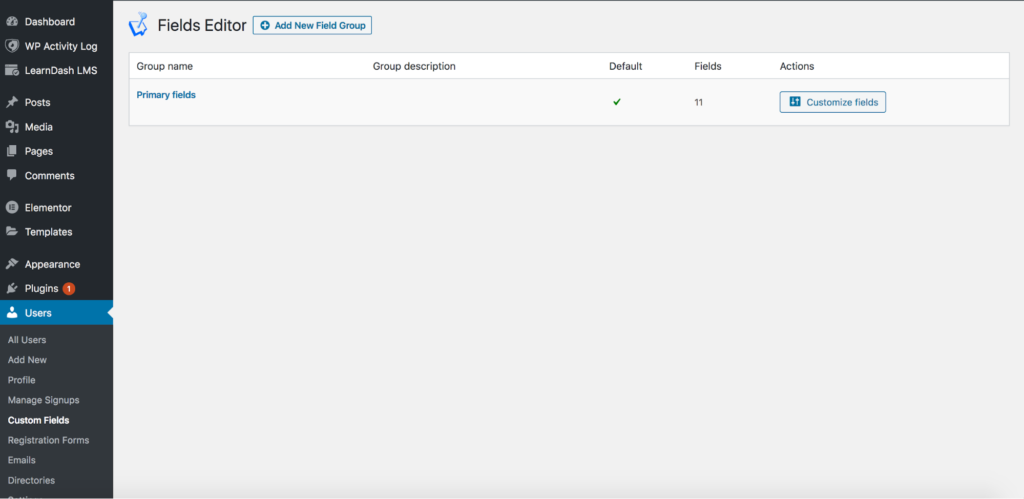
- To add custom fields to your Primary group, go ahead and select it.
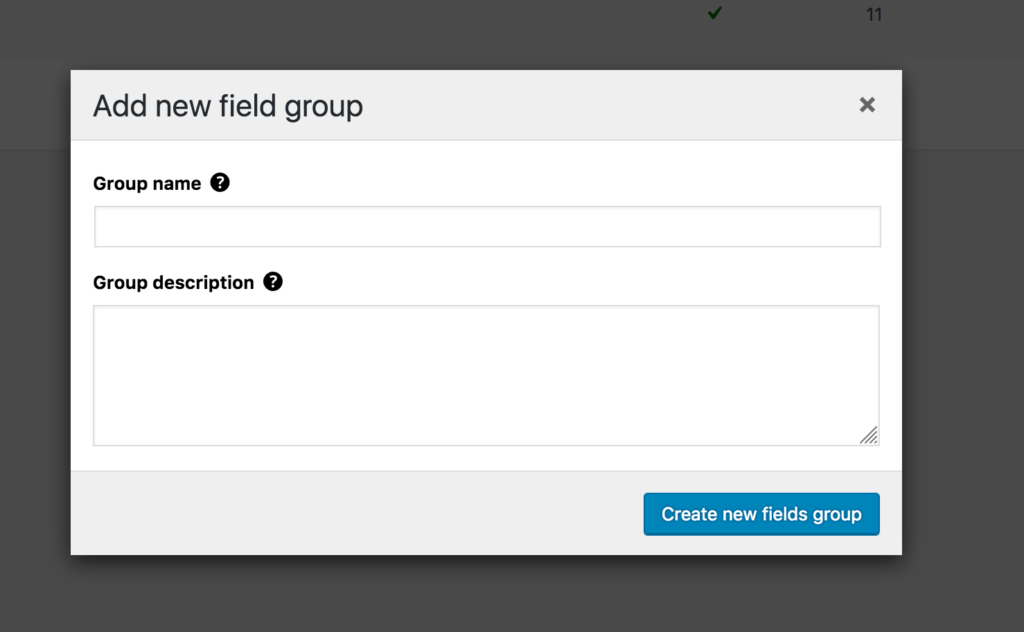
- If you wish to create a new field group before adding new fields, click Add New Field Group. Fill out the form that pops up. Once you have created a new group you can begin adding your custom fields.
- Select your desired group. In the new window, to the right of the group name, you will see a button called Add new custom field.
As previously mentioned, you’ll be given two different field categories, Standard or Advanced. Each category contains a list of fields you can choose from.
Each field category has a different function and are as flexible as you need them to be.
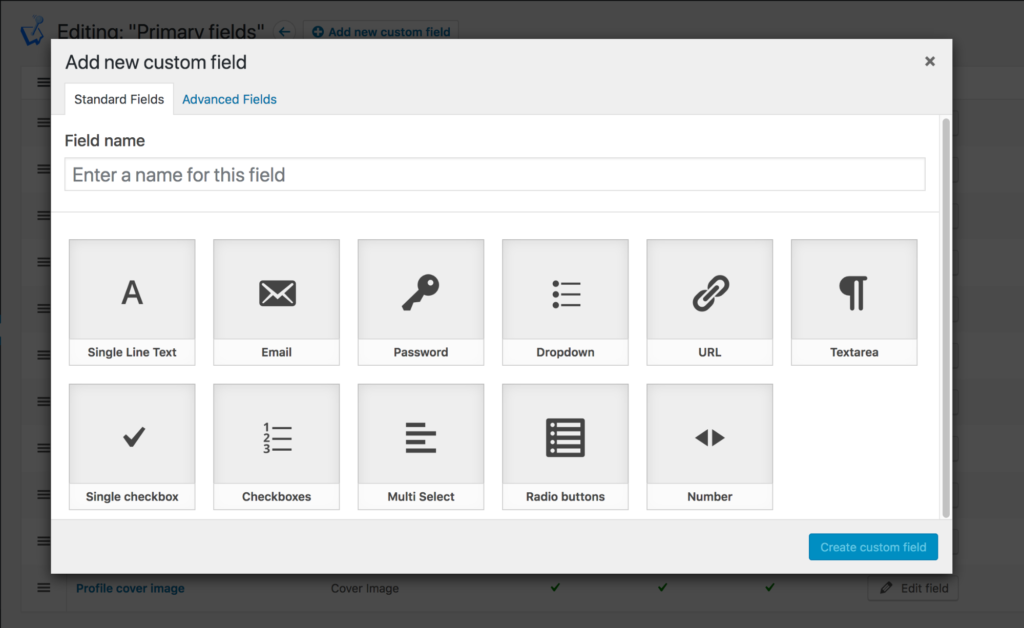
To add the field to your list, fill out the new field title, select the field type from the icons below, and click Create Custom Field.
- You will be taken to a new window where you can adjust the settings of the field, including the field’s display settings. The visibility settings will allow you to add or hide the fields on user profiles. These field settings can always be accessed and edited later by selecting Edit Field. You can find this in the list view of your field group.
- The new field is now part of your group list.
You can add these custom fields to registration forms and user profiles just as you would the default fields.
Standard Fields:
- Single Line Text: allows for short text responses.
- Email: Users can add an email address. The field will determine whether or not the input text is an email address. This will not change the user’s account email.
- Password
- Dropdown: create a drop down with predefined options. Users choose one option. Admins can create an unlimited amount of choices.
Admins can also create a US State dropdown field. *Note: You may have to create a new directory for this feature. First, create a new dropdown field. Go into the field’s settings and change the unique meta key setting to field_us_state. Create a new file in wp-content/mu-plugins called wpum-field-state.php. Copy and paste the code listed here.
- URL: users can add a URL to their profile.
- Paragraph Text Area: allows for multiple lines of text.
- Single Checkbox: the user is given a yes/no option. If the user checks the box, it is considered a yes and the field text will appear on the user’s profile.
- Checkboxes/Multi Select: users can select multiple options set by the administrator.
- Radio Buttons: like the dropdown field, users choose one choice from a set of predefined options. Admins can create an unlimited amount of choices.
- Number: administrators can set a minimum and maximum number or leave one blank if they don’t need two number boxes.
Advanced Fields:
-
- File: users can upload images or other file types. If users upload images, they will appear as the image on the frontend; other files will appear as the file name. On the backend, all uploaded files appear as a list. Uploaded files are stored under wp-user-manager > wp-content/uploads folder on your server. Administrators can determine maximum file size in bytes.
- Datepicker
Editing and Collecting User Information
While the default fields are great and all how about if you want to collect more information at signup like a phone number?
Then you’re in luck. When using custom fields from WPUM you can go to your wp-admin > Users > Custom Fields and edit the primary field group and click “Add custom field”.
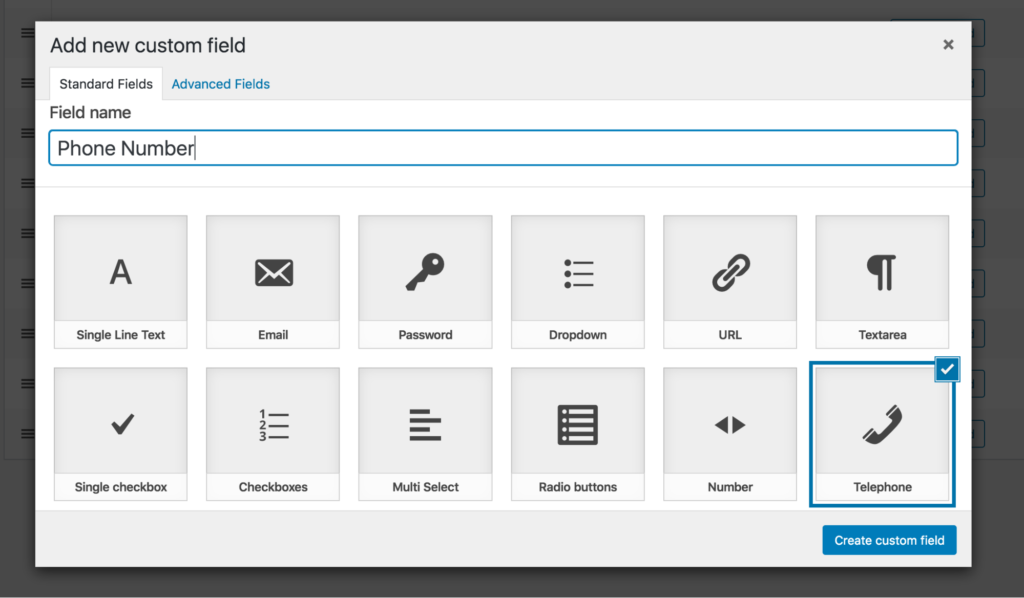
Then select “Telephone” as we want to add a phone number field, remembering to enter a name for your custom field. Once done click “Create custom field”.
You can then change a wide array of settings for your custom field:
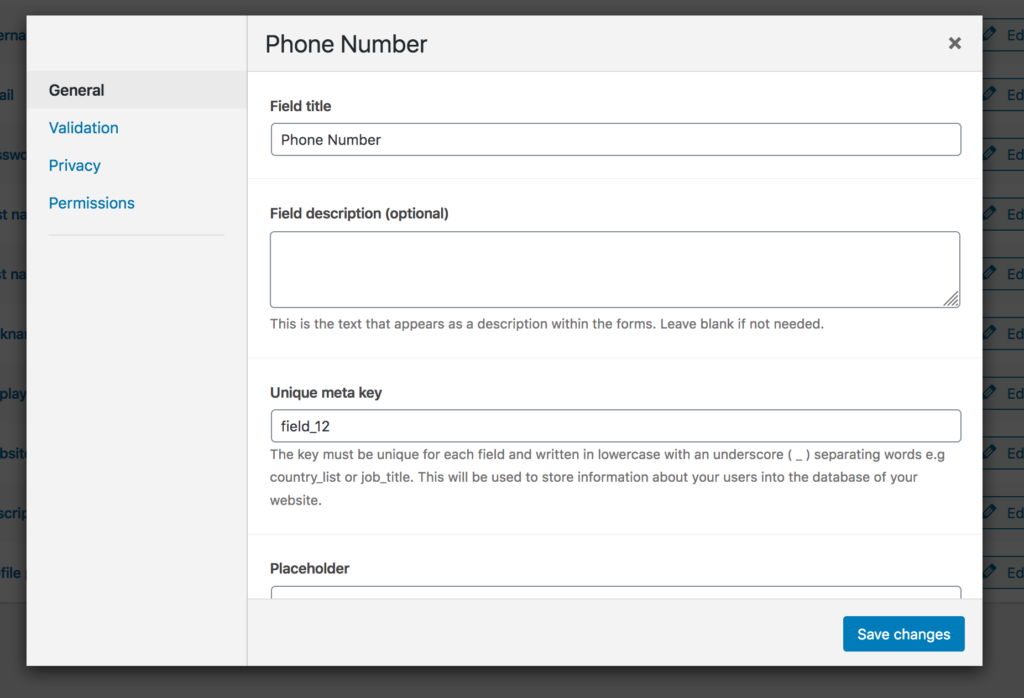
We’re going to skip that though, so just click “save changes”.
Now your field is created you need to add it to your form so go on over to your wp-admin > Users > Registration forms and edit the default registration form.
You’ll see your newly created field on the right.

Drag and drop that to your form and it’ll be automatically saved.
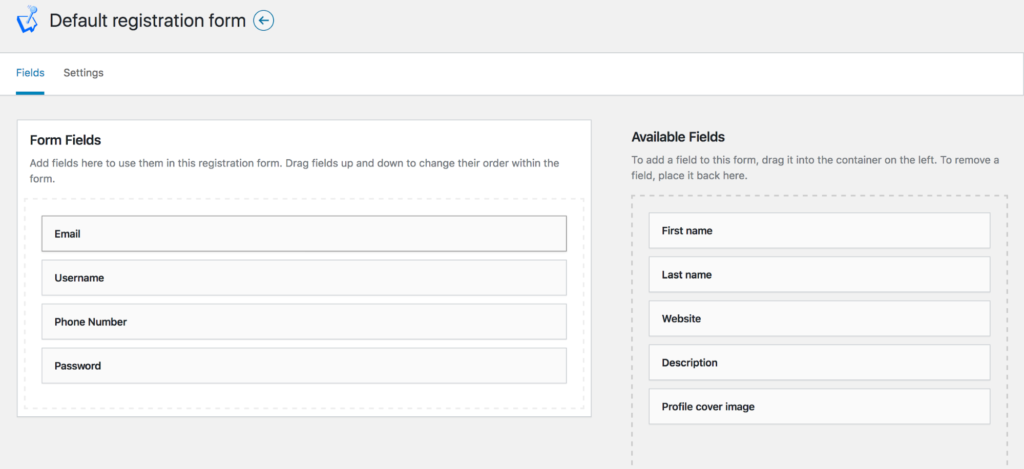
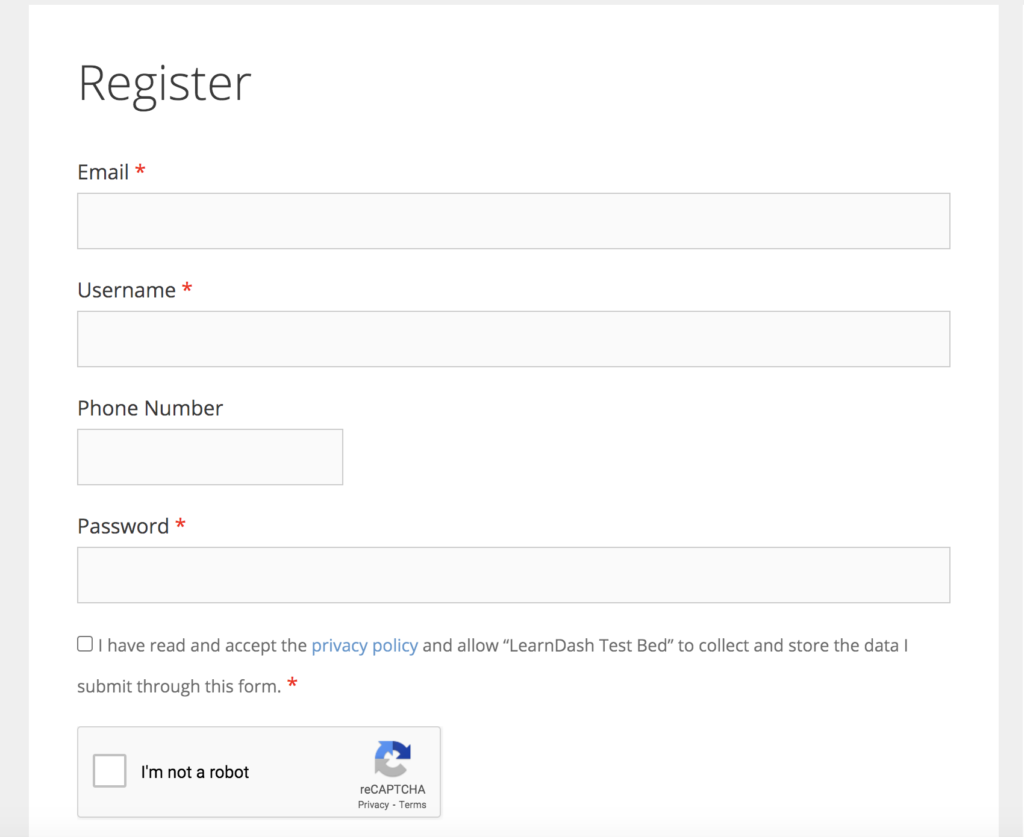
Now when you go to the front-end of your site you should see the new field as part of your registration form like so:
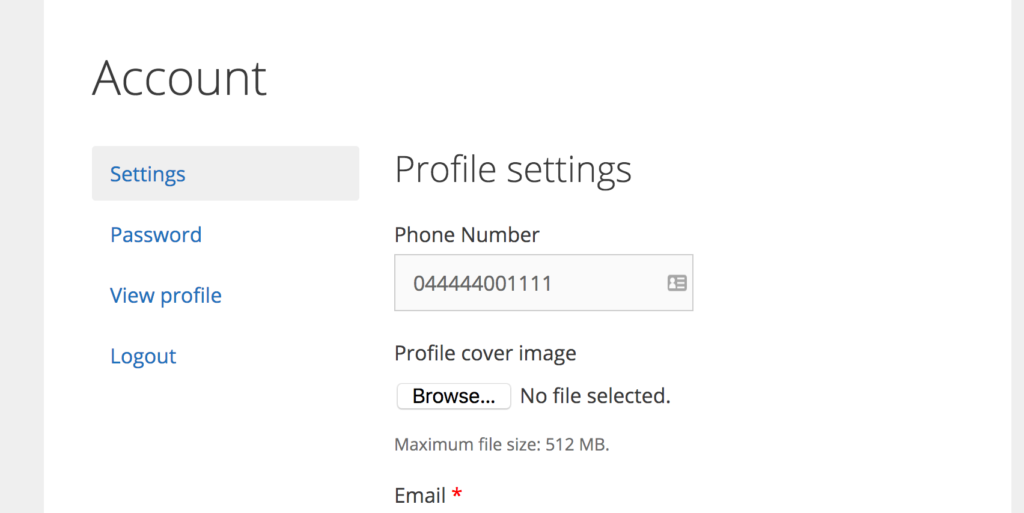
Now if you were a user on your website and had entered an incorrect phone number you can go to your account page on the front-end and edit the field value and save your changes.
Admins
You can edit information input into new fields by users from the backend. Simply go to your dashboard, select Users and click edit.

Deleting Fields & Groups
Deleting fields are easier than making them! In the list view of your field groups, next to Edit Field, you’ll see Delete Field. All you have to do is press that button!
The same goes for deleting field groups. Just be wary that there aren’t any fields in the group that you’d like to keep. When you delete a field group, you delete all the fields in that group.

Wrapping Up
Adding custom user meta fields doesn’t have to be a pain. Thanks to the custom user meta add-on it’s both quick and straightforward to add new fields and make that connection between your site and your users that much more dynamic.
Have you created custom user meta before? Have you found that having more user meta improves your site experience? Let me know in the comments below.

Get Started with the Best WordPress Membership Plugin Today
Connect, Manage and Build your Membership Site
