If you want to know how to create a custom WordPress login page, you’ve come to the right place.
For most WordPress websites, the login page won’t be widely accessed by your visitors. But if your visitors need to log in for some reason — maybe you have a membership site, an online directory, or a discussion forum — then they’re going to be accessing the default WordPress login page on a regular basis.
While the default login page does work, it’s not particularly attractive and isn’t very user-friendly or welcoming, especially for those who aren’t familiar with logging in to WordPress websites.
Thankfully there’s a lot you can do to make your login page feel more like a part of your website, and best of all, with the right tools, the process of creating a custom WordPress login page is very straightforward.
Why Create a Custom WordPress Login Page?
If you’re tempted by the idea of creating a custom login page for your WordPress website but aren’t completely convinced it’s a necessary task, here are some of the benefits of doing so:
Deliver a Consistent and Seamless User Experience
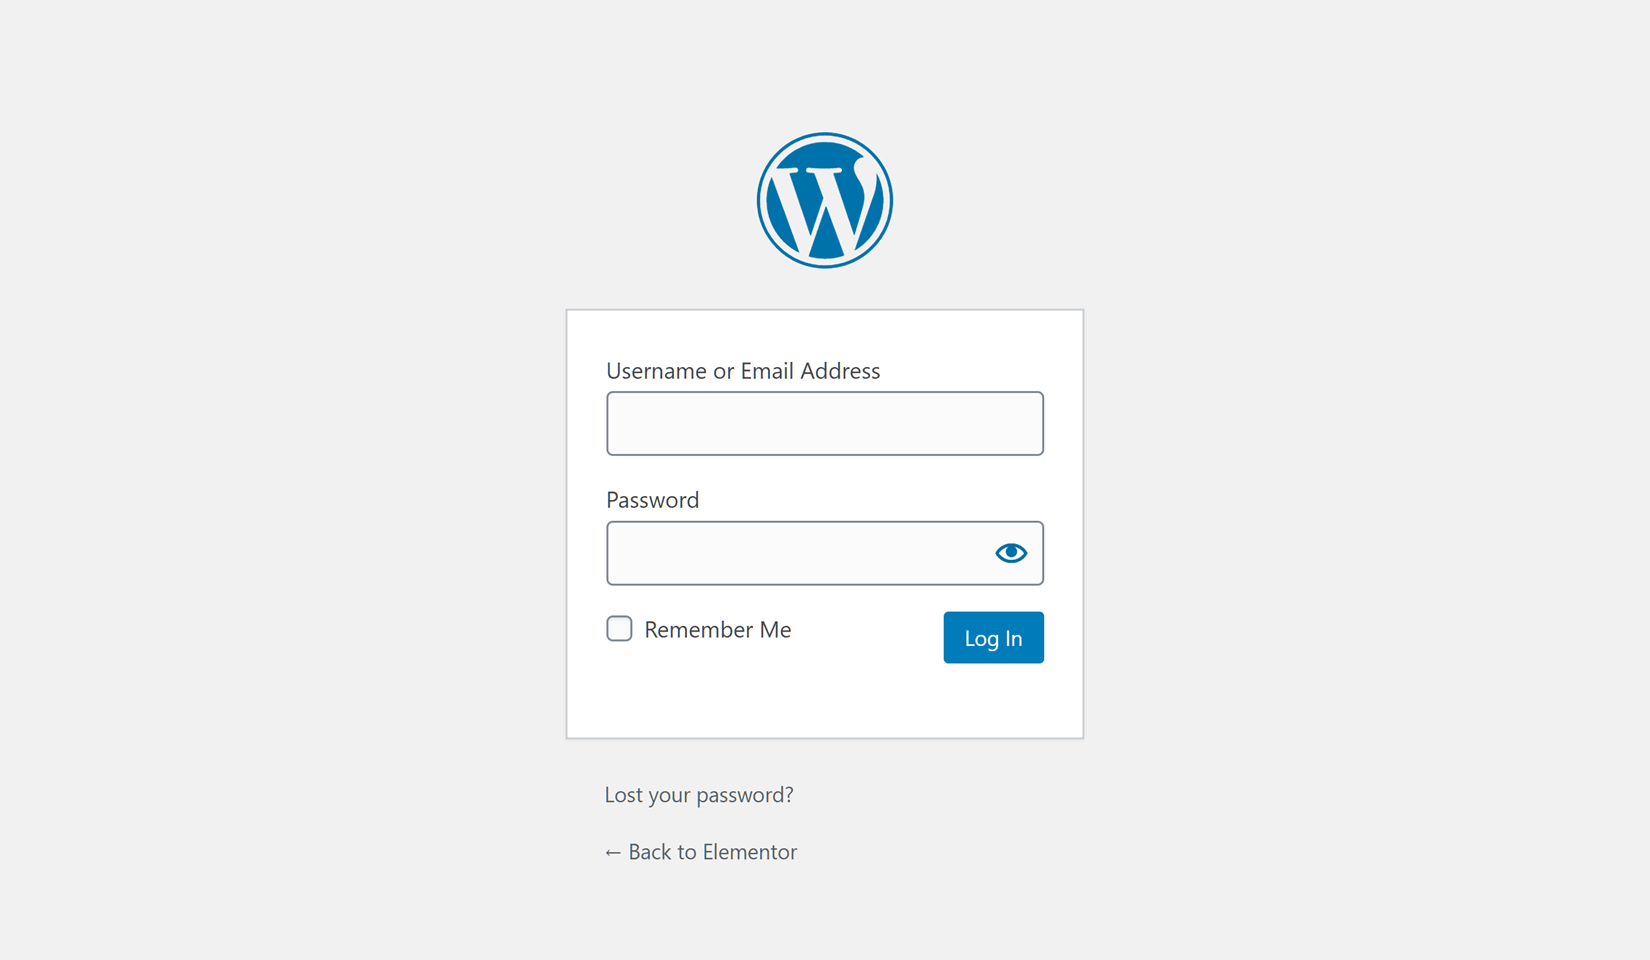
By default, when users login to WordPress, they see the boring and unattractive default login page. Even if you’ve chosen a stylish theme for your site, chances are, the default login page will still be in use.
This might be fine for you and your team, but for your customers or members, running into the default login page can be a confusing break in the user experience of your website.
Not only will visitors see the WordPress branding instead of your own, but the change in style and design might make them wonder if they’ve reached a part of your site they shouldn’t have. Rather than logging in, they might turn back, or even open a support ticket asking for help, creating more work for you and your team.
Taking the time to create a custom WordPress login page allows you to extend the overall design and user experience of your site to cover the process of logging in.

Get Started with the Best WordPress Membership Plugin Today
Connect, Manage and Build your Membership Site
Improve the Security of Your WordPress Website
Overall, the WordPress software is secure. However, the predictability of a typical WordPress website makes these sites easy for hackers to exploit, especially when it comes to the default login page that’s in use on most sites.
Taking control of the design of your login page, however, gives you an opportunity to implement some steps that can stop potential hackers in their tracks.
Some examples of this include changing the default URL or address of the login page so it’s not so easy for spam bots to find and attack as well as adding some anti-spam features, such as a reCaptcha field to prevent robots from being able to log in.
Make Better Use of a Frequently Visited Page
As well as including your own branding, you can also add other content to this important part of your site when you create a custom WordPress login page.
Depending on the type of website you’re creating a custom login page for, this additional content could include promotional messages, links to other parts of your site, or content that’s useful for anyone who accidentally reaches your login page.
As you can see, there are lots of good reasons to replace the default WordPress login page with a custom design.
So know that you know why let’s find out how…
Creating a Custom Login Page for WordPress
When it comes to creating a custom login page, just like using an off-the-shelf WordPress theme to change the design of your site, or installing a plugin to add a new feature, the quickest and easiest way to get the job done is to use a purpose-built tool.
When it comes to custom login page plugins, the free-to-use WP User Manager is more than up to the task.
As we’re about to see, WP User Manager makes it very easy to create a custom login page for your WordPress website.
Install the WP User Manager Plugin
As the WP User Manager plugin is free to use, it can be installed directly from your inside your WordPress dashboard.
Once you’ve logged in to your WordPress website, navigate to the Add Plugins page, and search for WP User Manager.
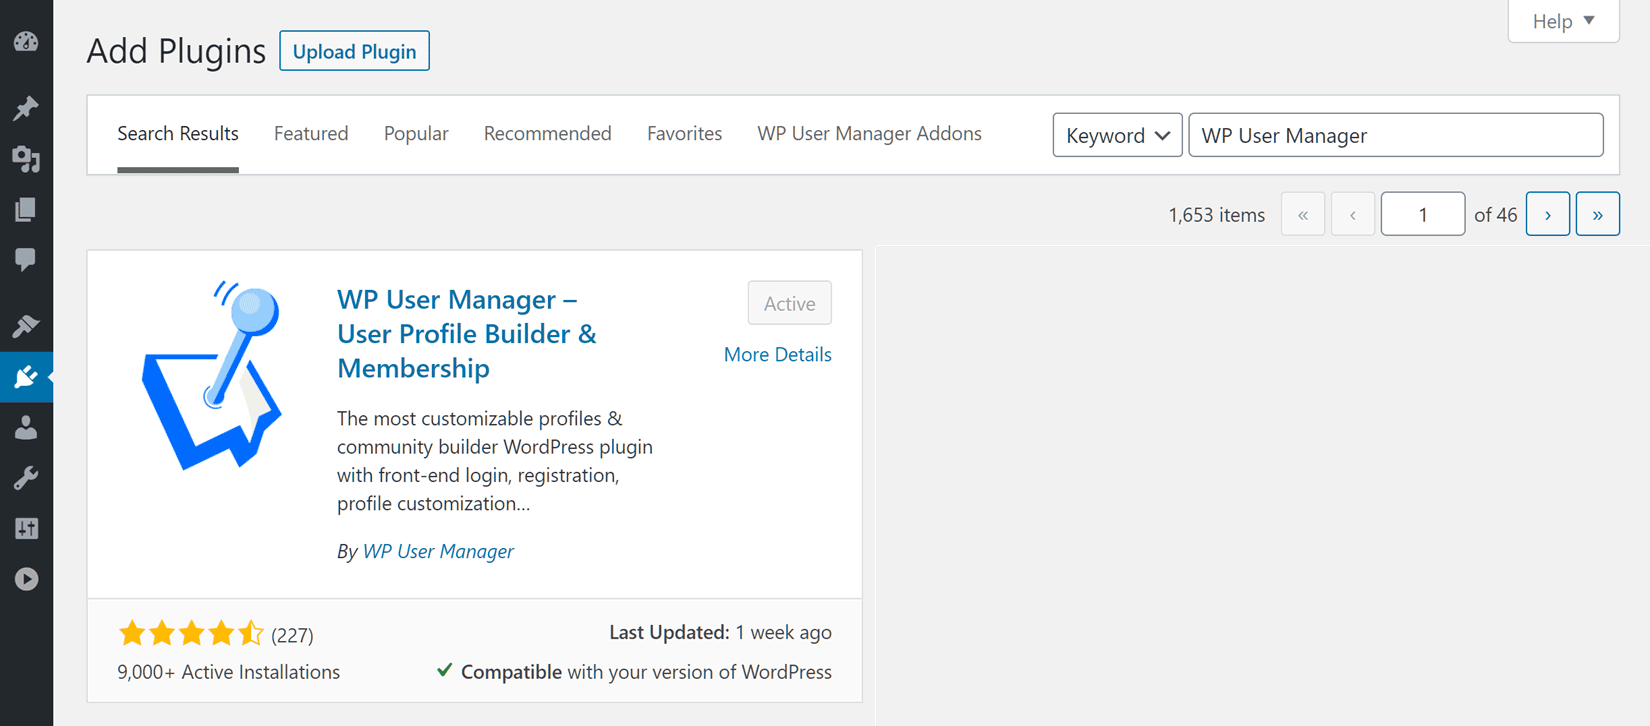
After clicking on the Install then Activate button, the plugin will automatically create a number of pages for your site, including one that will serve as the custom login page.
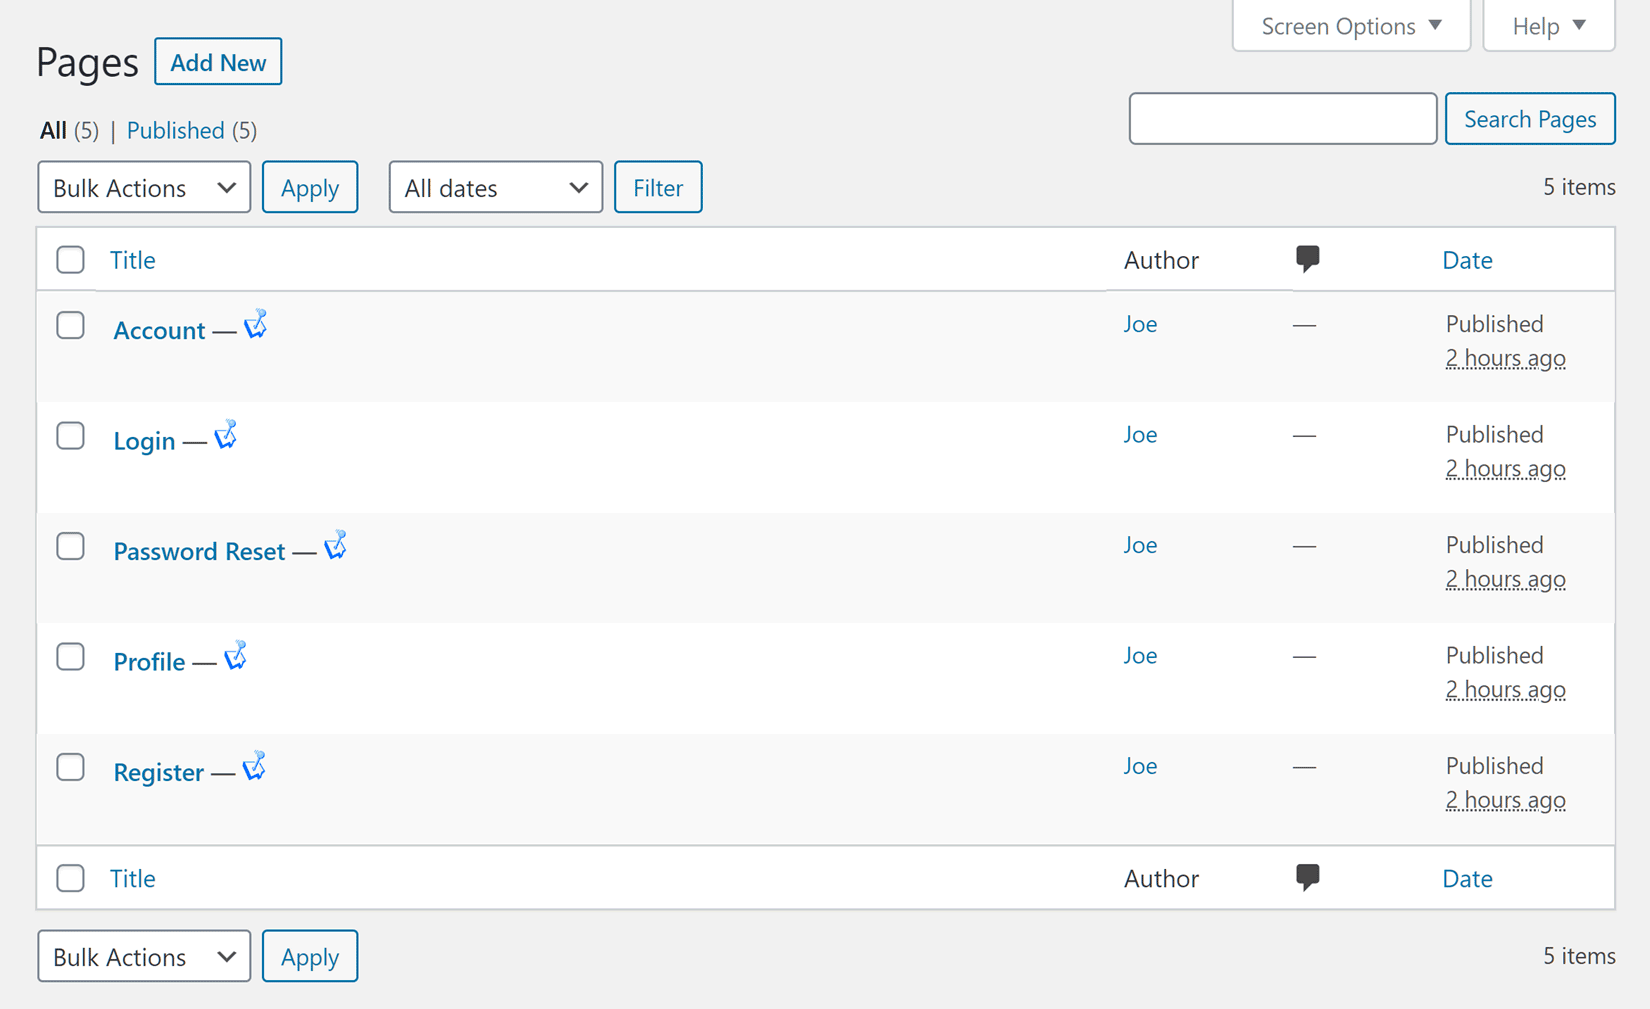
The login page that’s created by the plugin contains a shortcode that will display the form that allows registered visitors to log in.
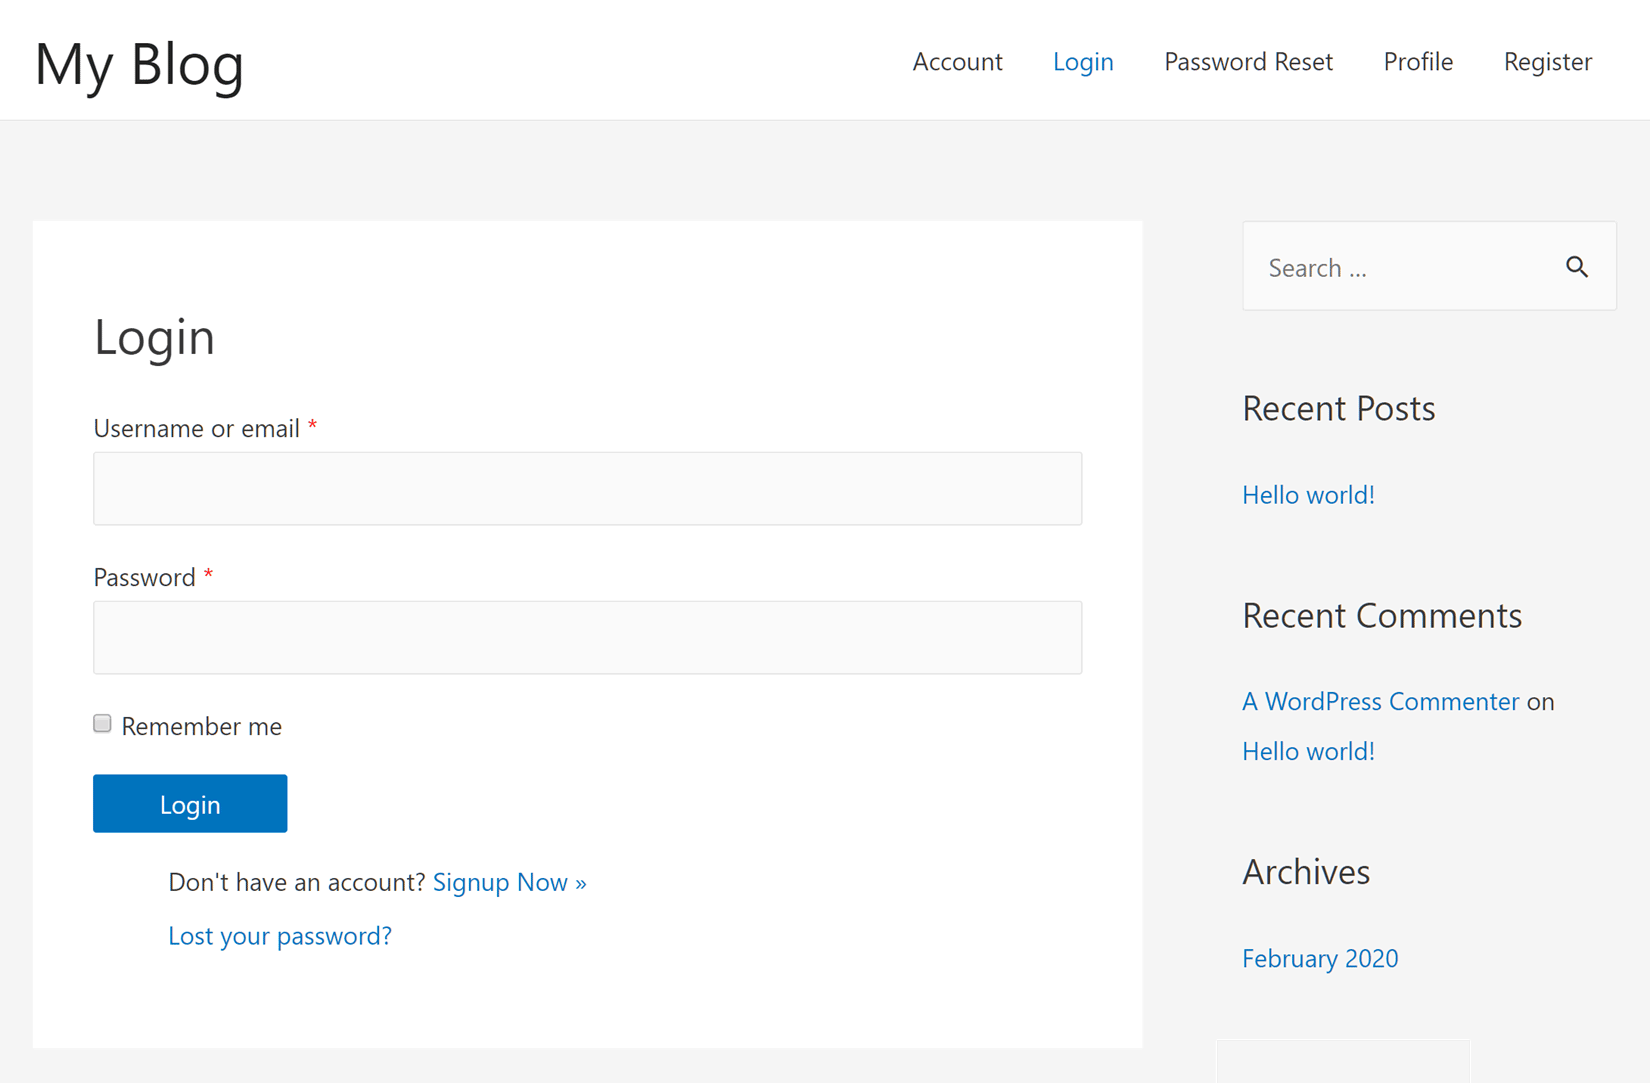
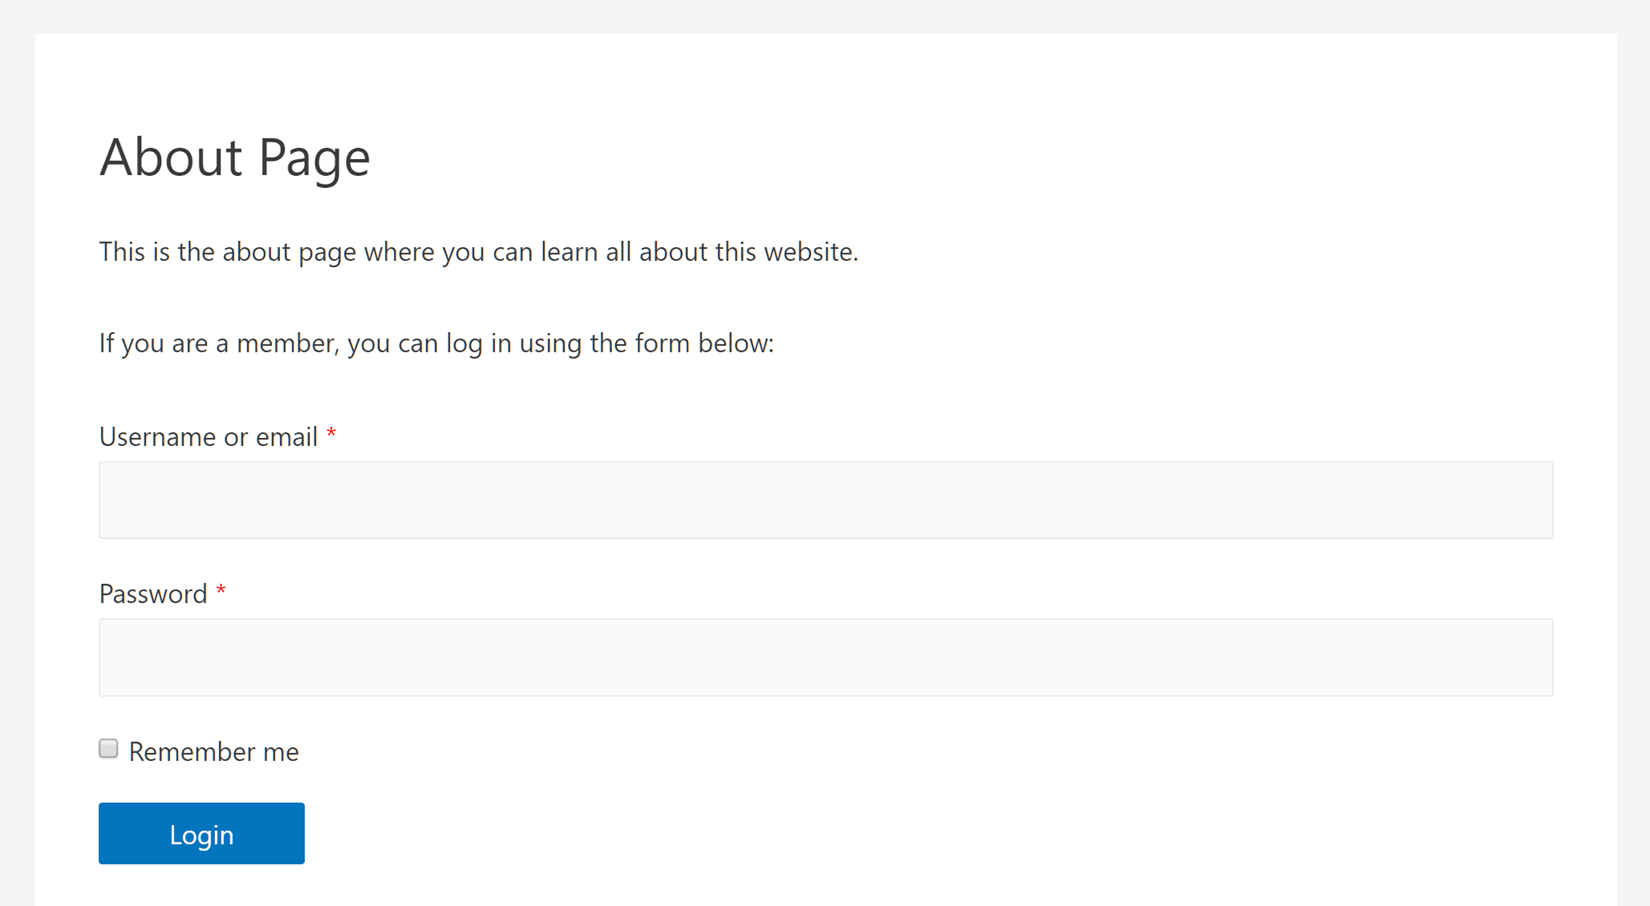
As you can see, when you access the new login page, not only is it lacking the WordPress branding of the default login page, but it also has the same styling as the other content on your site, such as the same fonts and colors.
Furthermore, as this is just a regular page on your site that you created – or WP User Manager created on your behalf – you can customize it just like any other piece of content on your website.
Display a Custom Page After Login
By default, users are taken to the WordPress dashboard once they’ve logged in. However, WP User Manager makes it easy to choose which page on your site is displayed after a successful login attempt.
To define which page is displayed to users when they log in, click on the Settings item of the User menu in your WordPress dashboard. Then after clicking on the Redirects tab, you’ll be able to choose an existing page on your site from the After Login drop-down menu.
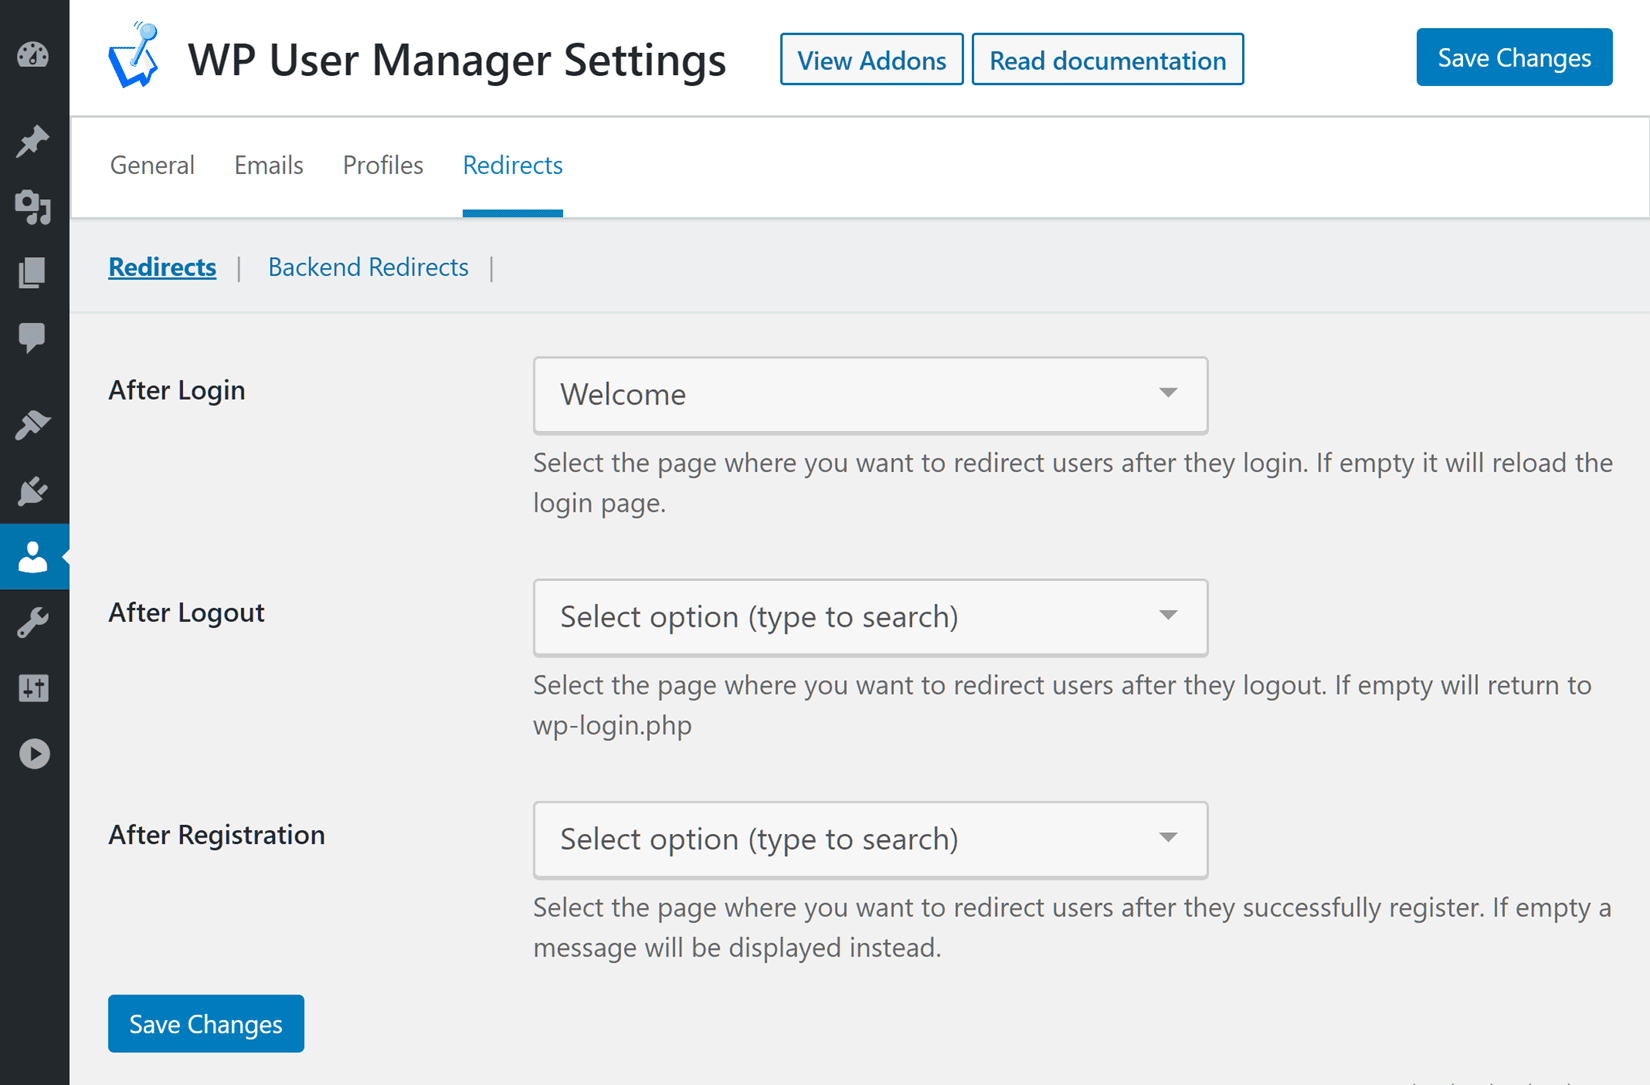
Now you can display custom content to your users after they log in that’s hopefully more helpful and potentially less confusing than having them unexpectedly reach the WordPress dashboard.
Add the Login Form to Other Pages
Although WP User Manager helpfully creates a custom login page for you to use, you can also add the login form to any other piece of content on your site.
To do this, it’s simply a case of opening a page that you would like to add the login form to for editing in the WordPress editor, or creating a new page, and then clicking on the plus symbol to display the Add block panel. Once the Content Block panel is visible, scroll down to find the WP User Manager blocks.
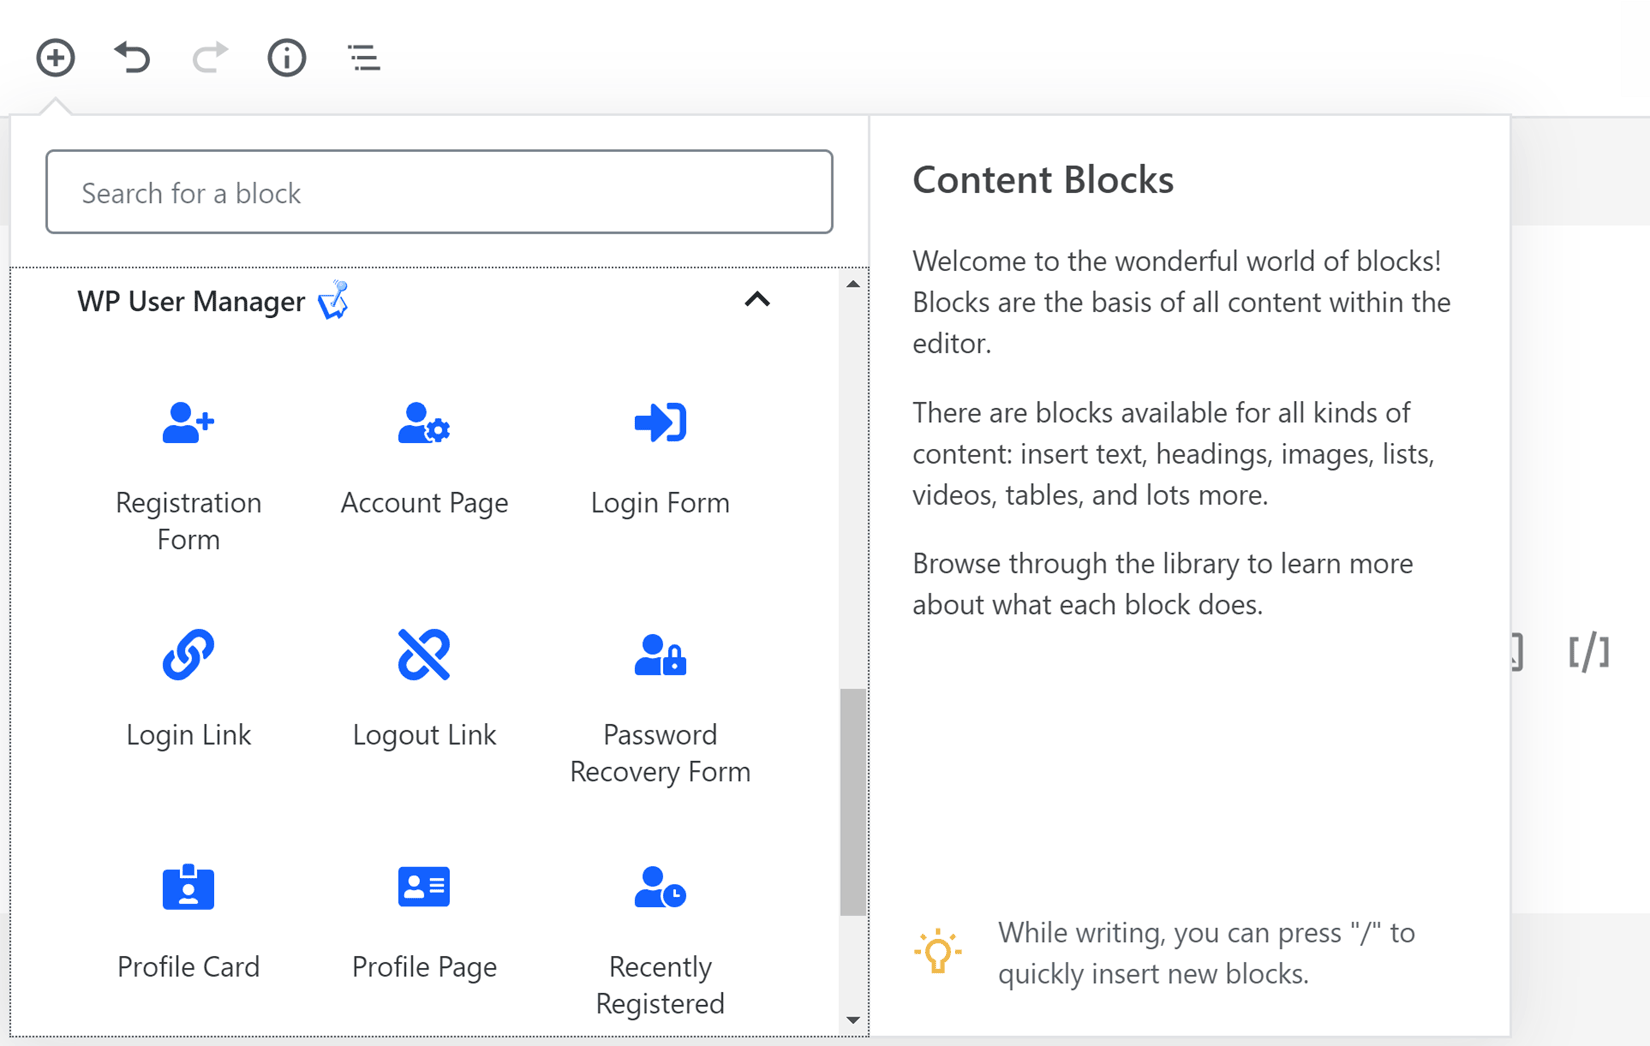
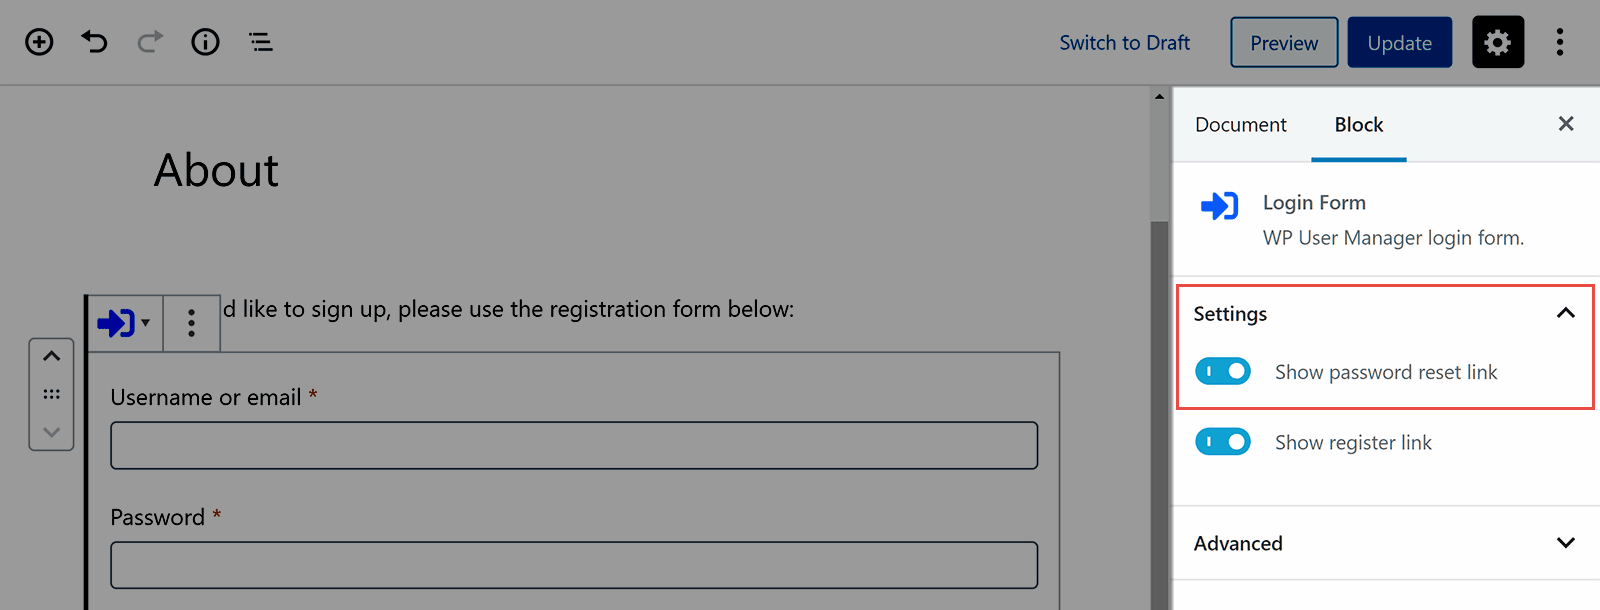
Once you click on the Login Form block, the form will be inserted into the page. If you select the form by clicking on it, you can use the settings in the sidebar to choose whether or not to show the password reset and register links on the page, with the login form.
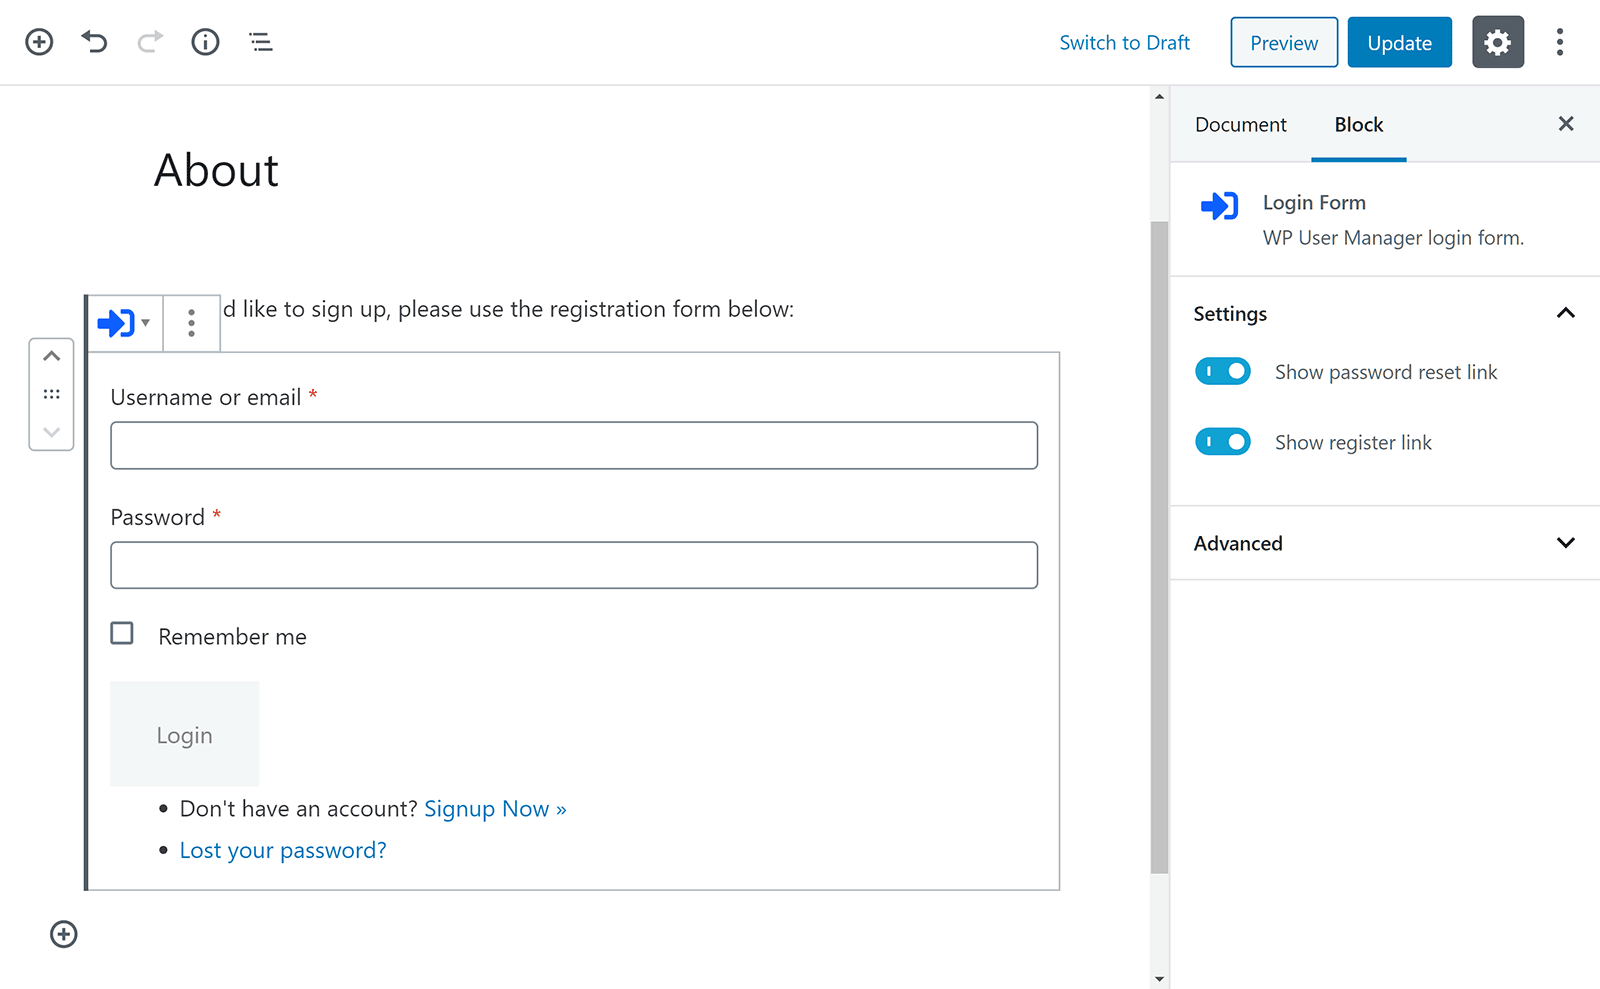
As well as using the WP User Manager block to add the login form to the page, you can also use the WP User Manager login form shortcode to insert the form: [wpum_login_form].
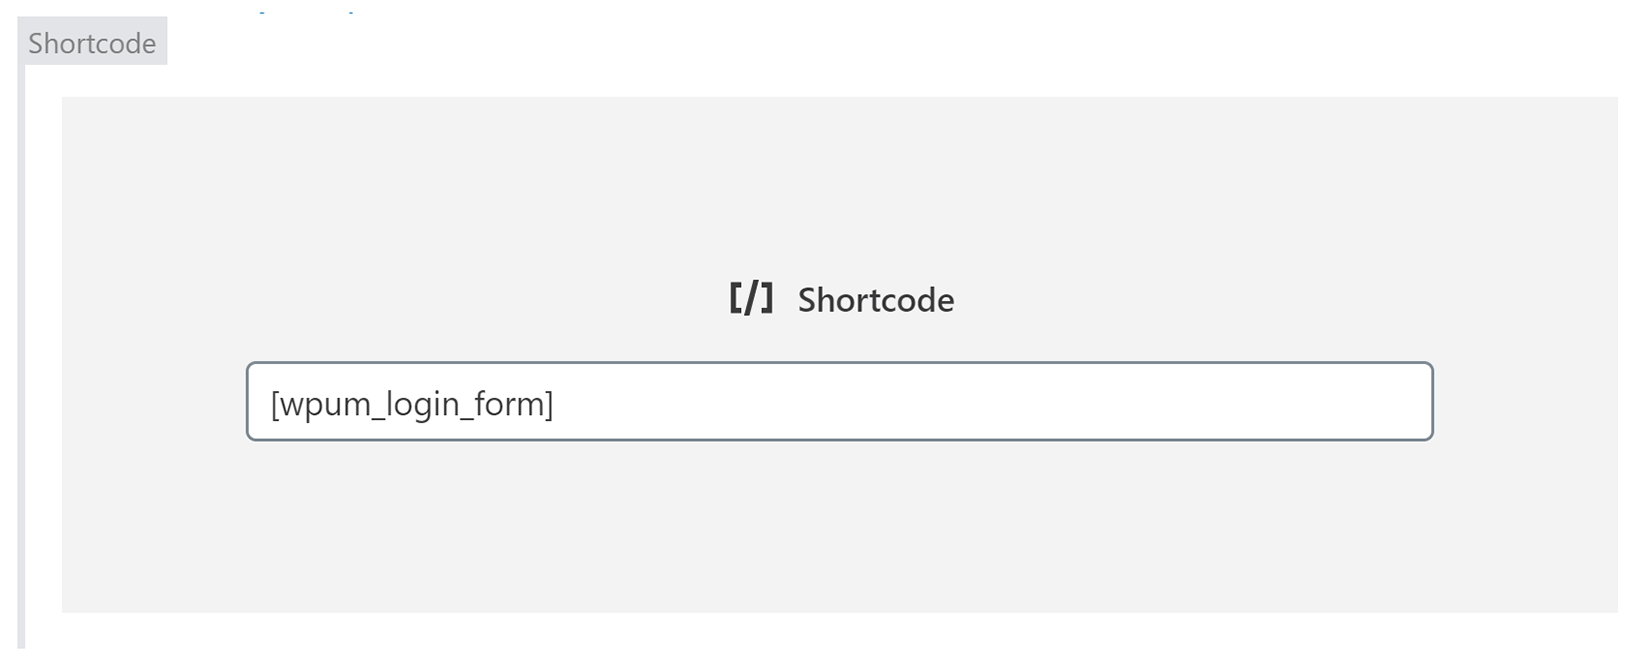
If your site uses the WordPress Classic Editor, rather than the new block-based editor, you won’t be able to use the WP User Manager blocks to insert the form. Instead, you’ll need to use a shortcode to insert the registrations form into a page. To do this with the Classic Editor, you can either enter the shortcode yourself or use the WP User Manager Shortcode Editor that’s accessible via the User Shortcodes button on the WordPress editor toolbar, to insert it into your page.
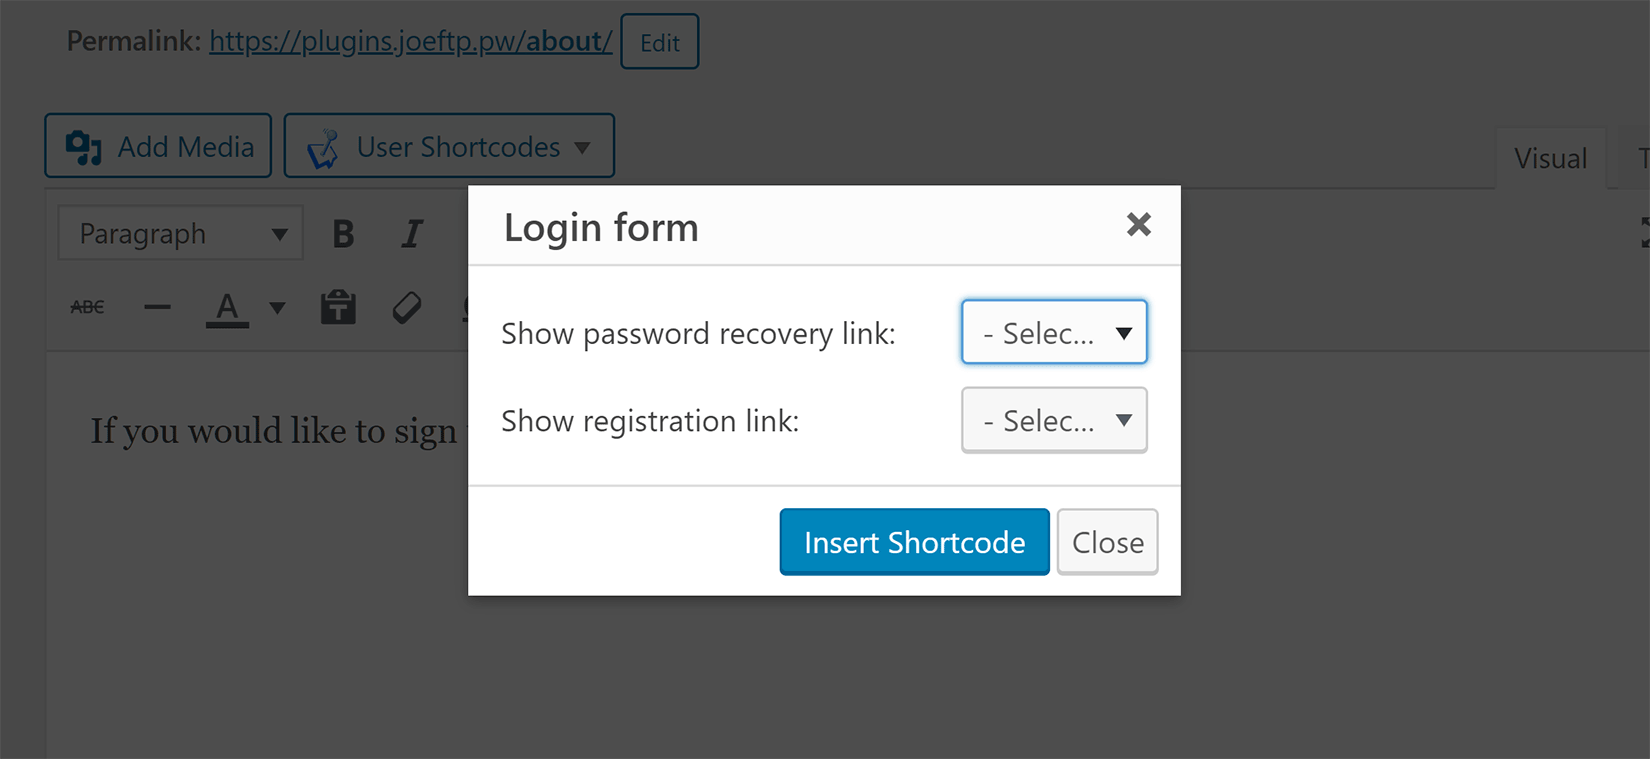
Once you’ve inserted shortcode it will be replaced by the login form when that post or page is accessed by your visitors.
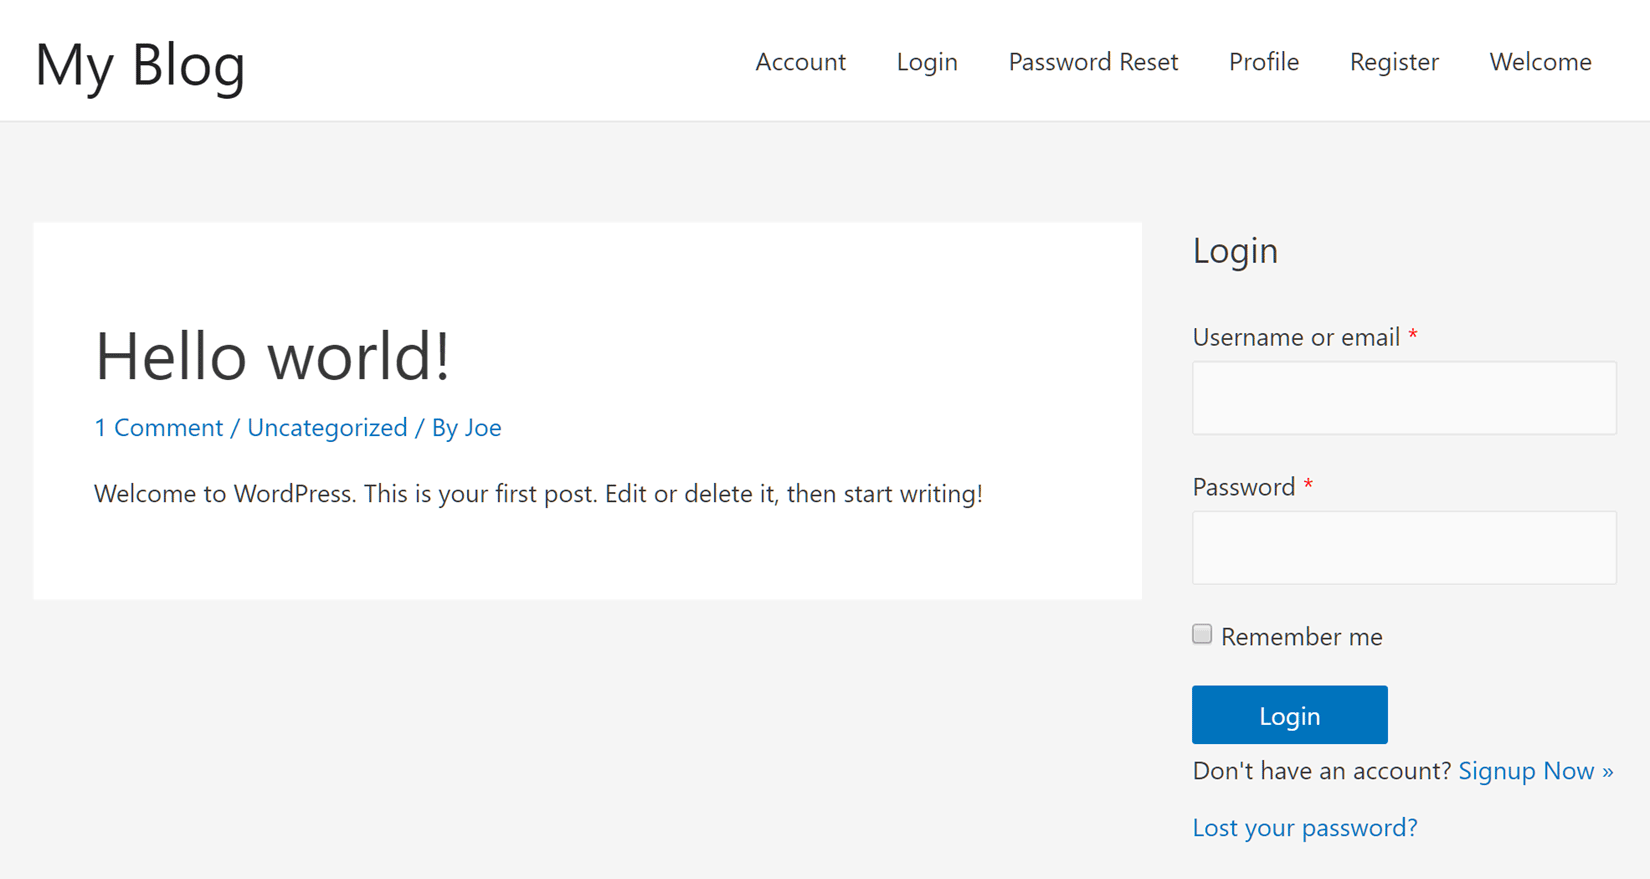
You can also insert the custom login form into the sidebar or footer areas of your site via the Login Form widget that comes with WP User Manager.
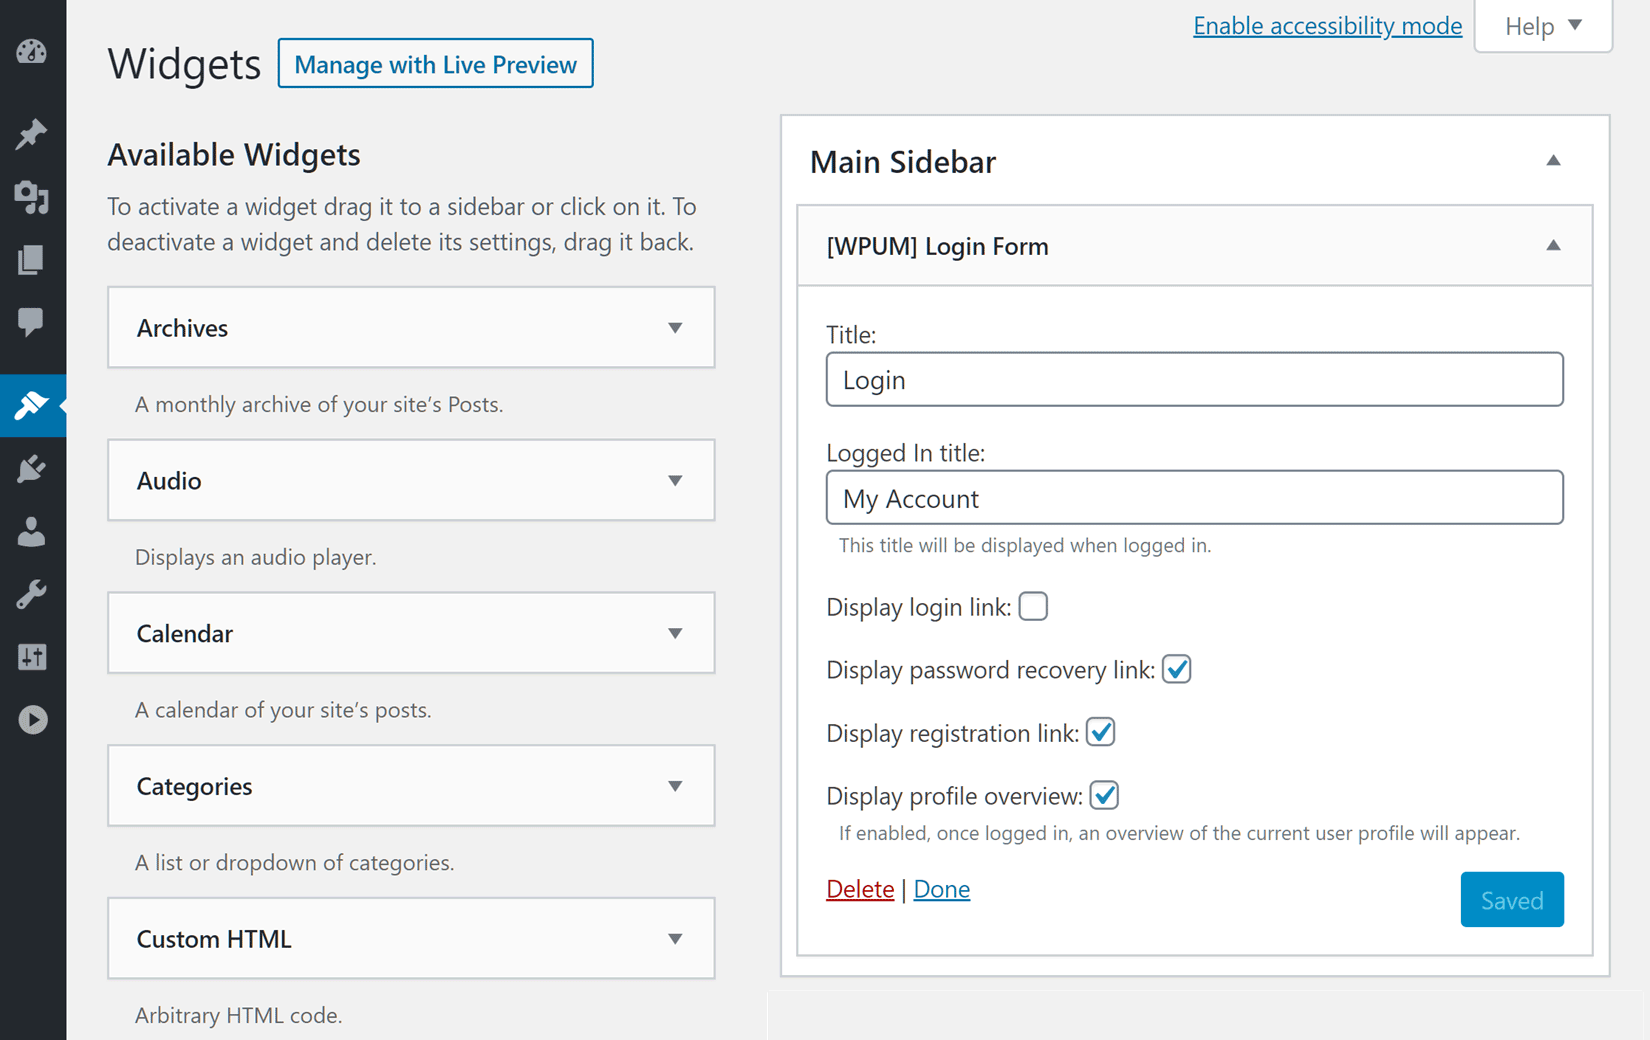
By doing this, your users can quickly log in from most, if not all, pages of your website.
Secure the Login Form
Whether or not you create a custom WordPress login page for your website, there’s a chance that hackers and spambots will attack your login form to try and gain access to your site.
Usually, these login form attacks use brute force hacking to automatically enter multiple username and password combinations in quick succession until they find a combination that’s accepted.
Due to the common occurrence of this type of spam and abuse, it’s important to secure your login page, whether it’s a custom one or not. Thankfully, the WP User Manager plugin makes it very easy to improve the security of your login forms.
To do so, simply install the Google reCaptcha addon that comes with the WP User Manager Pro bundle. Once the addon is activated, you can quickly get the necessary keys from Google that will allow you to use their anti-spam service on your site for free. Once you have those keys, paste them into the relevant page in your WordPress dashboard.
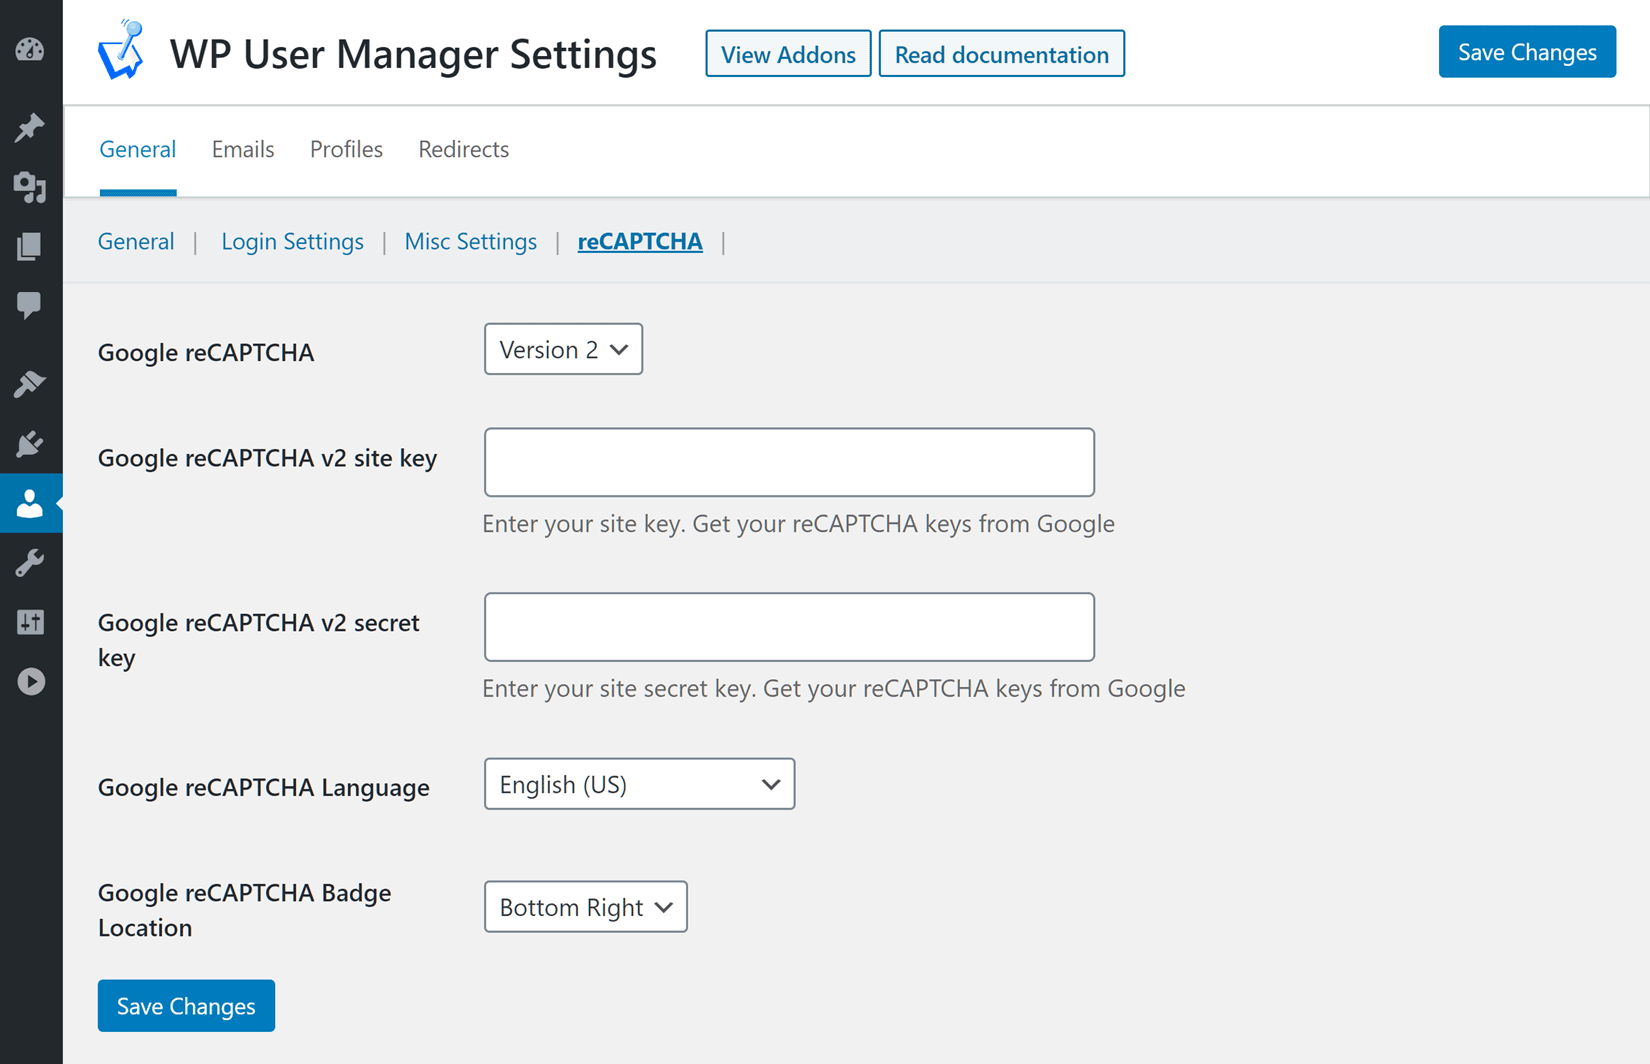
After entering the keys, you can then visit the Login Setting tab to enable reCaptcha and choose whether to display a checkbox that your visitors have to click on or instead, use reCaptcha in invisible mode.
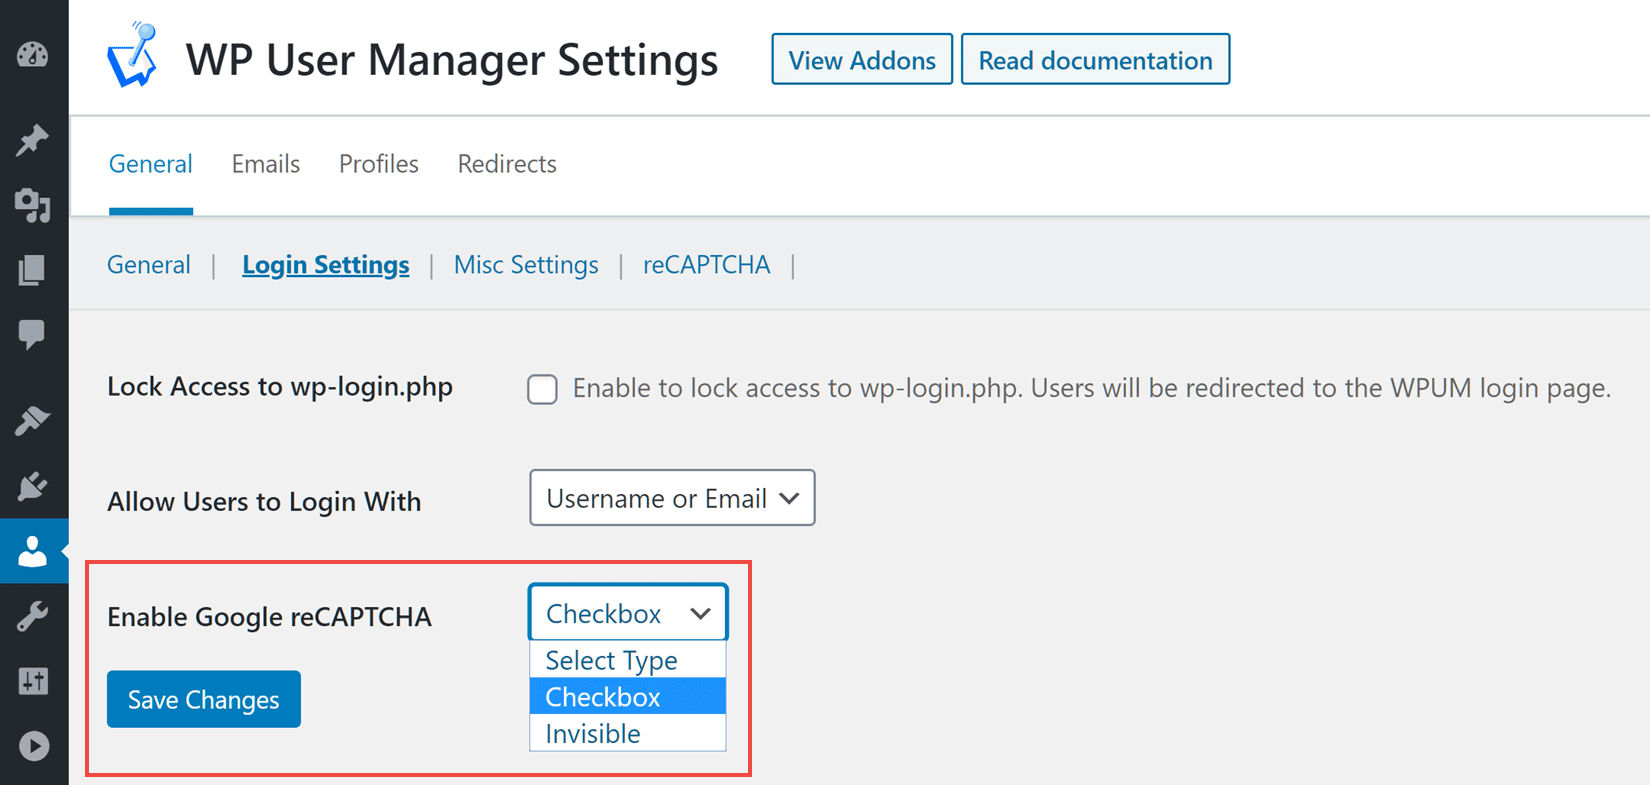
Once everything’s set up, Google reCaptcha will detect any suspicious activity on your login pages and forms and stop potential attacks in their tracks, all without disrupting the user experience of your legitimate visitors.
Customize the Design of the Login Page
Now that you’ve published your login form on a regular WordPress page, you can customize the design of your login page in the same way that you can any other piece of content on your website.
As well as adding text and images to your new custom login page, you can also use a page builder plugin to give it a totally custom design. With lots of powerful page builders available, including free options like Elementor, you shouldn’t find it hard to give your login page a custom look.
Restrict Access to the Default Login Page
Once you’ve created a custom login page that you’re happy with, it’s time to restrict access to the default WordPress login page that’s located at https://yourdomain.com/wp-login.php.
Again, the WP User Manager plugin makes it very easy to effectively disable the default WordPress login page. Simply click on the Settings links on the User menu in your WordPress dashboard.
Then click on the Login Settings tabs and check the box next to Lock Access to wp-login.php
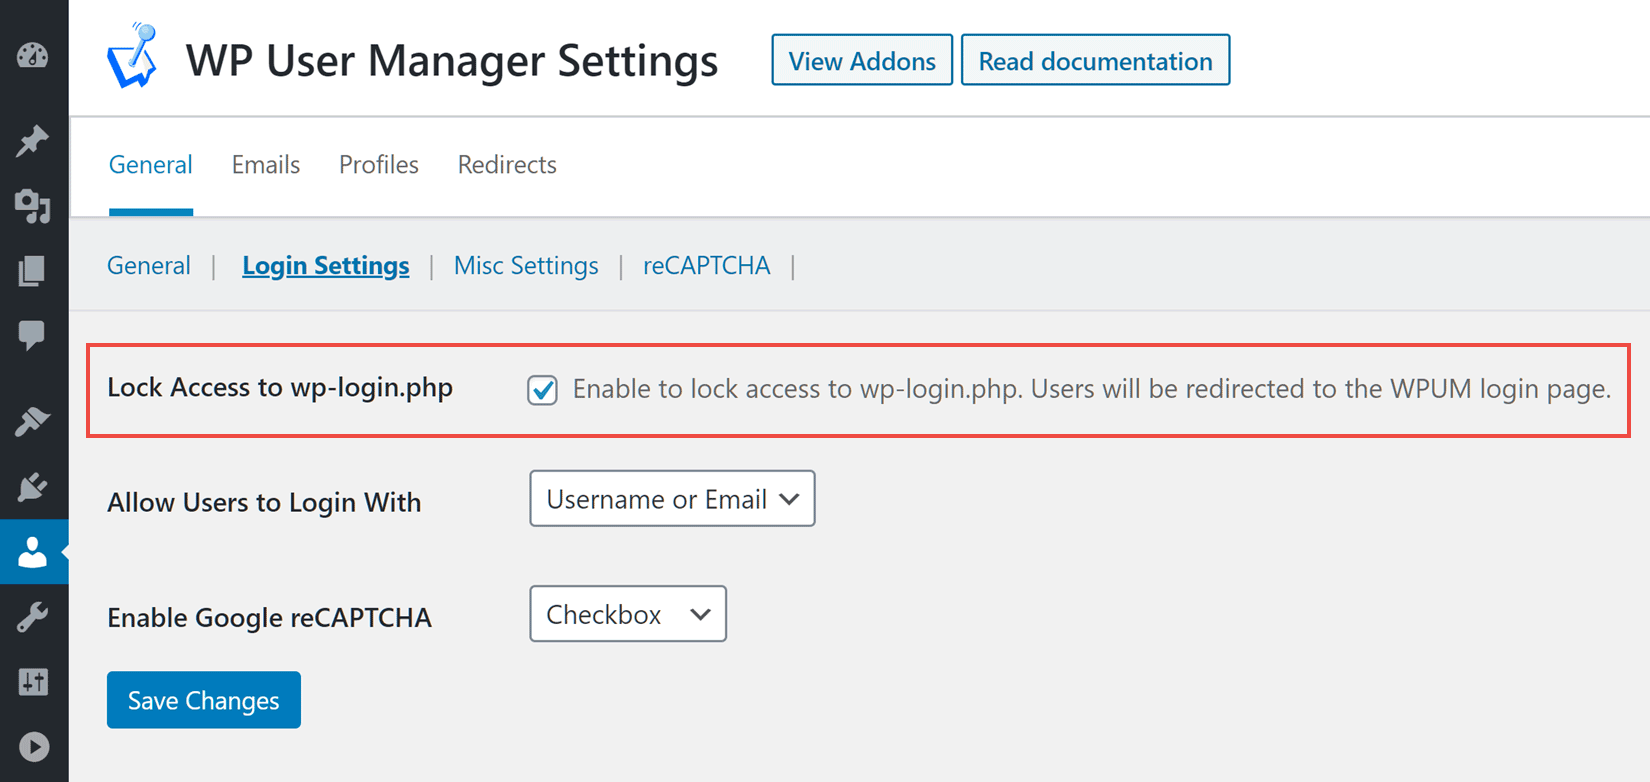
You can also control how users can log in to your site from these settings, including whether they can enter their username and email, or only one of those two options.
Once you’ve restricted access to the default WordPress login page, if anyone does try to reach it via the old URL, they’ll be automatically redirected to your custom login page.
Add a Custom Password Reset Form
Another way that you can customize your login page is to add a password reset link to the form to help out any users who have forgotten their login credentials.
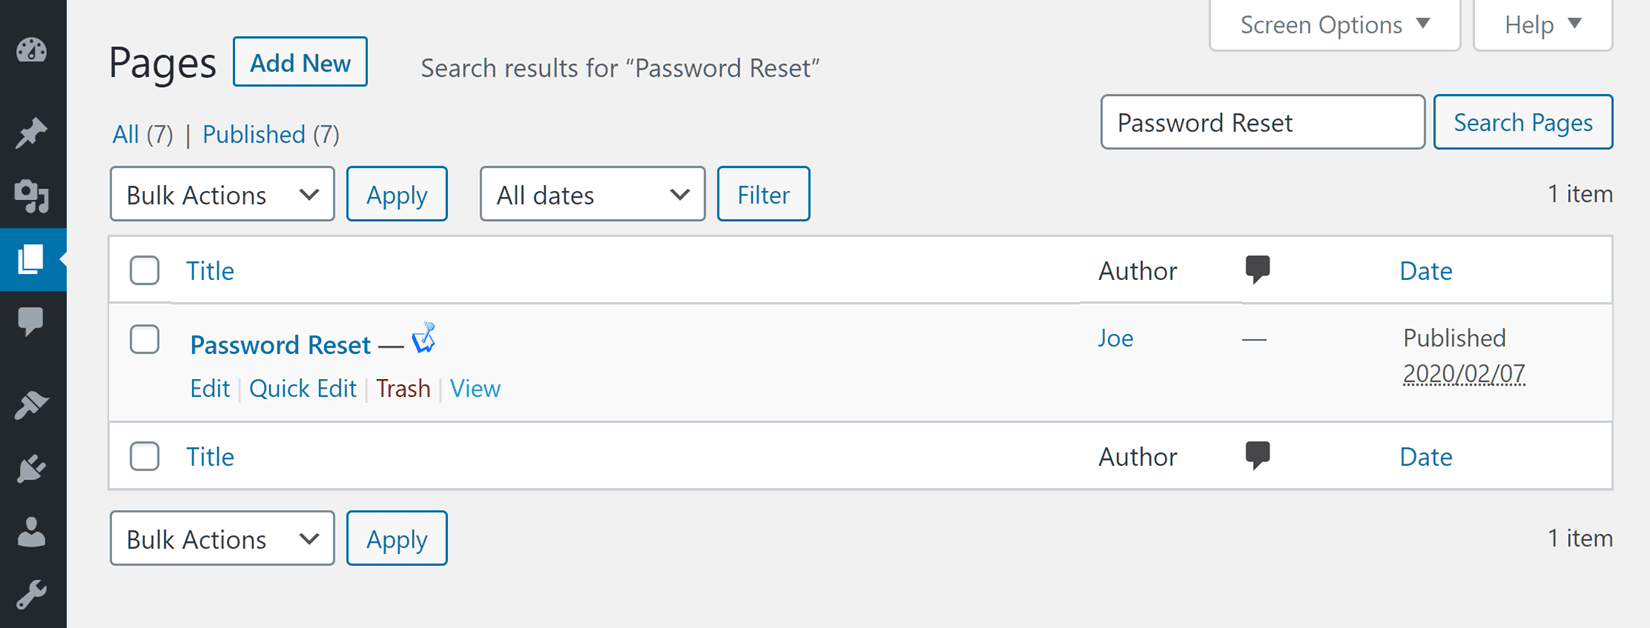
WP User Manager automatically creates a custom password reset page after activation, and you can easily display a link to this page on your login forms by checking the appropriate option when inserting your form.
When someone requests a password reset, they’re sent an email with instructions for them to follow. Customizing the content of this email is very straightforward too, giving you full control over the communications sent out by your site.
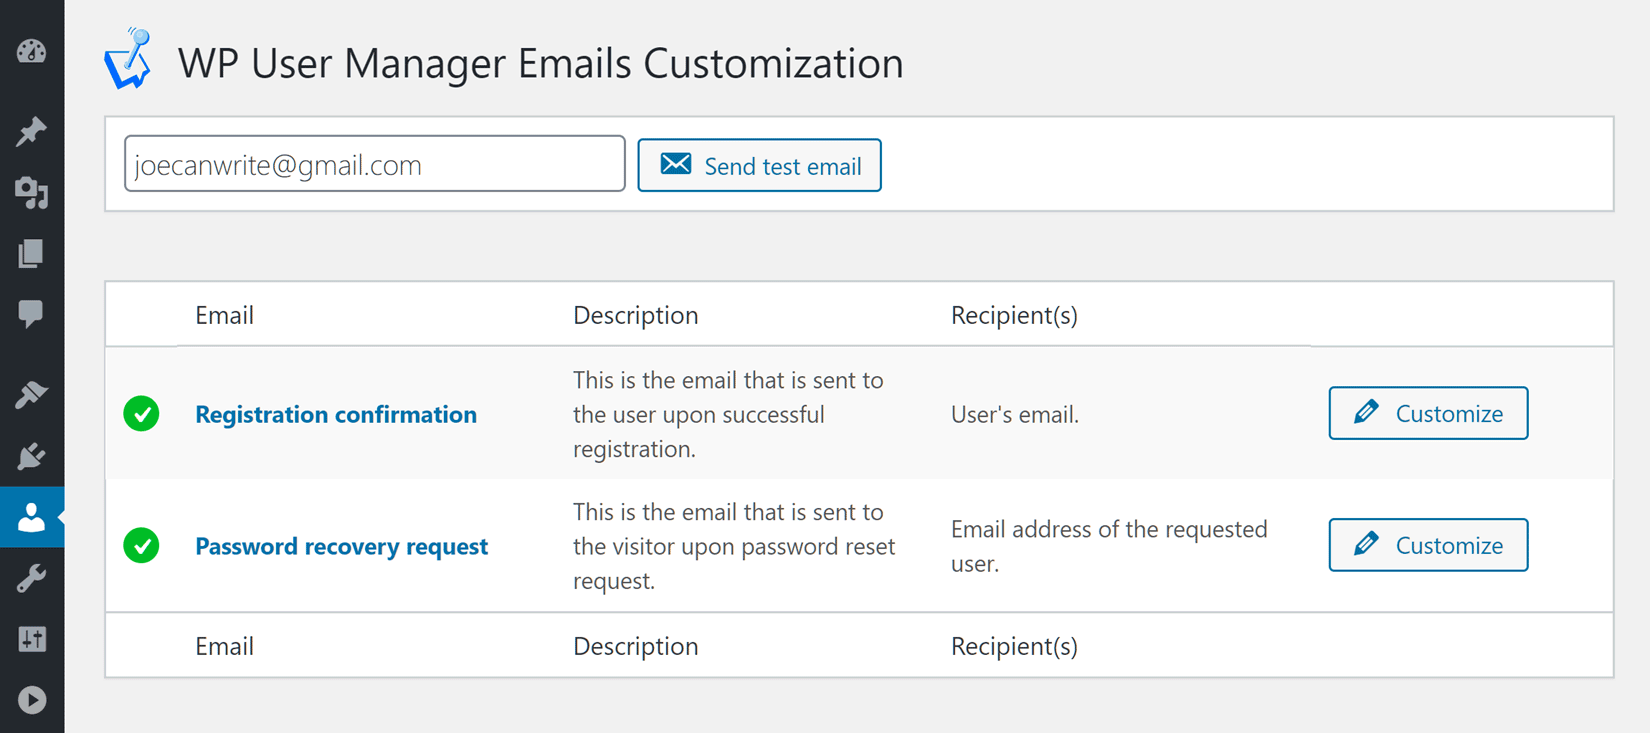
To personalize these emails, simply visit the Email section of the Users area in your dashboard and then use the customizer to edit the templates.
Add Custom Fields to User Profiles
If you want to store additional information about your users, such as their telephone number, WP User Manager makes it easy to add extra custom fields to WordPress user profiles.
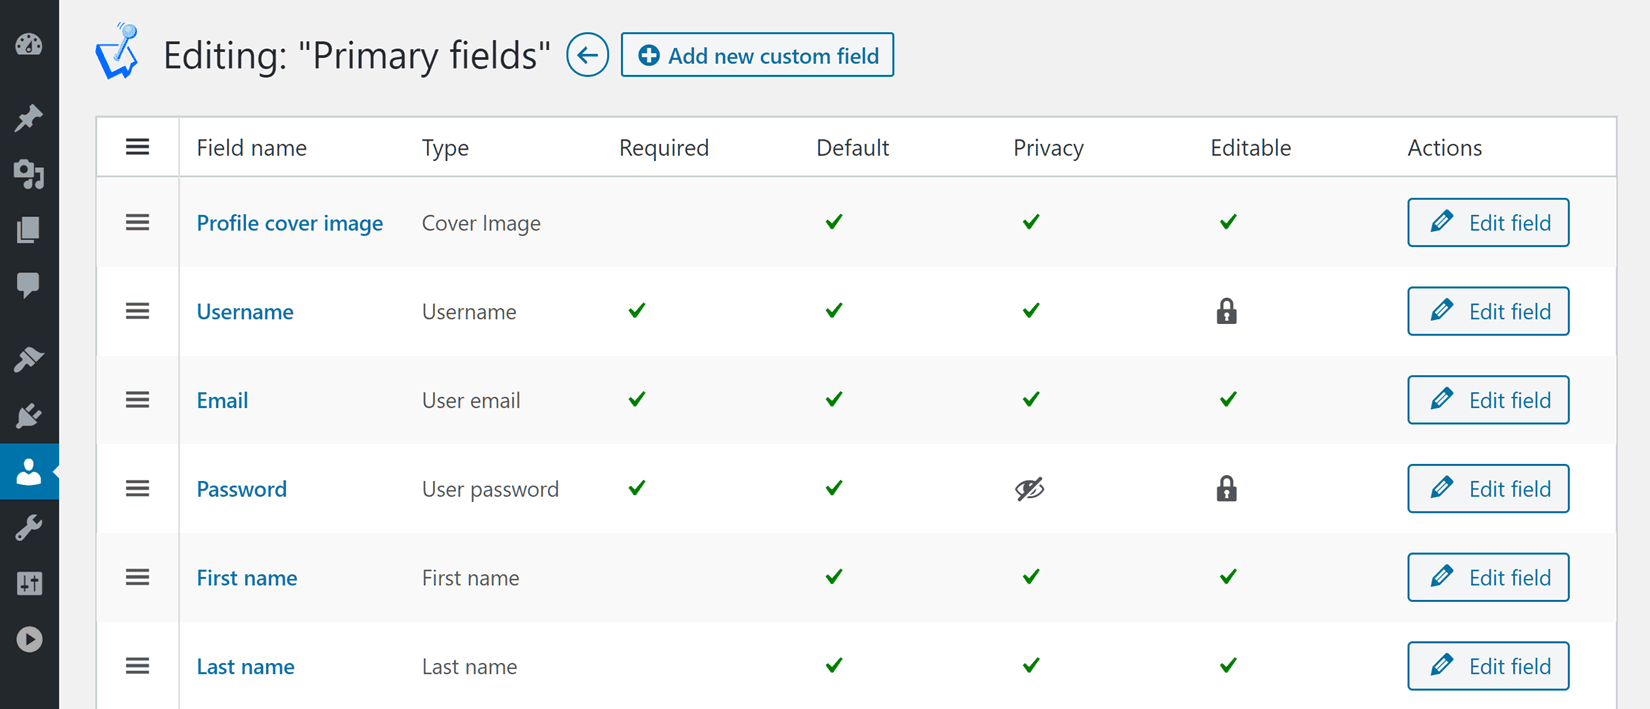
Once you’ve installed the relevant addon, you can take full control of what fields are included with the user profiles on your site.
Create a Custom User Registration Form
As well as creating custom login forms and being able to define which fields make up a user profile, you can also create a custom registration form for your WordPress website with WP User Manager
Creating a custom registration form has many of the same benefits as adding a custom login page to your WordPress website, including delivering a consistent user experience and improving security, as well as ensuring you’re able to collect all the information you need from users when they sign up.
Furthermore, with the WP User Manager Registration Forms addon, you can create multiple registration forms for your website, each with a different purpose. Thanks to this, you can collect different information from the various types of users at your site, such as site admins, members, or customers, creating a unique form for each group of users.
Final Thoughts
As you can see, installing the WP User Manager plugin and its addons makes it very easy to create a custom WordPress login page and then, not only configure how that page is used and looks but also secure it to prevent your site from being hacked.
If you have any questions about creating custom WordPress ling pages, please leave a comment below.
