

Although creating and managing a WordPress website consistently becomes easier every year, building a membership website can still present an overwhelming number of options. What’s more, there are multiple membership models, and ways to implement them.
For instance, you could choose paid access, or trade user information for the content. Some sites simply deal with offering information, while others want to build a community. The good news is that WordPress (and the plugins you install) can adapt to suit your vision.
In this guide, we’re going to walk through building a membership website using WordPress and WP User Manager. Let’s begin with what makes a membership site appealing.
What Makes for an Attractive Membership Website
First of all, a membership site should center around the user. This means clean lines without clutter, and contrasted signposting across the whole site to tell the visitor what to do next. This is something on display on the Smart Passive Income site:

Here, the Let’s Get Started and SPI Pro buttons use a green color that stands out against the white background. Notice how the the Courses button uses a lighter hue too.
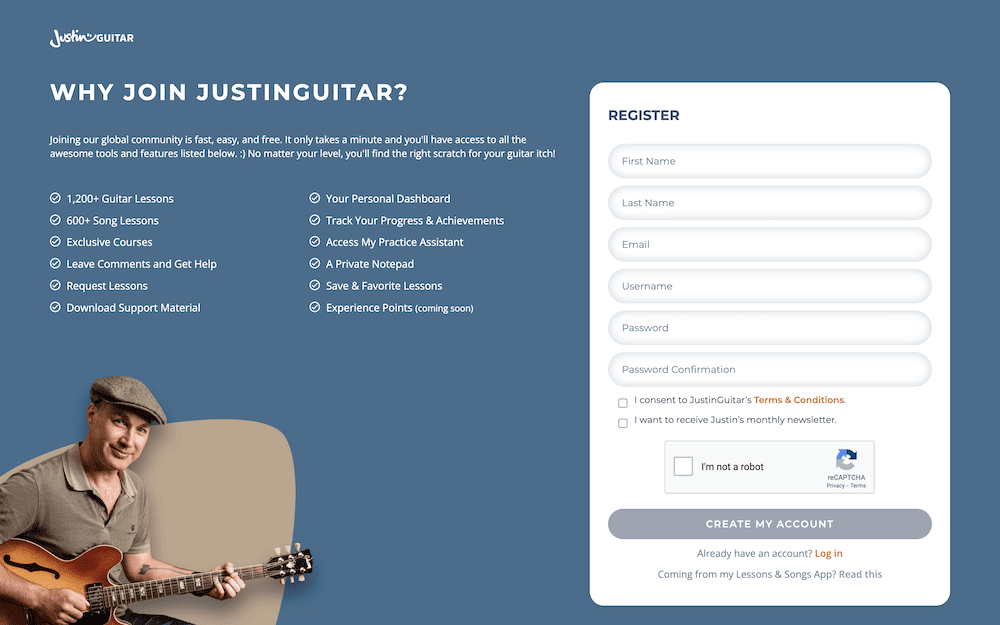
Given the user-centric focus, your membership site should have a registration process that encourages sign ups and is easy to use. For example, JustinGuitar’s site outlines why a membership is a good idea using bullet points, with the form waiting for your input on the page:
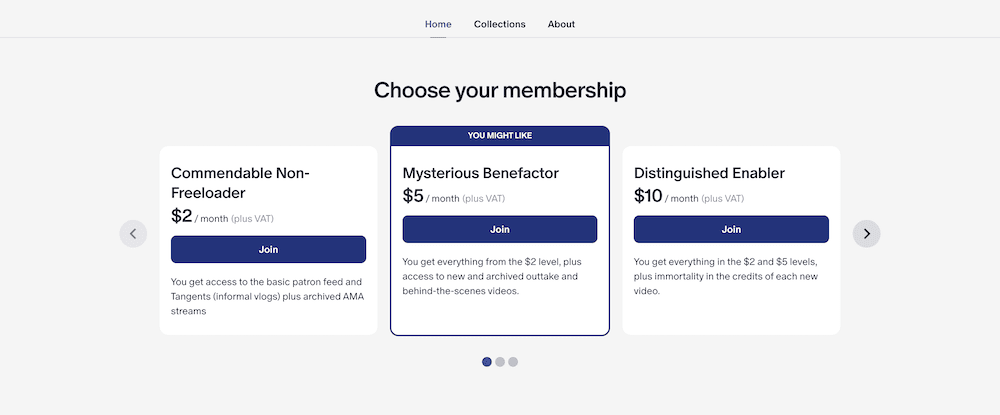
Tiered memberships can offer more content and benefits based on what you spend. ContraPoints’ Patreon website put those membership levels front and center, with more perks for tiers with higher pricing:
Gamification and membership websites are also a good match. WPMU Dev’s site illustrates this, as it awards Hero Points and Reputation Points for participating in the community. Even better, members can exchange those points for tangible rewards:

Of course, build a membership website is much more than only a list of recommended features and functionality. Next, let’s turn our attention to some of the most pressing concerns you’ll find with yours.
The Roadblocks You’ll Face When Building a Membership Website
Before you begin building your membership website, it’s good to know about some of the pitfalls. This way, you can protect against them or avoid them altogether.
Get Started with the Best WordPress Membership Plugin Today
Connect, Manage and Build your Membership Site
While there can be any number of technical issues, there are a few ‘procedural’ mistakes you could make:
- Members lack access to content. This is often a rookie mistake, but it’s easy to solve. The answer is to run through your signup process as a user would often during the design of your site.
- You use member segregation too much. A strong community is a fast way to succeed with your membership website. However, making them feel like they are in individual camps isn’t the way to grow community spirit. Instead, forums and groups for different interests can help members find one another.
- The plugin you choose is not right for your needs. The foundation you use when building a membership website is critical. There are many WordPress membership plugins available, and despite common functionality, some suit specific tasks better than others.
In the next section, we’ll focus on the solution we recommend – WP User Manager. From there, we’ll show you how to use it as the basis for building a membership website.
Why WP User Manager Is Ideal for Building a Membership Website
As you can guess from the name, WP User Manager is a simple, intuitive, and powerful way to create a membership website.

The focus is (of course) on users – specifically connecting, managing, and building profiles. However, WP User Manager includes lots of other functionality to help you when building a membership website, and make the experience a breeze:
- You can set up user directories and groups to help members find and connect with each other.
- You’re able to restrict content – ideal for a membership site!
- The ability to login using social media credentials removes a huge barrier for signing up to a site.
- For email marketing, WP User Manager integrates with Mailchimp.
- There’s the option to tailor user profiles to your site’s needs with custom field support.
- You can set up robust and secure user verification and moderation.
While WP User Manager offers a free version, the most customization and flexibility is available within its premium plans.
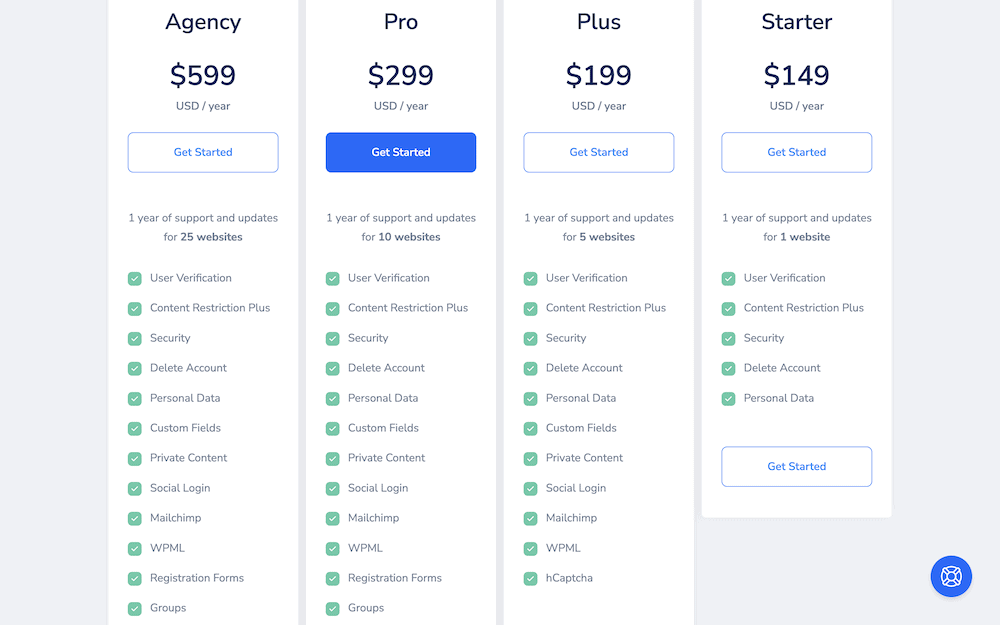
There are four plans available, each with an increasing number of included features and functionality. The core tools are all available on the Starter plan – user verification, content restriction, security options, and more. However, Higher tiers provide access to CAPTCHA integration, email marketing support, social login options, and plenty more.
As such, building a membership website will need you to purchase one of WP User Manager’s premium tiers. From there, you can begin to create your site.
Building a Membership Website with WordPress and WP User Manager (In 6 Steps)
To work with WP User Manager, you first need to download, install, and activate the core plugin from the WordPress Plugin Directory. You’ll also need to install and activate any required add-ons you need.
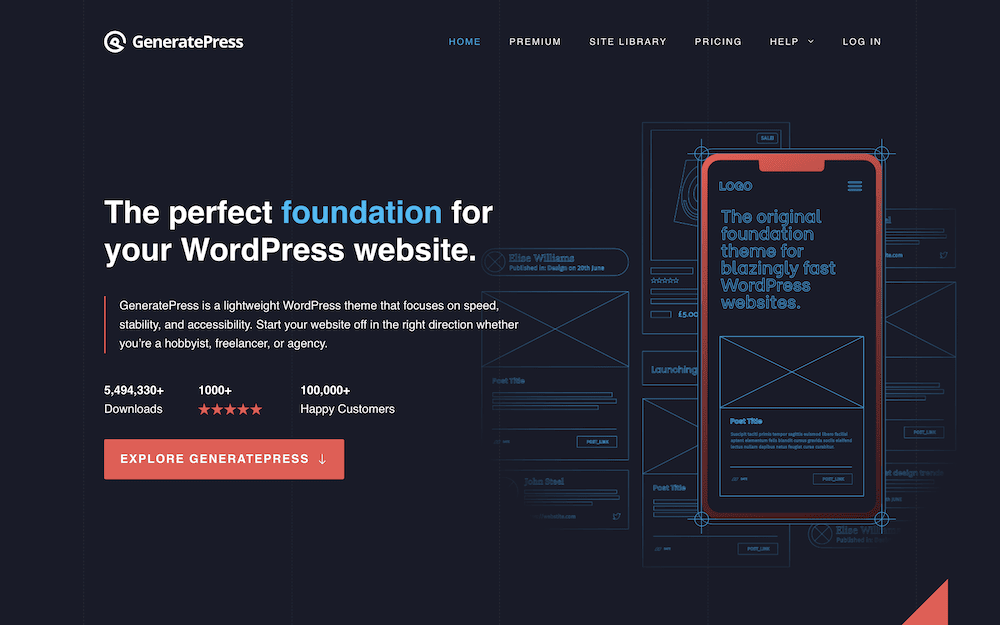
Before you move onto creating your site, it’s also a good idea to choose the right theme. This is beyond the scope of this post, but GeneratePress offers the performance, polish, and particulars to be your long-term WordPress theme. Of course, there are many other themes on the market to choose from.
At this point, you’ll want to begin working on your membership site’s functionality, so we’ll discuss this first.
1. Configure WP User Manager
Setting up WP User Manager should be your first task, as there is a lot of scope available. You can find these options on the Users > Settings screen within WordPress.
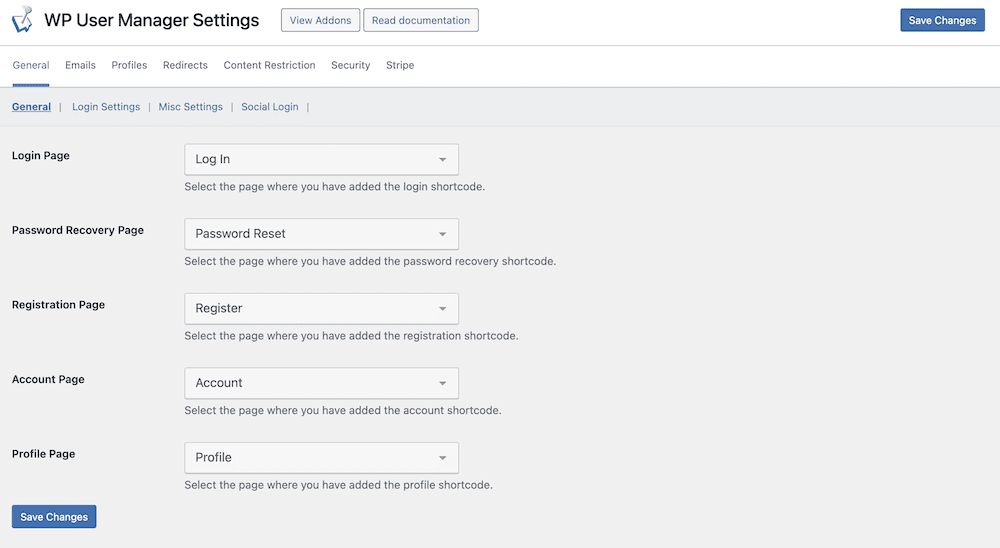
The General > General screen lets you set up different pages for various aspects of your membership website. For instance, you can set a registration page, account page, and more. This is something WP User Manager sets up for you upon install, although you can change this if you wish:
The General > Login Settings screen gives you a few options relating to how users log in, and whether you implement specific security or redirection settings.

Combined with some of the WP User Manager add-ons, this screen becomes more important. Later, we’ll talk about some of the ways you can expand your membership site’s functionality.
2. Set Up Your Membership Emails
Communicating with your members will be a core aspect of your site. As such, WP User Manager includes plenty of settings to help customize this. To do so, navigate to the Emails > Emails tab in the WP User Manager dashboard.
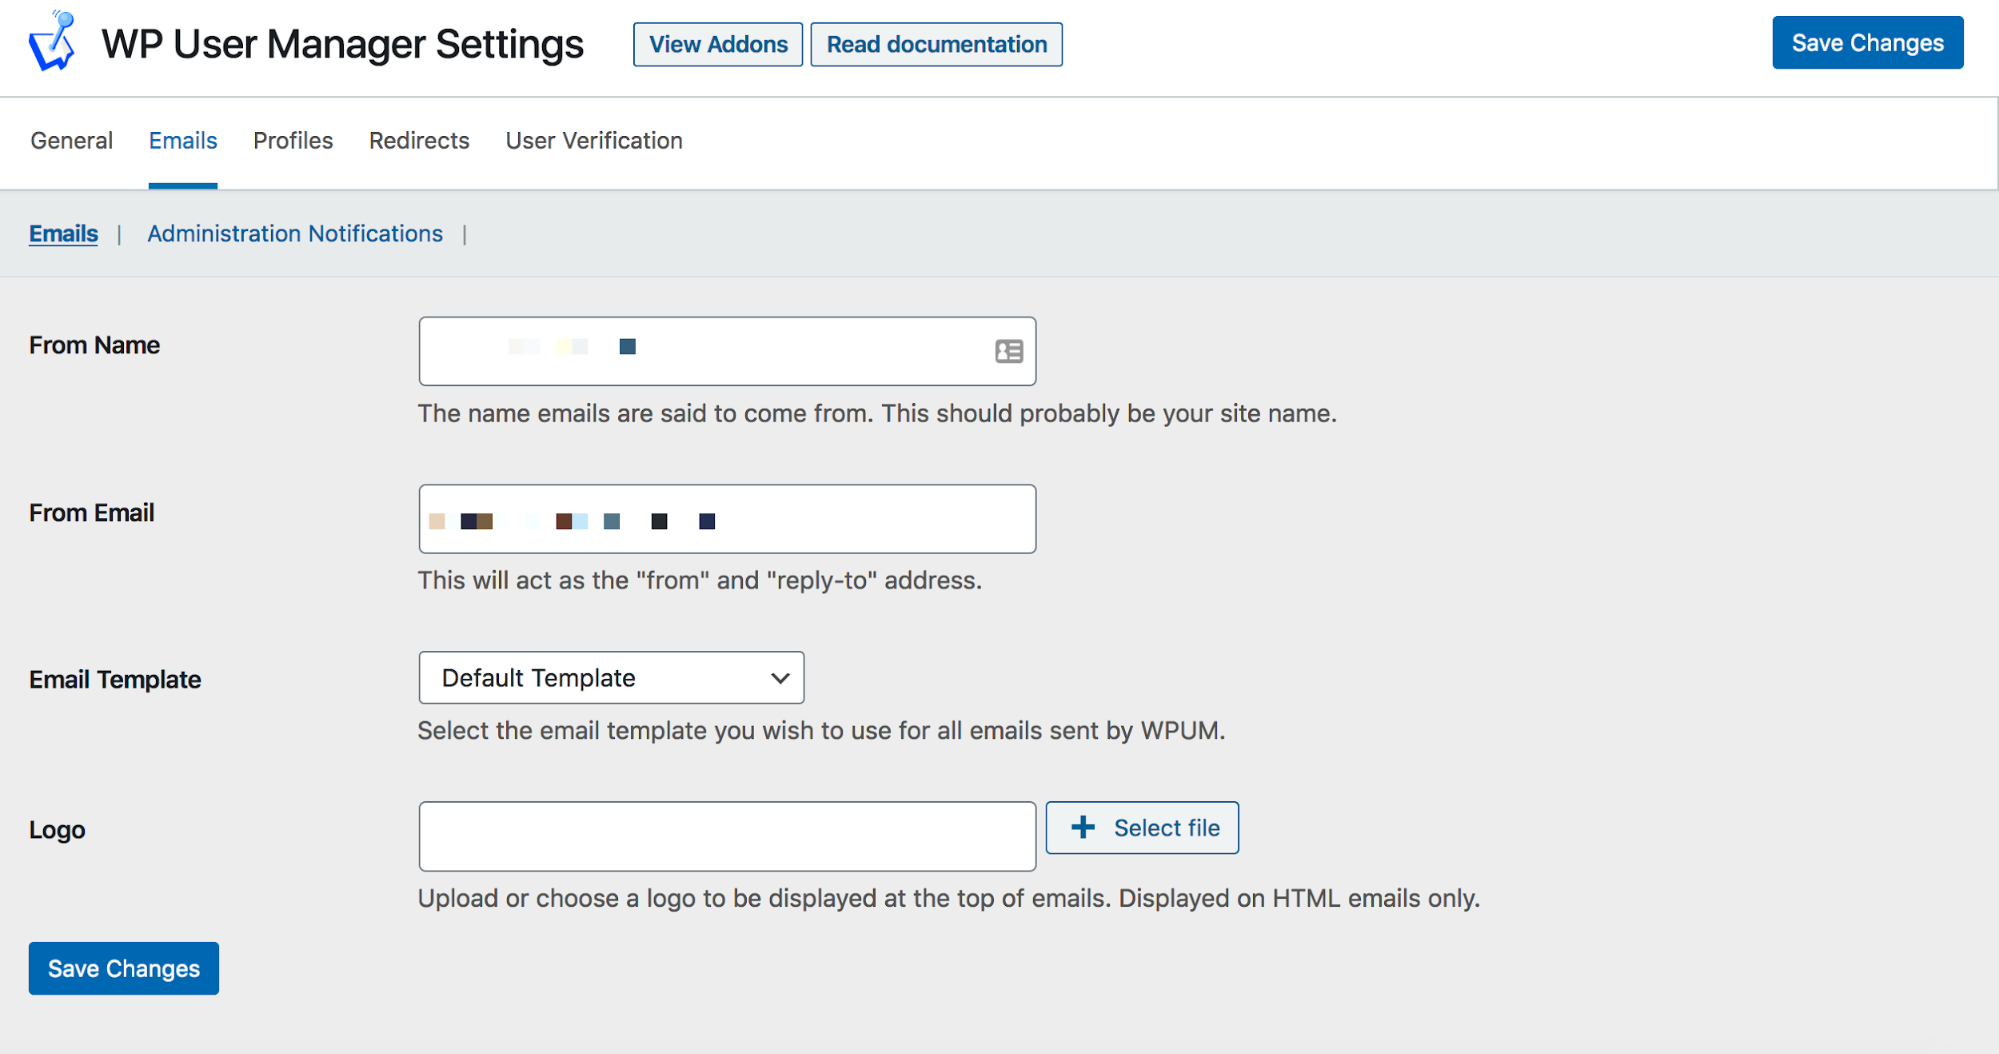
The options here are simple, yet important for branding:
- From Name. This will show up as your name in your member’s inbox when you send an email.
- From Email. Here, enter the address you want to send emails from. Look to avoid ‘no-reply’ email addresses, as they can drop straight into a member’s spam folder.
- Email Template. From the drop-down menu, you can use the WordPress default template, or make your email text only.
- Logo. It’s a good idea to add your site’s logo to your email content. This field lets you choose a suitable image to include.
You also have the Emails > Administration Notifications tab that contains a couple of options. These let you disable notifications for new user registrations or password changes. Other than these, you can then move onto tweaking user profiles.
3. Tailor User Profiles to Your Vision
WP User Manager’s Settings > Profiles screen handles how your member’s own profiles display:
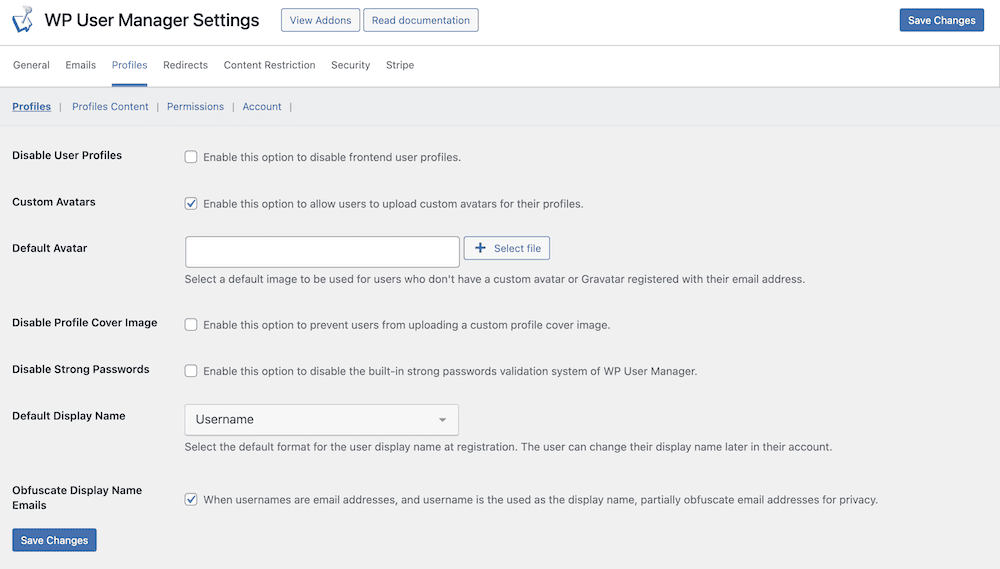
The available options are all intuitive to understand, and gives you the scope to customize what the user can do. For instance, you can choose to display custom avatars, disable profile cover images, or even enable weaker password usage. Our advice is to keep passwords strong though, as it makes your site (and members) more secure.
On the Profiles > Permissions page, you can think about is how others view member profiles.
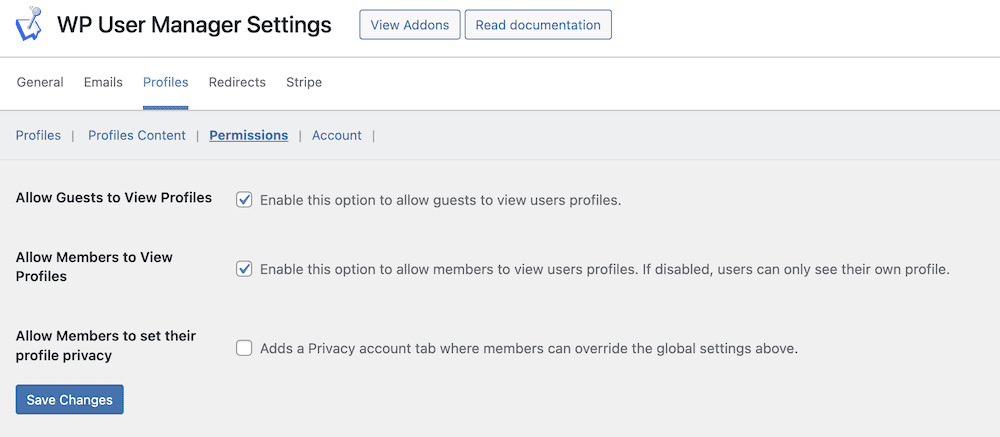
For example, social media often defaults to an ‘open’ model. This means guests and other members can view all registered profiles. As such, you have the choice to enable guests and/or others members to view profiles. What’s more, you can give this choice to each individual member too.
Finally, the Profiles > Profiles Content screen lets you display user posts and comments on member profile pages.
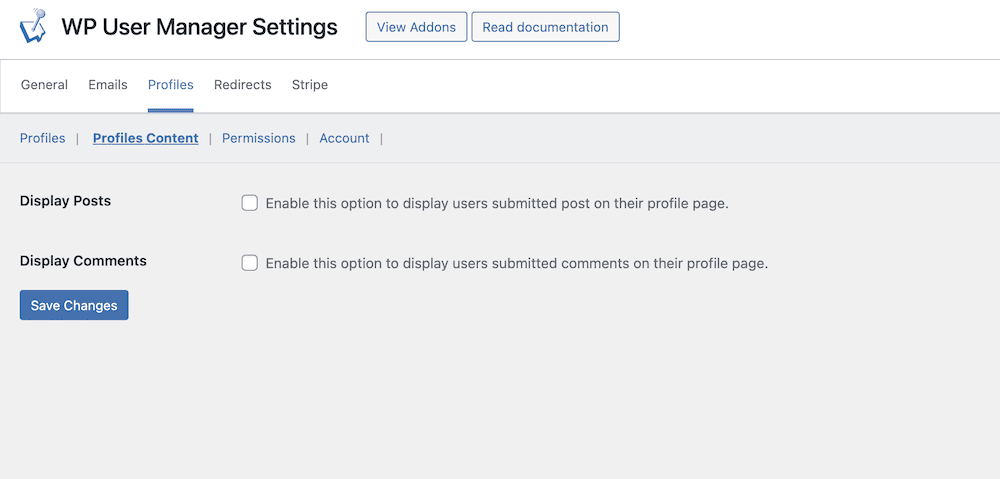
Whether you do this depends on the goal for your site. Of course, if commenting is key for you, it makes sense to enable this – it’s a similar situation with user posts.
4. Implement Redirects within WordPress
One vital yet overlooked aspect of building a membership website is the ‘user journey’. This is essentially how the user finds your site, browses it, then registers. To optimize your signup conversion rate, this journey needs to make sense.
Given this, the Settings > Redirects page within WP User Manager lets you redirect users based on a few different actions:
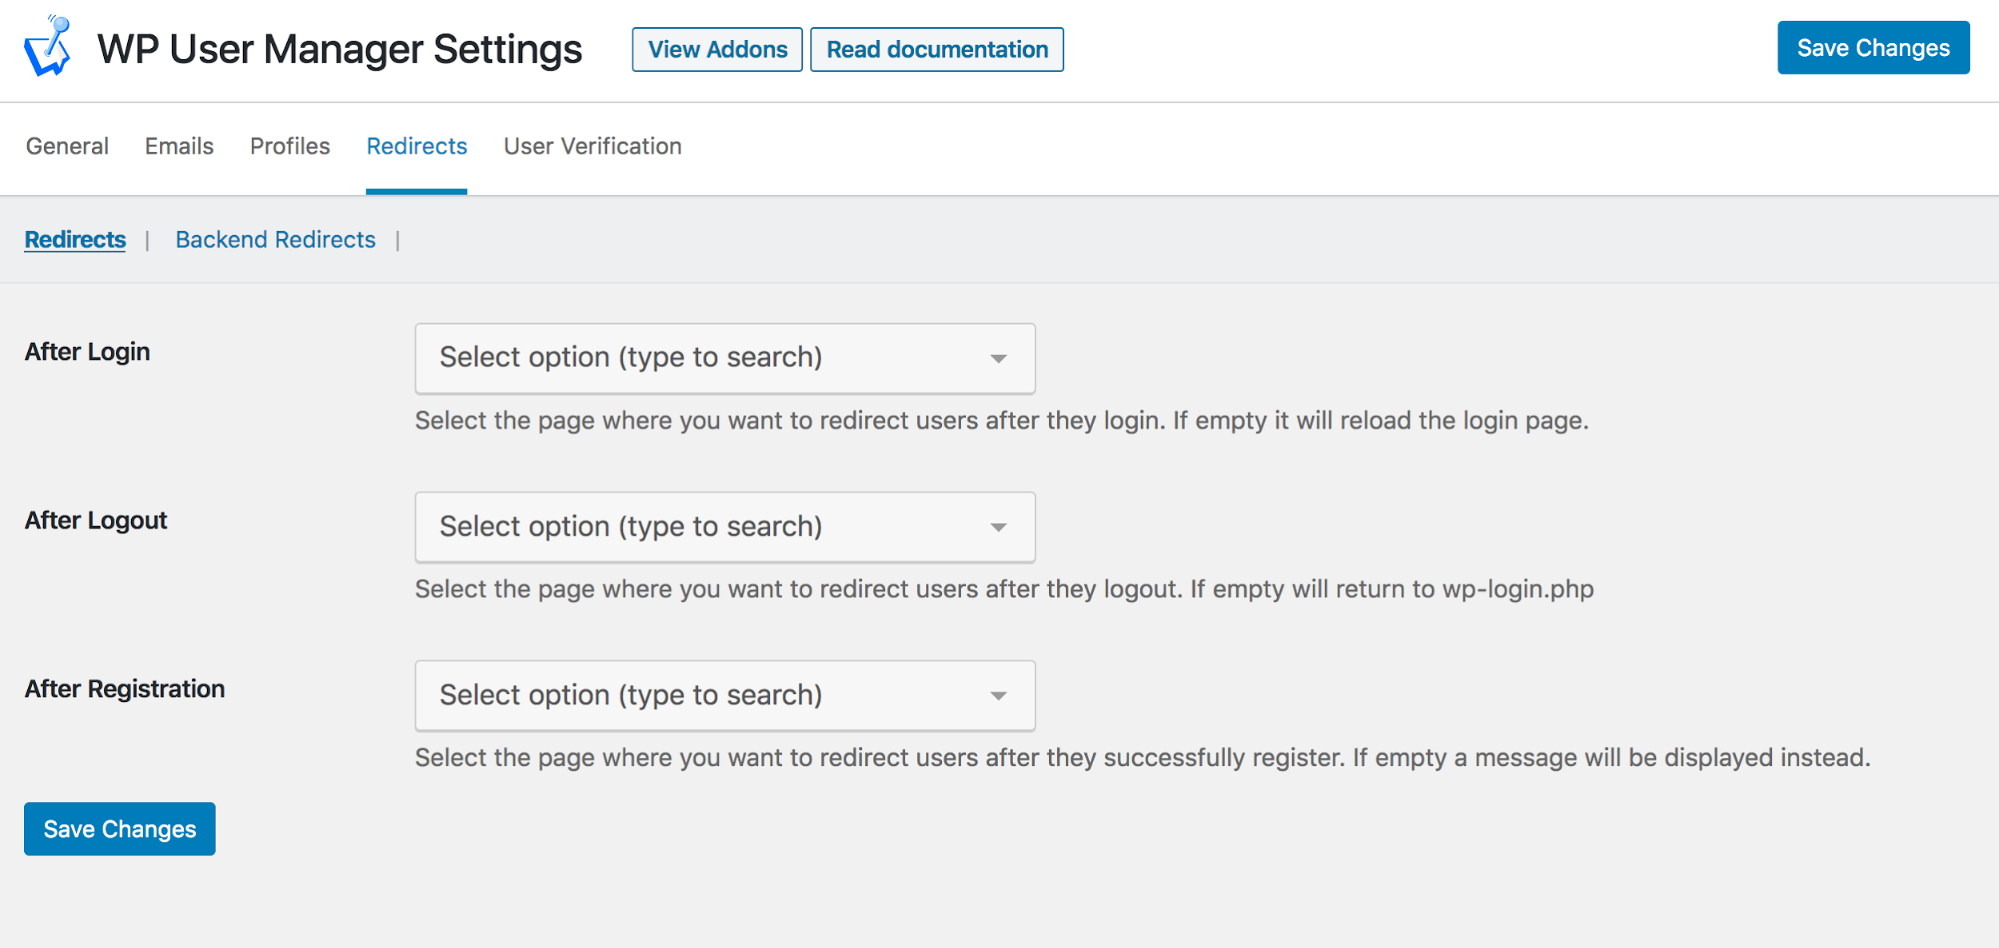
You can assign redirection pages based on a user logging in, logging out, or registering. It makes sense to create pages for these in WordPress first before you assign them.
For example, you could create a Thank You page for the After Registration option. This could show account access details, relevant documentation, or even fitting groups to join. For the After Login redirect, you could send a member directly to their profile. You have full scope to change these to the pages you wish to use.
You also get a set of Backend Redirects too. These let you send users to custom pages based on whether they try to log in without registering, lose their password, or access their profile while logged out. All of these combined let you set the user’s journey to your own requirements.
5. Create the Registration Forms for Your Membership Site
The main way users become members on your site is through registration forms. WP User Manager has plenty of functionality on hand to help you create and manage them.
You can access all of your forms on the Users > Registration Forms screen:
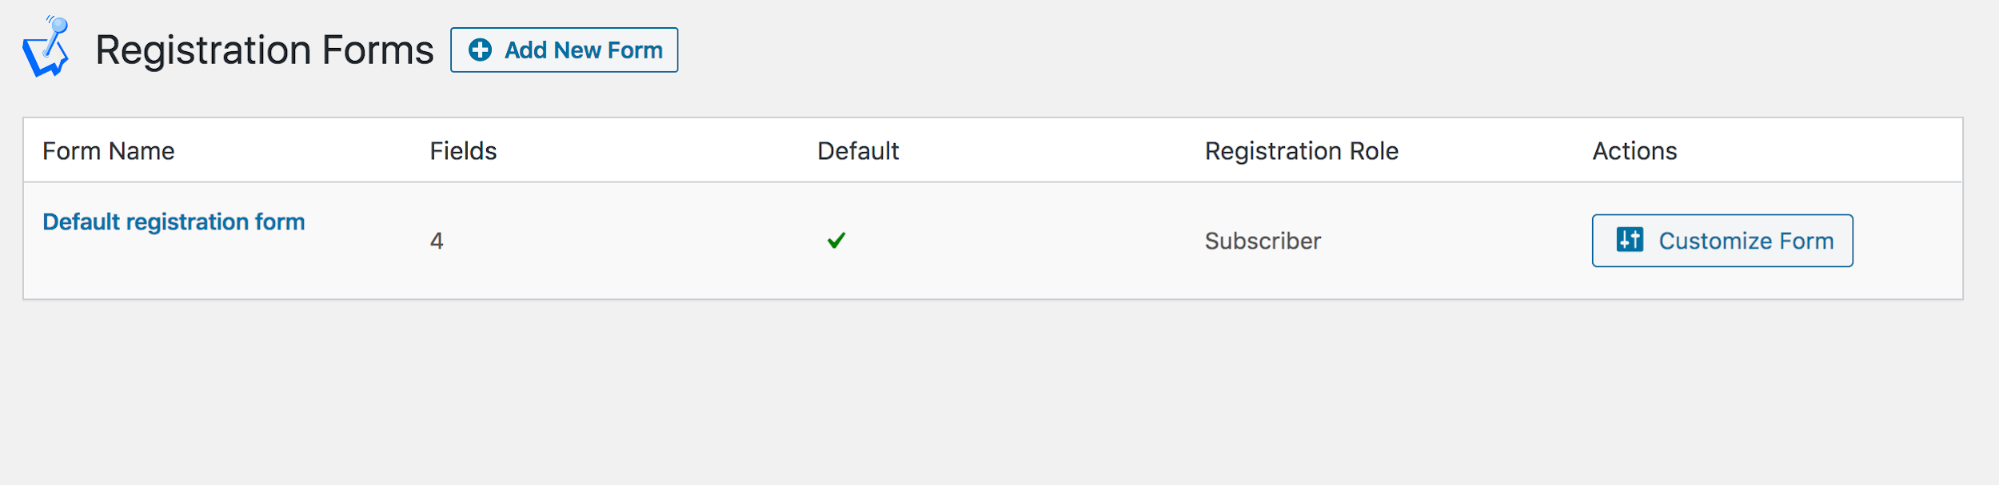
Rather than show you how to put together a simple form here, you’ll instead want to read our full guide on creating custom WordPress registration forms. Note that this tutorial uses custom field and other extras you can find in the Registration Forms premium add-on.
Speaking of which, you can expand WP User Manager in a number of different ways. This is something we’ll look at in our last step.
6. Add Extra Functionality to Your WordPress Membership Site
If WP User Manager is going to be a central component of your membership website, it makes sense to give it greater responsibility. With this in mind, there are premium add-ons that let you expand what your site (and the plugin) can achieve.
For instance, we already talk about enhancing registrations forms, but adding other vital functionality is possible too. Take connecting your members. This is possible through the Groups add-on:

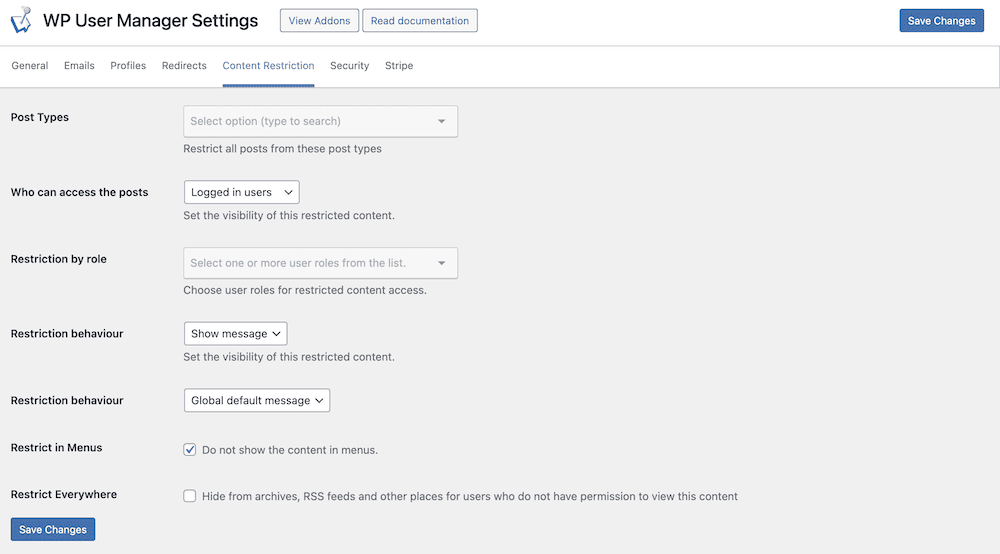
The Content Restriction add-on is arguably the best way to monetize or otherwise use your content as a commodity – ideal for signup perks:
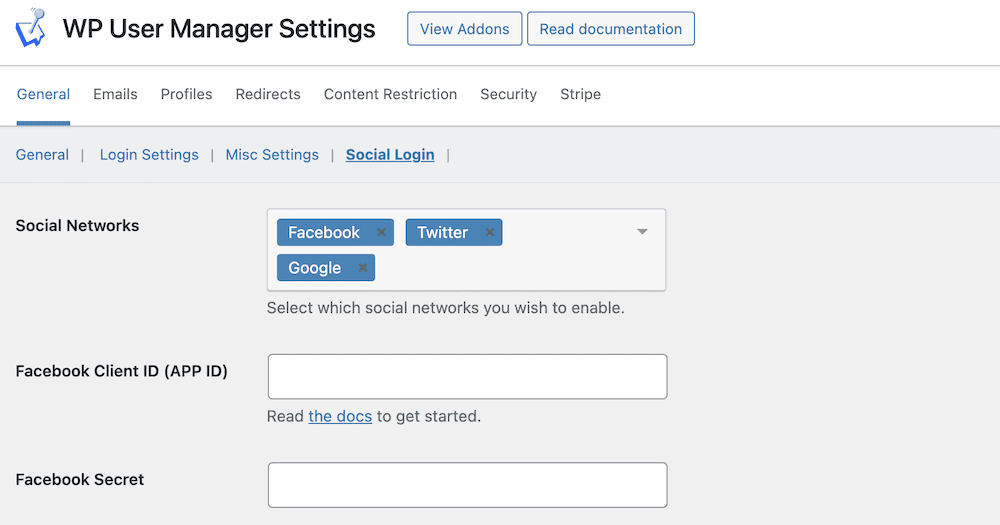
Social login options let users become members in a flash, without the need for a new set of credentials. We mention this in our post on managing user profiles. You simply add social networks to the WP User Manager settings and save your changes:
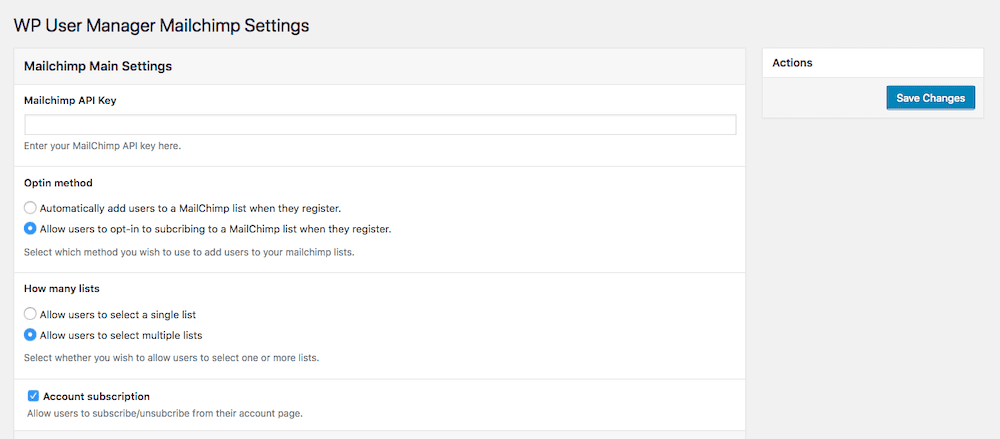
WP User Manager also lets you automate aspects of your email marketing with Mailchimp. For example, you have a wealth of options using the Mailchimp add-on, although you’ll need an active API key to connect your site to your account:
We recommend you look at the full complement of WP User Manager add-ons, as there are solutions to fit a wide range of user cases, such as translating your site, taking payments, and enhancing security.
Summing Up
Building a membership website boils down to choosing a WordPress theme, and the right plugin to give you the correct functionality. WP User Manager makes sense thanks to its feature set and expandability.
For instance, it offers an intuitive interface and essential core functionality, all from within the WordPress dashboard. In addition, you have the ability to expand your site’s offering using WP User Manager’s premium add-ons. What’s more, pricing is competitive and full of value – premium plans begin from $149 per year.
Do you have any questions about building a membership website with WordPress and WP User Manager? Ask us in the comments section below!