

Gated content is content visitors can only see after they do something first: create a free account, or pay. In WordPress you add gated content with a plugin that knows who’s logged in and what they’re allowed to see. This guide shows how to set it up with the free WP User Manager plugin, from gating half a post behind a sign-up to charging for access, and which parts need a paid addon.
Two kinds of gate
Most gated content falls into one of two types:
- A sign-up gate. The content is free, but visitors need an account to read it. You get an email address and a registered member in return. This is the lead-generation kind: guides, templates, reports and webinar recordings.
- A paid gate. Visitors pay, once or by subscription, to get access. Courses, premium articles and member areas work this way.
You also choose how much to hide. A hard gate hides everything. A soft gate shows an introduction and hides the rest, so visitors (and search engines) can see what’s on offer. Soft gates usually convert better, and the public part can still rank in Google, since search engines only see what a logged-out visitor sees.
When gating content makes sense
Gate content that people can’t easily get elsewhere: in-depth guides, downloadable templates and tools, original research, and recordings of live events. Don’t gate the articles you need for traffic. A gated page can’t rank for what’s behind the gate, so most sites keep their tutorials open and gate the extras.
How to set up gated content in WordPress
Step 1: Install WP User Manager
Install and activate WP User Manager from wordpress.org (see installing from wordpress.org if you need a hand). On activation it creates the login, registration, password reset, account and profile pages that a gate sends visitors to, so there’s nothing to build first.
Step 2: Gate part of a post with a shortcode
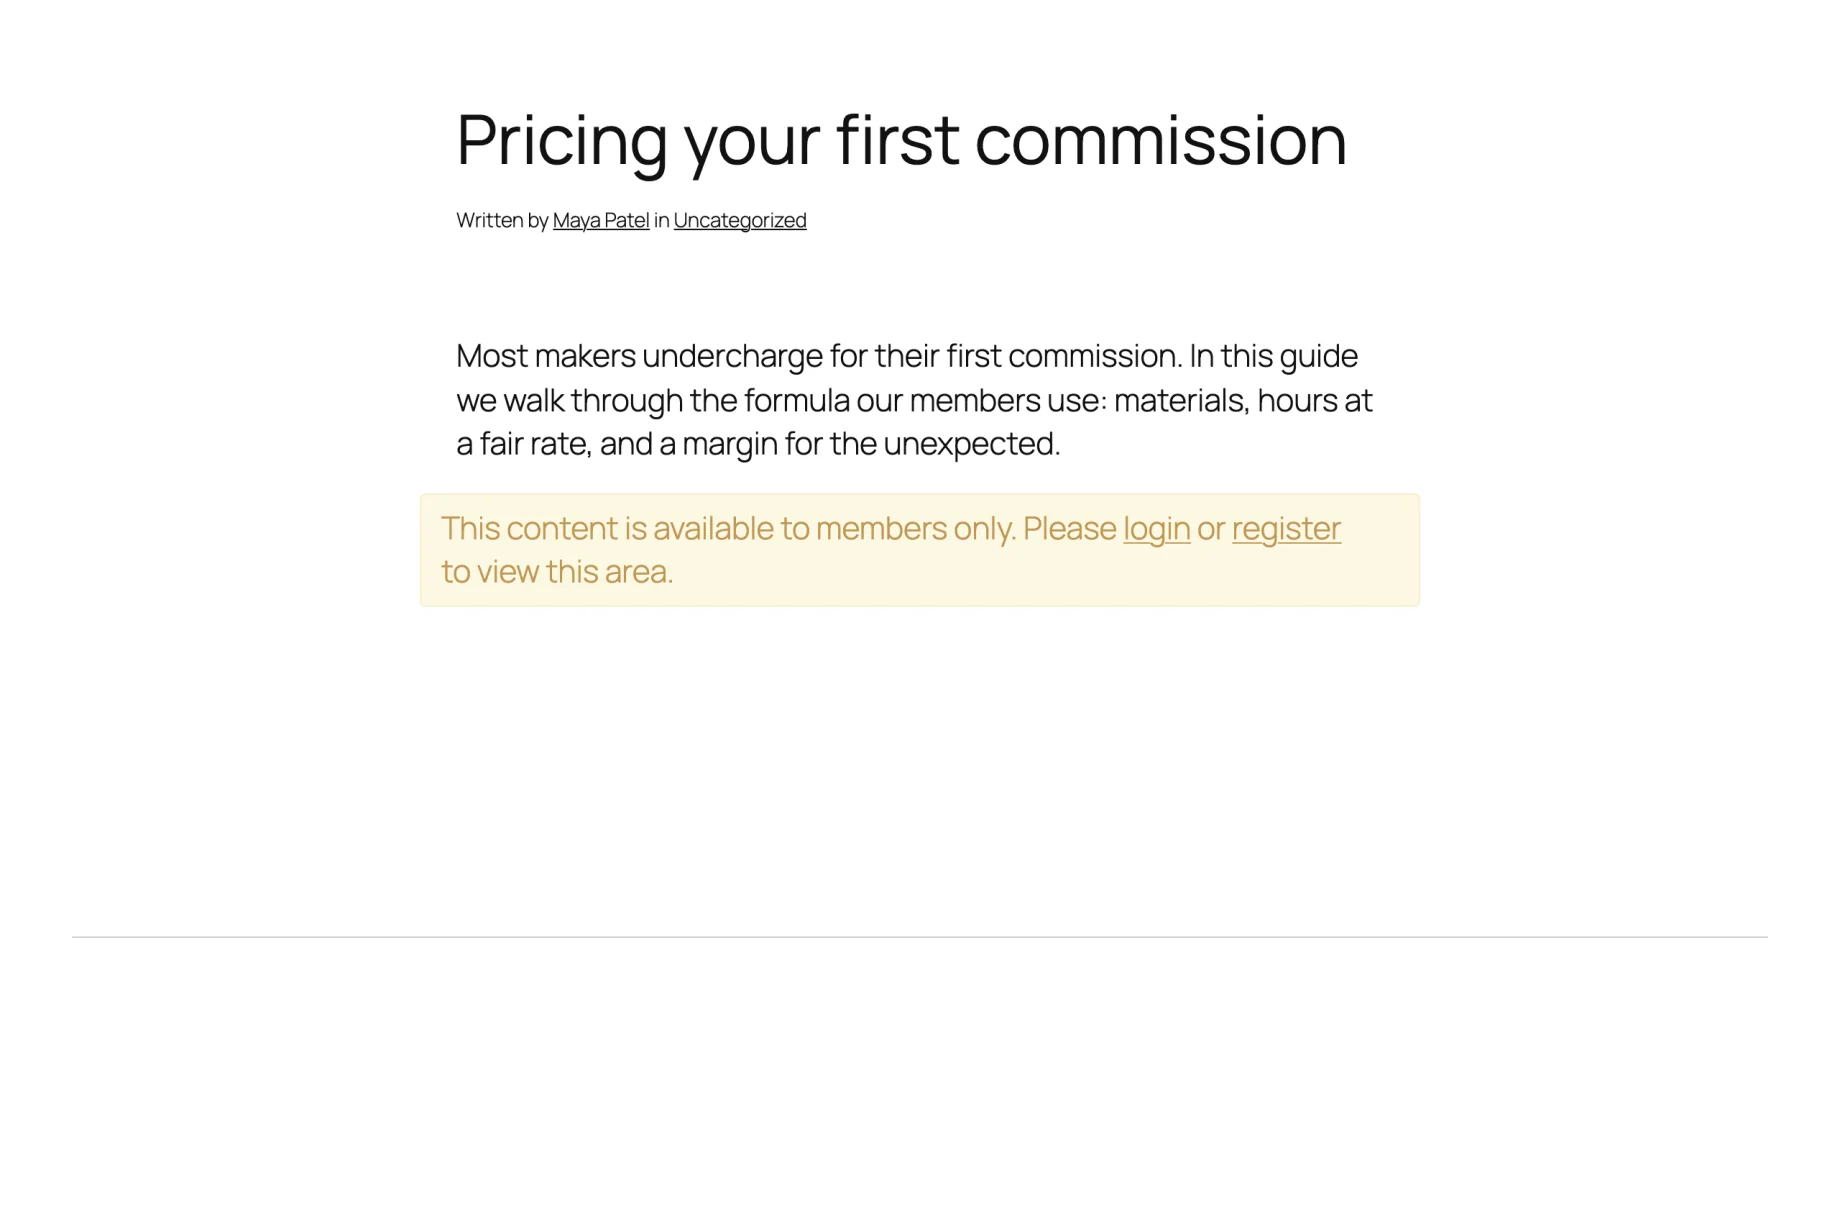
To show an introduction and gate the rest, wrap the members-only part in the [wpum_restrict_logged_in] shortcode:
Most makers undercharge for their first commission. In this guide we walk
through the formula our members use.

[wpum_restrict_logged_in]
Step 1: Add up your materials...
[/wpum_restrict_logged_in]
Logged-out visitors see the introduction and a message with links to your login and registration pages. Logged-in members see everything.
Three more shortcodes cover the other cases, all listed in content restriction shortcodes:
[wpum_restrict_to_user_roles roles="subscriber,editor"]shows content only to users with those roles. Combined with user roles, this is how you give different members different content.[wpum_restrict_to_users ids="12,34"]shows content only to specific users.[wpum_restrict_logged_out]shows content only to visitors who aren’t logged in, which is handy for a “join to read the rest” call to action.
Each one takes show_message="no" if you’d rather hide the content without a message.

Get Started with the Best WordPress Membership Plugin Today
Connect, Manage and Build your Membership Site
Step 3: Or gate blocks, without shortcodes
If you build pages in the block editor, select any block and open the WP User Manager – Restriction panel in the block settings. Choose Show block by users state, Show block by user role or Show block for certain users, and whether to display the restricted message. Our guide to conditional WordPress blocks walks through it. Elementor widgets get the same restriction controls.
Step 4: Hide members-only menu links
There’s no point showing visitors a menu link to a page they can’t open. In Appearance > Menus (on classic themes), each menu item gets a Display to setting: Everyone, Logged in users or Logged out users, plus the roles that should see it.
Step 5: Or gate the whole site
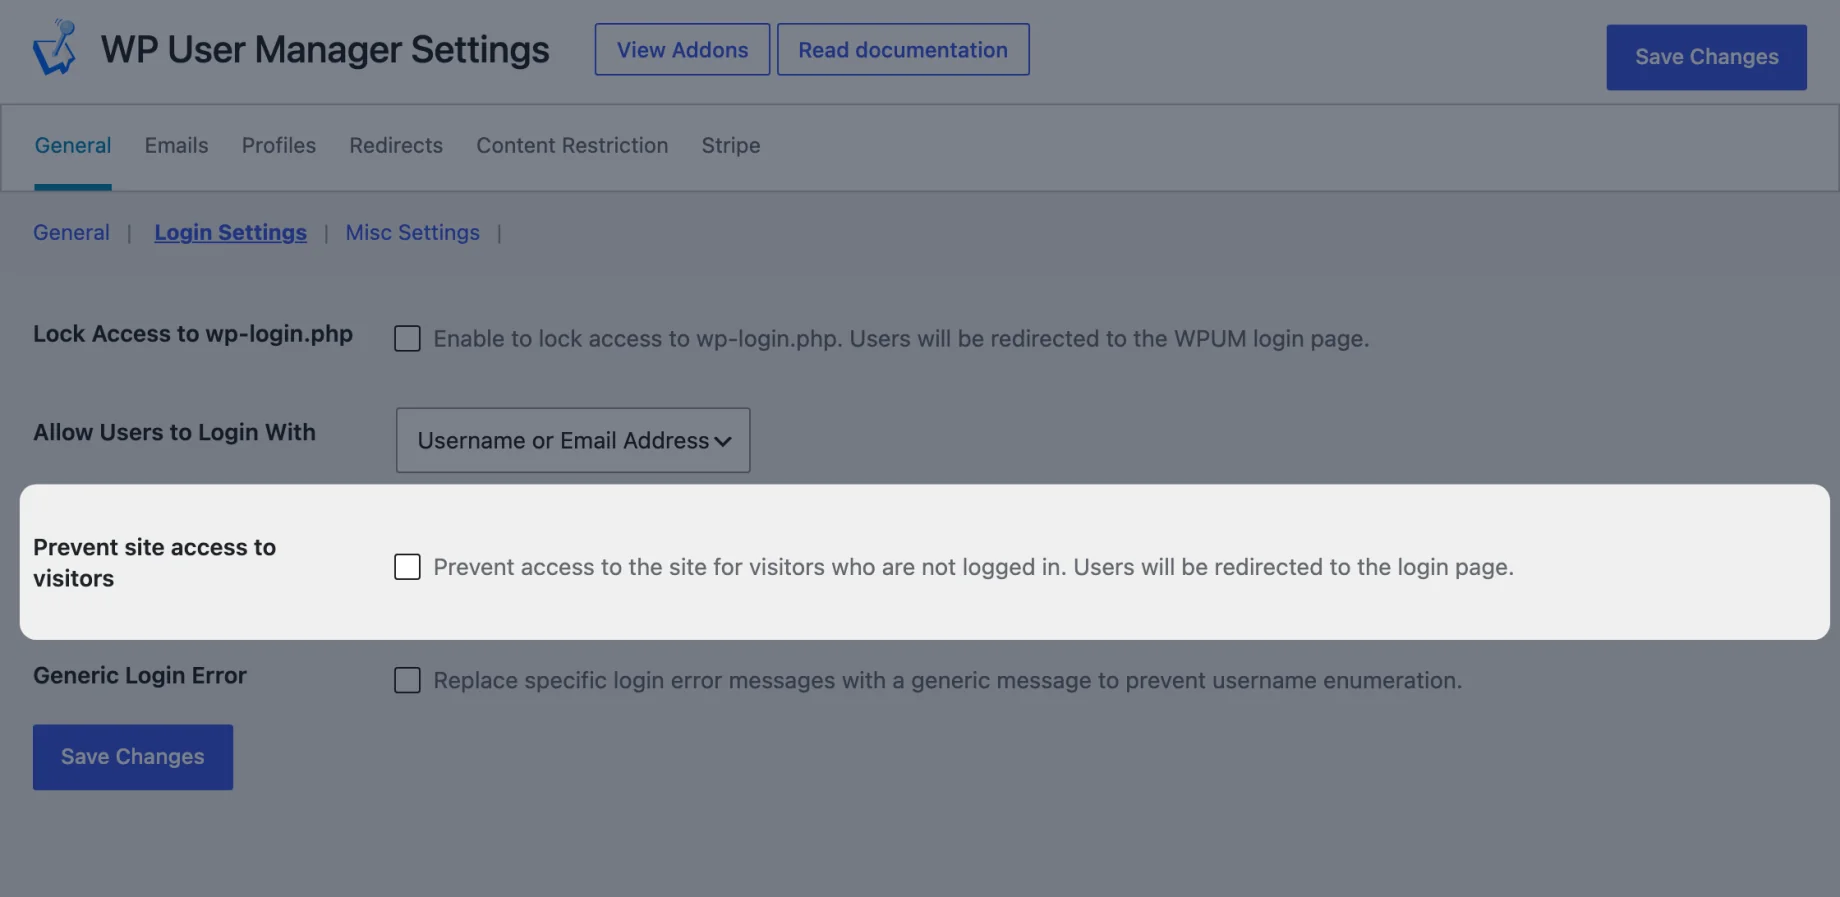
For a fully private site, such as a club or an intranet, go to Users > Settings > General > Login Settings and turn on Prevent site access to visitors. Anyone who isn’t logged in is redirected to the login page. Turn on Allow site registration as well if new members should still be able to sign up. Our guide to making a WordPress site private covers this in more detail.
Gate whole posts, pages and categories
Shortcodes and blocks work well for part of a page. To gate whole posts, use the Content Restriction addon (paid, included in every plan). If you’re still choosing a plugin, see our comparison of content restriction plugins. It adds a WP User Manager – Content Restriction box to every post and page:
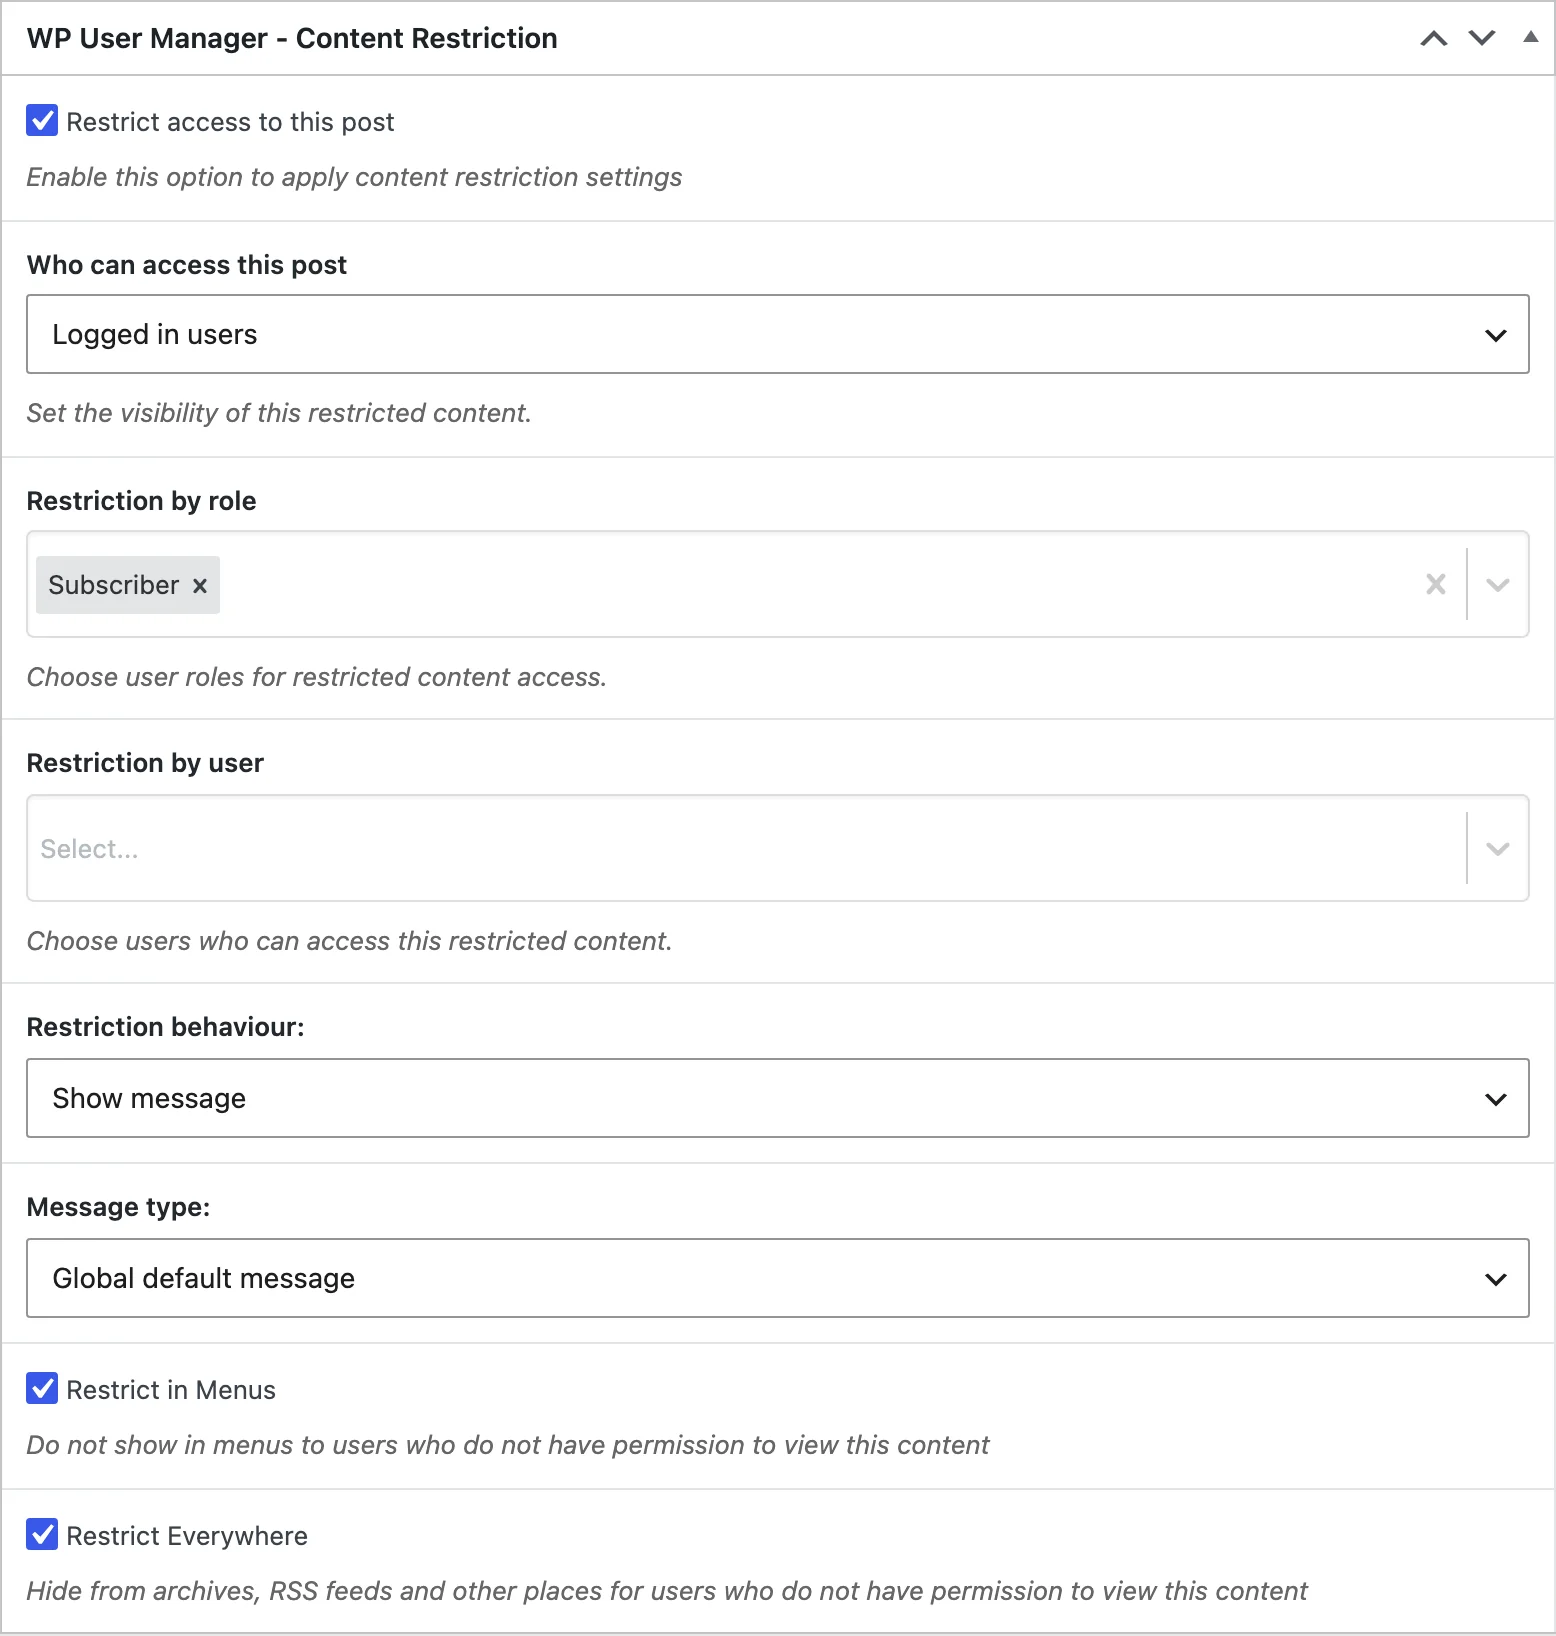
Tick Restrict access to this post, then choose:
- Who can access this post: logged in or logged out users.
- Restriction by role and Restriction by user: narrow it to particular roles or people.
- Restriction by Stripe Product or WooCommerce products purchased: only customers who’ve bought a product get in. More on this below.
- Restriction behaviour: show a message (the global default or a custom one) or redirect to another page.
- Restrict in Menus and Restrict Everywhere: hide the post from menus, archives and RSS feeds for anyone who can’t open it, so gated posts don’t leak through your blog page or feed.
For pages there’s an option to apply the same settings to all child pages, and categories and tags get the same box, so you can gate a whole section at once. To gate every post of a type (all your downloads, say), choose it under Post Types on the Content Restriction tab in Users > Settings, as described in restricting all content in specific post types.
Charge for access
A paid gate has two parts: taking the payment, and letting payers in.
- Take payment at registration. WP User Manager connects to Stripe in the free plugin. In Users > Registration Forms, open your form’s settings and choose the product under Payment > Stripe Product. New members pay as they sign up, once or by subscription. The free integration adds a 2% fee per transaction on top of Stripe’s own; the paid Stripe Pro addon uses your own Stripe account and removes it. Setup is in using Stripe to collect payment for site registration.
- Let payers in. In the Content Restriction box, choose that product under Restriction by Stripe Product. Only people who bought it can see the post.
If you already sell through WooCommerce, gate posts by WooCommerce products purchased instead.
Turn sign-ups into leads
If your gate is about growing a list rather than selling, connect registration to your email marketing. The Mailchimp addon adds new members to a Mailchimp list as they register, as described in syncing WordPress registrations to Mailchimp.
Tips for gated content that converts
- Show enough to prove the value. A clear introduction or a table of contents above the gate does more than a bare login prompt.
- Keep the registration form short. Name, email and password is enough to start. You can collect more on the account page later.
- Say what members get. Use the space around the gate to list what’s behind it.
- Don’t gate your traffic. Keep the pages that bring visitors in public, and gate the extras they come back for.
Get started
Everything up to the Content Restriction addon is in the free plugin: download WP User Manager from wordpress.org, wrap your first members-only section in [wpum_restrict_logged_in], and log out to see it from a visitor’s side. When you need to gate whole posts, categories or paid products, the Content Restriction addon is in every plan.