
Personalizing your content is one way to create a connection with your site’s visitors and users. There are lots of tactics you can use, such as using certain types of dynamic content. Conditional WordPress Blocks will let you set content to display based on user role, among other elements.
Creating content using personalized conditional Blocks lets you improve the User Experience (UX.) You also get greater flexibility when it comes to content scheduling, setting up a membership site, and lots of other use cases.
For this tutorial, we’re going to first discuss the concept of conditional WordPress Blocks, then go into what WP User Manager offers. From there, we’ll present a third-party solution to help you set up more powerful conditional Blocks, and show you how to use it.
What Conditional WordPress Blocks Are (And Why You’d Want to Use Them)
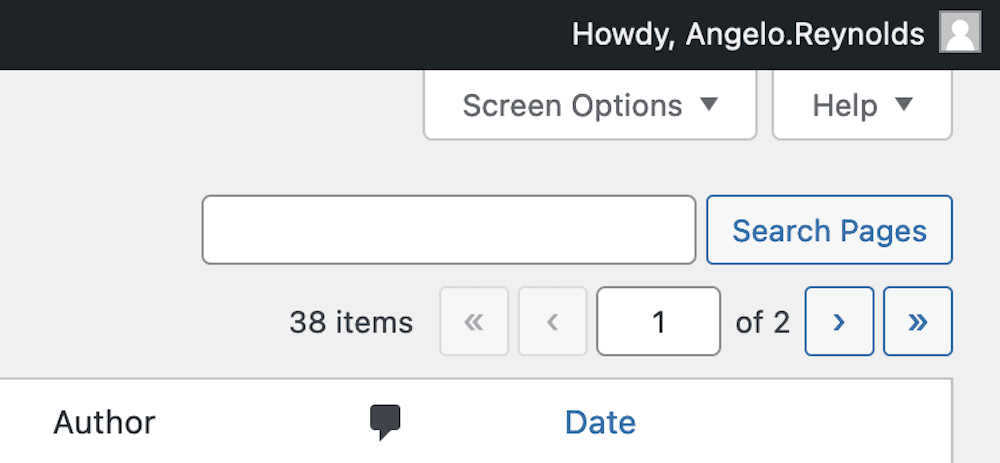
In short, conditional WordPress Blocks let you create dynamic content on your website. It’s a way to change up what certain users see when they view a particular post or page. In general, dynamic content could be as straightforward as using a personalized name – as is the case with the WordPress dashboard:
However, conditional WordPress Blocks can supercharge your dynamic content. For instance, you can control the visibility of this content (or its format) based on certain conditions. This could be location, login status, whether you are using maintenance mode, and much more.
In fact, you’ll find a lot of different use cases for conditional WordPress Blocks that go beyond simple personalization. In the next section, we’ll look more into this.
Some Examples of How Your Site Can Leverage Conditional WordPress Blocks
You’ll find umpteen ways to apply and use conditional content on your WordPress website. For instance, you can set up Blocks that respond to your user’s device screen size. This might suit a contact page, as you can scale the form to a specific size. In contrast, you can set up a different contact method altogether if you wish that targets mobile users only.
Another straightforward use case for conditional Blocks is membership content, albeit one that can have a huge impact on your site. You can lock content away behind a paywall based on whether a user logs into your site. As an alternative, you can show those users who don’t log in a message specific to them.
In fact, there are so many applications for conditional WordPress Blocks that we can’t cover them all here. However, in a few sections, we’ll discuss a solution that can show you the scope of the functionality.
Why You Might Need to Update Your Privacy Policy if You Use Conditional WordPress Blocks
One of the core fundamentals of conditional content is the need for information. For example, you’ll have to know some important data about your users. This could be as simple as the device they use, activity within your e-commerce store, and much more.
Get Started with the Best WordPress Membership Plugin Today
Connect, Manage and Build your Membership Site
Given this, it’s a good idea to consider whether you need to change your privacy policy to adapt to your new conditional and dynamic content. There are a few key areas you can begin to investigate.
You’ll want to consider the relationship between your hosting provider’s location, that of your server, and your physical location. Different areas will implement data privacy laws in various ways, and you’ll want to make sure that the data you collect is safe, secure, and legal to own.
How WP User Manager Can Help You Set Up Conditional WordPress Blocks
The WP User Manager plugin can help you implement lots of different functionality, and administrate the registered users on your site. However, it also offers native functionality to restrict Blocks and Block Groups within the default WordPress editor through the Content Restriction add-on.
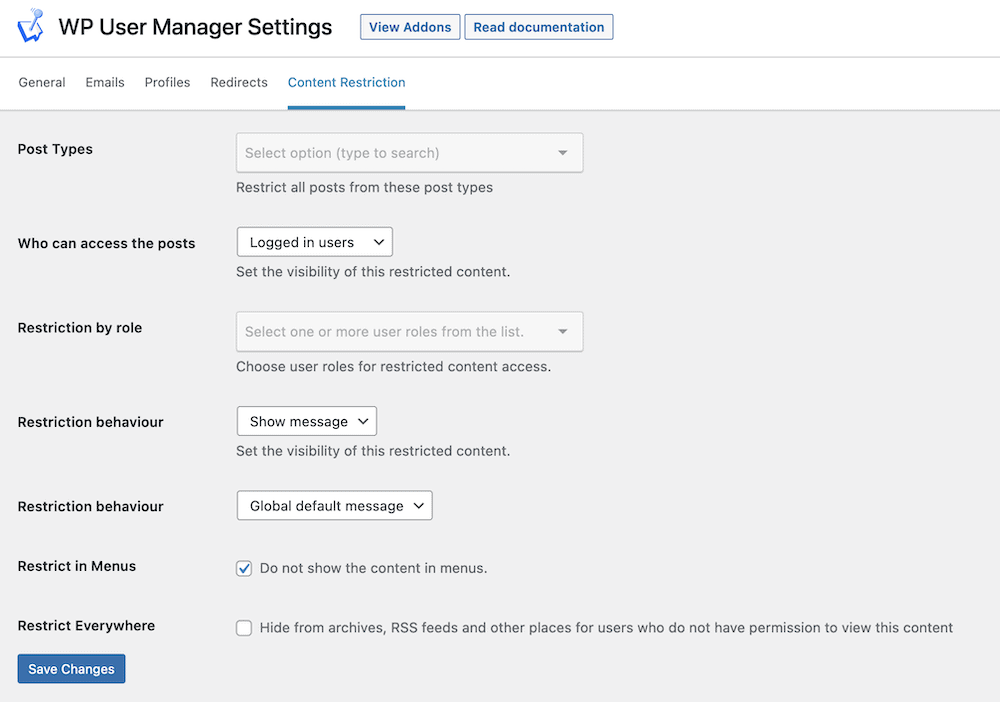
The Users > Settings > Content Restriction screen within WordPress gives you a set of global options to work with. You can restrict certain post types and user roles from your content, and choose how those restrictions display to the end user:
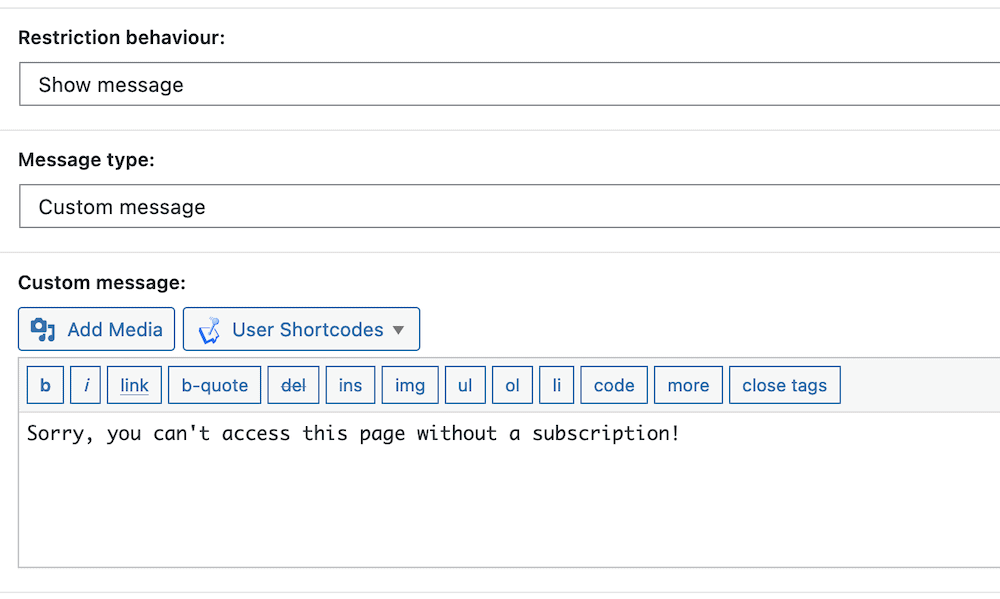
However, there’s also a comprehensive set of options on a per-page basis. You can find them within a dedicated metabox within the Block Editor:
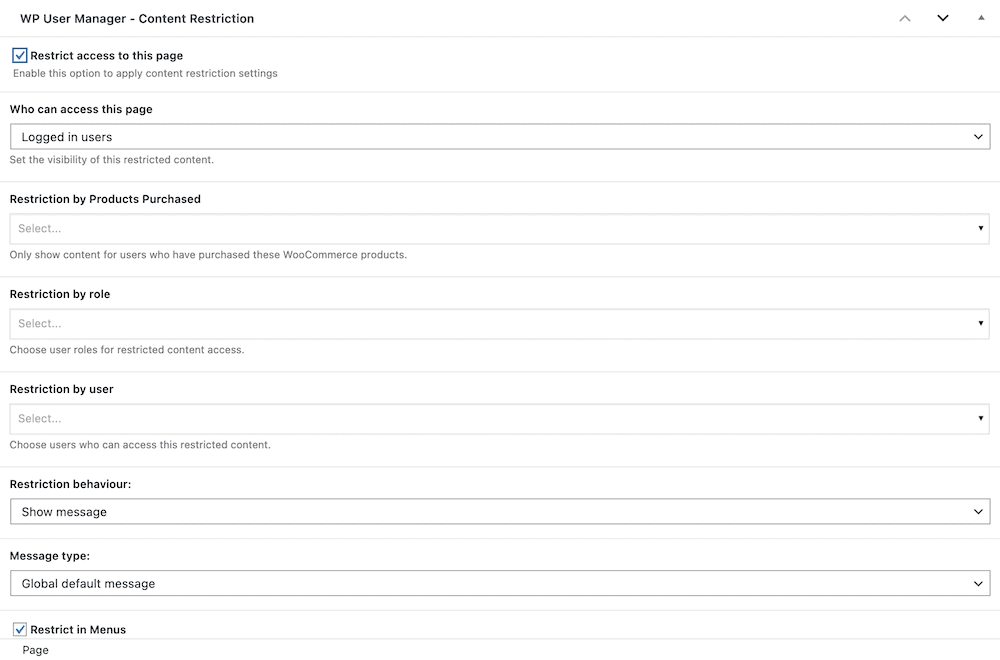
This gives you options such as access rights based on login status and user role – you can even restrict content on a per-user basis. You again get options to choose how those restrictions display, while controlling the message the user will see, and even whether you use a redirect to send them elsewhere.
Despite the functionality WP User Manager provides, it doesn’t do everything. Next, we’ll show you a way to expand on this functionality.
A Third-Party Solution to Implement Conditional WordPress Blocks
If you want to supercharge the way you use conditional WordPress Blocks, there’s a fantastic third-party solution available that works well with WP User Manager.
Conditional Blocks is a premium plugin with a whole host of superb features and functionalities to help you implement advanced dynamic content:
- You can work with user roles, login status, screen size, and more user-related data.
- There’s a full-featured scheduler that will restrict content and Blocks based on the date range you choose.
- You’re able to work with posts, pages, and custom post types without restriction. This includes archive pages, taxonomies, and other custom data.
- There are lots of server-related options too. For example, you can use the URL format as a condition. This means you can set up Urchin Tracking Module (UTM) codes and direct users to specific pages based on that URL.
- There is also a full set of WooCommerce conditional elements too, including how much the customer spends, the total value of the cart, and the products within it.
Despite the wealth of functionality within Conditional Blocks, the price should fit most budgets. A single-site license is $49 per year, and you get the full feature set of the plugin. In our final section, we’ll show you how to use Conditional Blocks on your own site.
How to Set Up Dynamic Content Using the Conditional Blocks Plugin
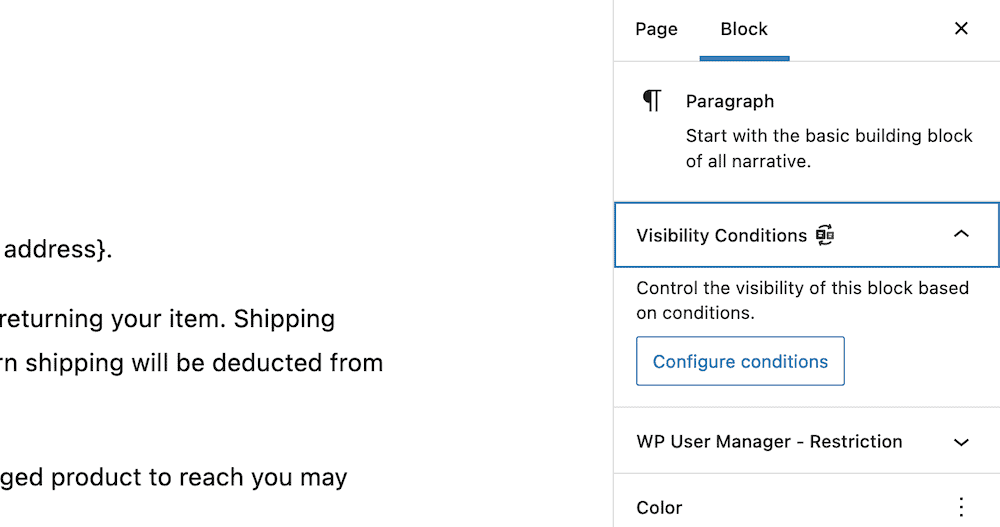
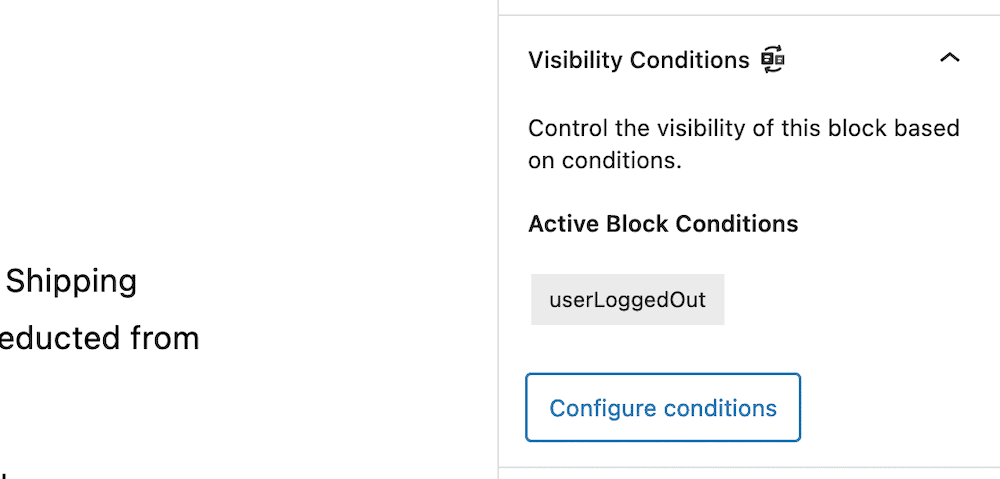
The first step is to make sure you purchase the plugin, install it, and activate it. Once you have the plugin ready, head to a post or page, and select a Block you’d like to set a condition for. You’ll see the Visibility Conditions options within the right-hand Block sidebar, and you’ll want to click the Configure conditions button:
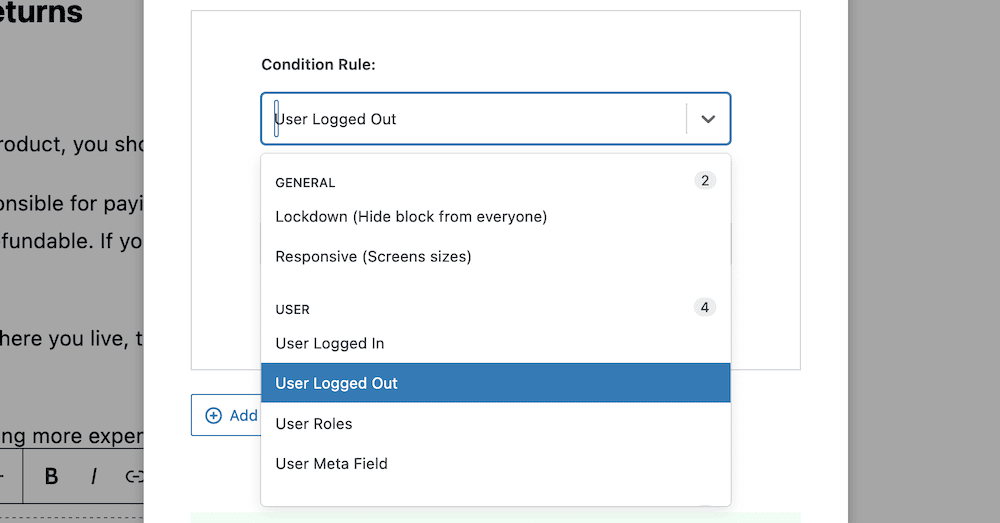
Clicking this button will bring up a modal dialog box. It contains three tabs: first is the condition builder for the current Block:

Here, you’ll use the Add condition button to set up a new rule. Each rule uses a group, so you can find what you need with ease:
Once you choose this and close the window, you’ll see a clear display of what rule and condition is set for a Block:
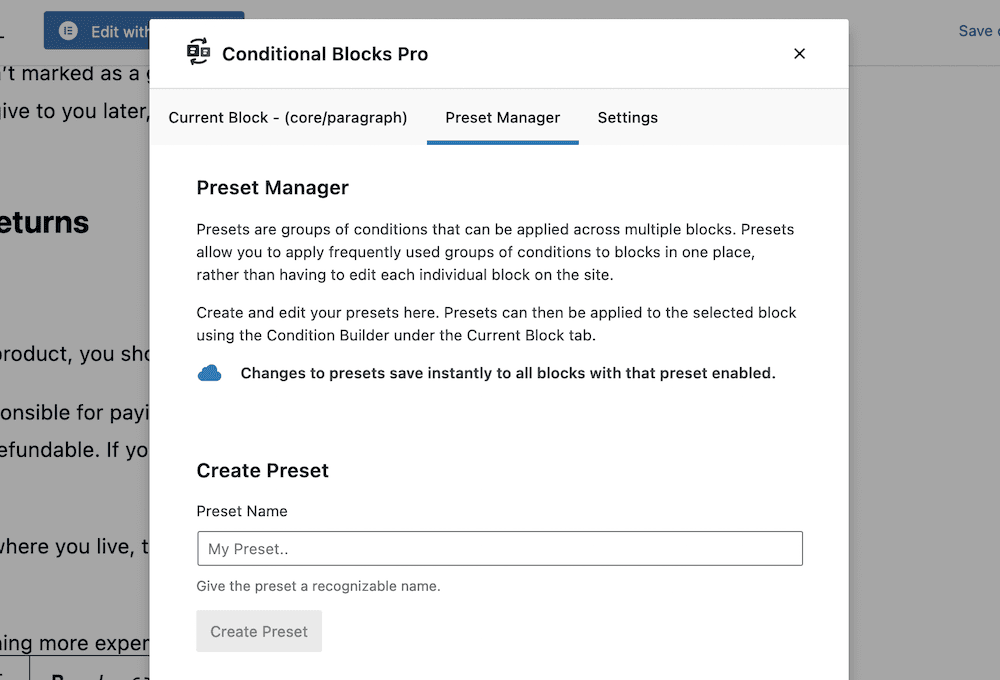
Back in the options window, the Preset Manager lets you set up conditions and rules for groups of Blocks across your site. This lets you work faster on your whole website, rather than edit each Block on an individual basis:
The final tab of note is Settings. This lets you adjust your breakpoints for different screen sizes:
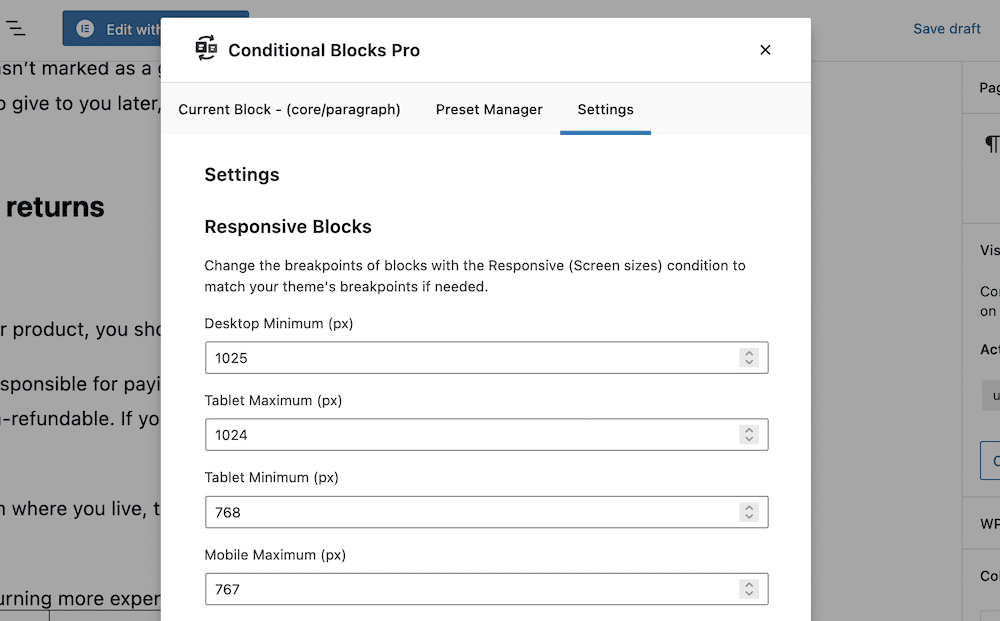
You’ll use this in conjunction with the Responsive (screen sizes) condition rule, and will even let you set whether a Block will display on certain devices.
Conclusion
If you want to boost the UX of your WordPress website, and engage on a deeper level with your users, you’ll need to personalize your content. Conditional WordPress Blocks let you do this, and the best news is that they are straightforward to set up.
This post looks at what WP User Manager offers when it comes to conditional WordPress Blocks. However, the Conditional Blocks plugin takes this functionality and runs with it. You can set up dynamic content on your site in a snap, with the power to implement advanced site features such as membership content, and upsells.
How will you use WP User Manager and the Conditional Blocks plugin on your site? Let us know in the comments section below!