

WordPress doesn’t do email verification for new users. Anyone can sign up with any address, real or not, and log straight in. This guide shows how to add WordPress email verification to your registration form with WP User Manager and its User Verification addon: send new members a link to confirm their address, approve each signup yourself, or require both before anyone can log in.
Why verify new signups
- Fake addresses spread. If new members are added to your Mailchimp list with the Mailchimp addon, a batch of made-up addresses goes with them, and a high bounce rate is how mailing accounts get suspended.
- Some sites need a gatekeeper. A private club, a professional network or a wholesale store wants a person to look at every application before it gets in.
- Your user list stays honest. Hundreds of accounts nobody can log in to make every report, export and member count less useful.
Be clear on what verification does, though. It doesn’t stop a bot filling in your form. It stops the account being used until the address is confirmed, and clears out the ones that never are. To stop the submissions themselves, pair it with a captcha: see how to add reCAPTCHA to WordPress. WP User Manager’s registration form also has a hidden honeypot field that turns away simple bots for free.
Email verification, manual approval, or both
The addon gives you two checks, and you can use either one or both together:
- Email verification: new members get an email with a link. Until they click it, they can’t log in. Nobody on your side has to do anything, so it suits open communities and any site where you just want real addresses.
- Manual approval: every signup waits for you (or a team member) to approve or reject it. It’s the right choice when you decide who joins.
- Both: the member confirms their address and you approve them, in either order. They can log in once both are done. Use this when you approve members by hand and also need their email to work, for example because you’ll be emailing them invoices or a newsletter.
What you need
- The free WP User Manager plugin, which gives you the front-end registration and login forms. See registration page setup if you haven’t added them yet.
- The User Verification addon. It’s a paid addon, also included in every addon bundle. Installing the addon takes a minute.
- Email that actually reaches inboxes. Verification depends on it, so if your site’s emails go to spam, fix that first: my emails aren’t delivering.
Step 1: Choose your verification method
Go to Users > Settings and open the User Verification tab. Under Verification Method, tick Email Verification, Manual Approval, or both, then click Save Changes.
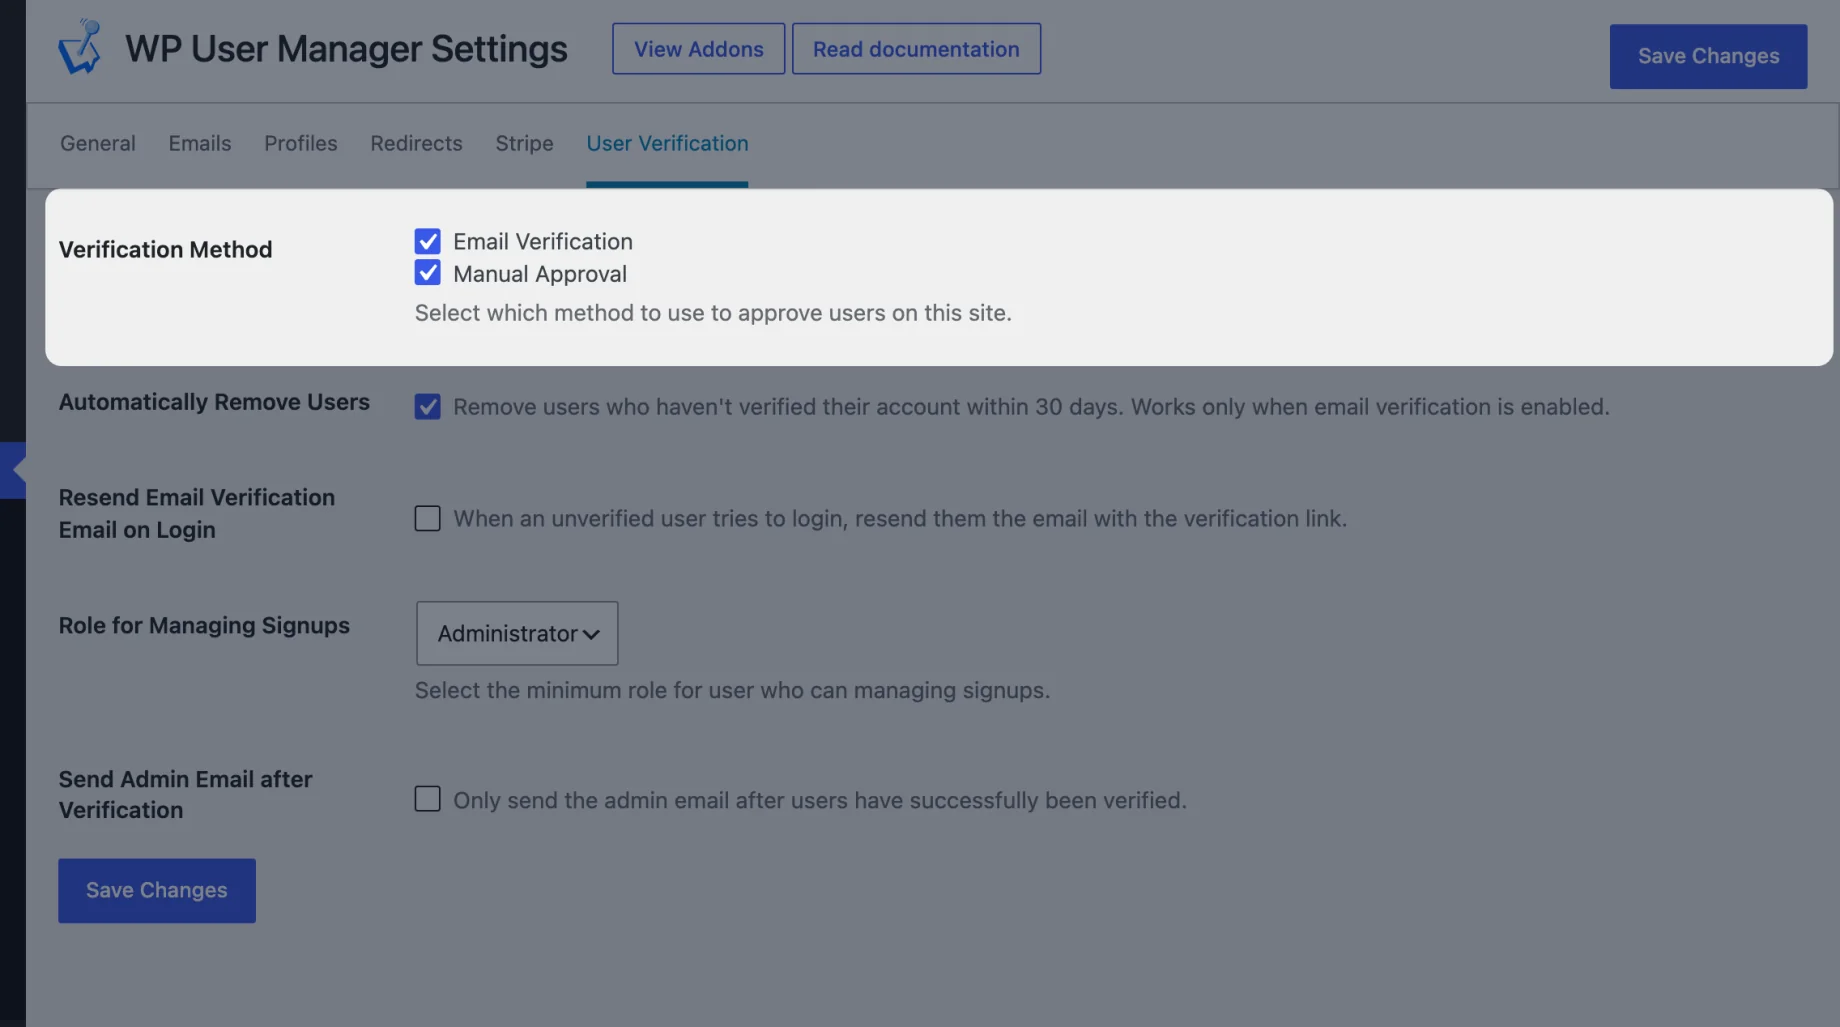
The other settings on this tab:
- Automatically Remove Users deletes accounts that haven’t verified their email within 30 days. It only applies with email verification on, and never removes someone who has verified and is just waiting for your approval.
- Resend Email Verification Email on Login sends the link again when an unverified member tries to log in. Turn it on if people tell you the first email never arrived.
- Role for Managing Signups lets an Editor, Author or Contributor approve signups, not just Administrators.
- Send Admin Email after Verification holds back WP User Manager’s “new user” email to you until the member has finished verifying, so you aren’t told about signups that never complete.
Step 2: Add the verification link to the registration email
This is the step most people miss. The link is sent in WP User Manager’s own Registration confirmation email, and it only appears where you put the {verification_link} tag.
Go to Users > Emails and click Customize next to Registration confirmation. Add a line such as “Please confirm your email address:” followed by {verification_link}, and save. If you’ve designed your own email with a button, use {verification_url} instead: it gives you the plain address to put behind the button.
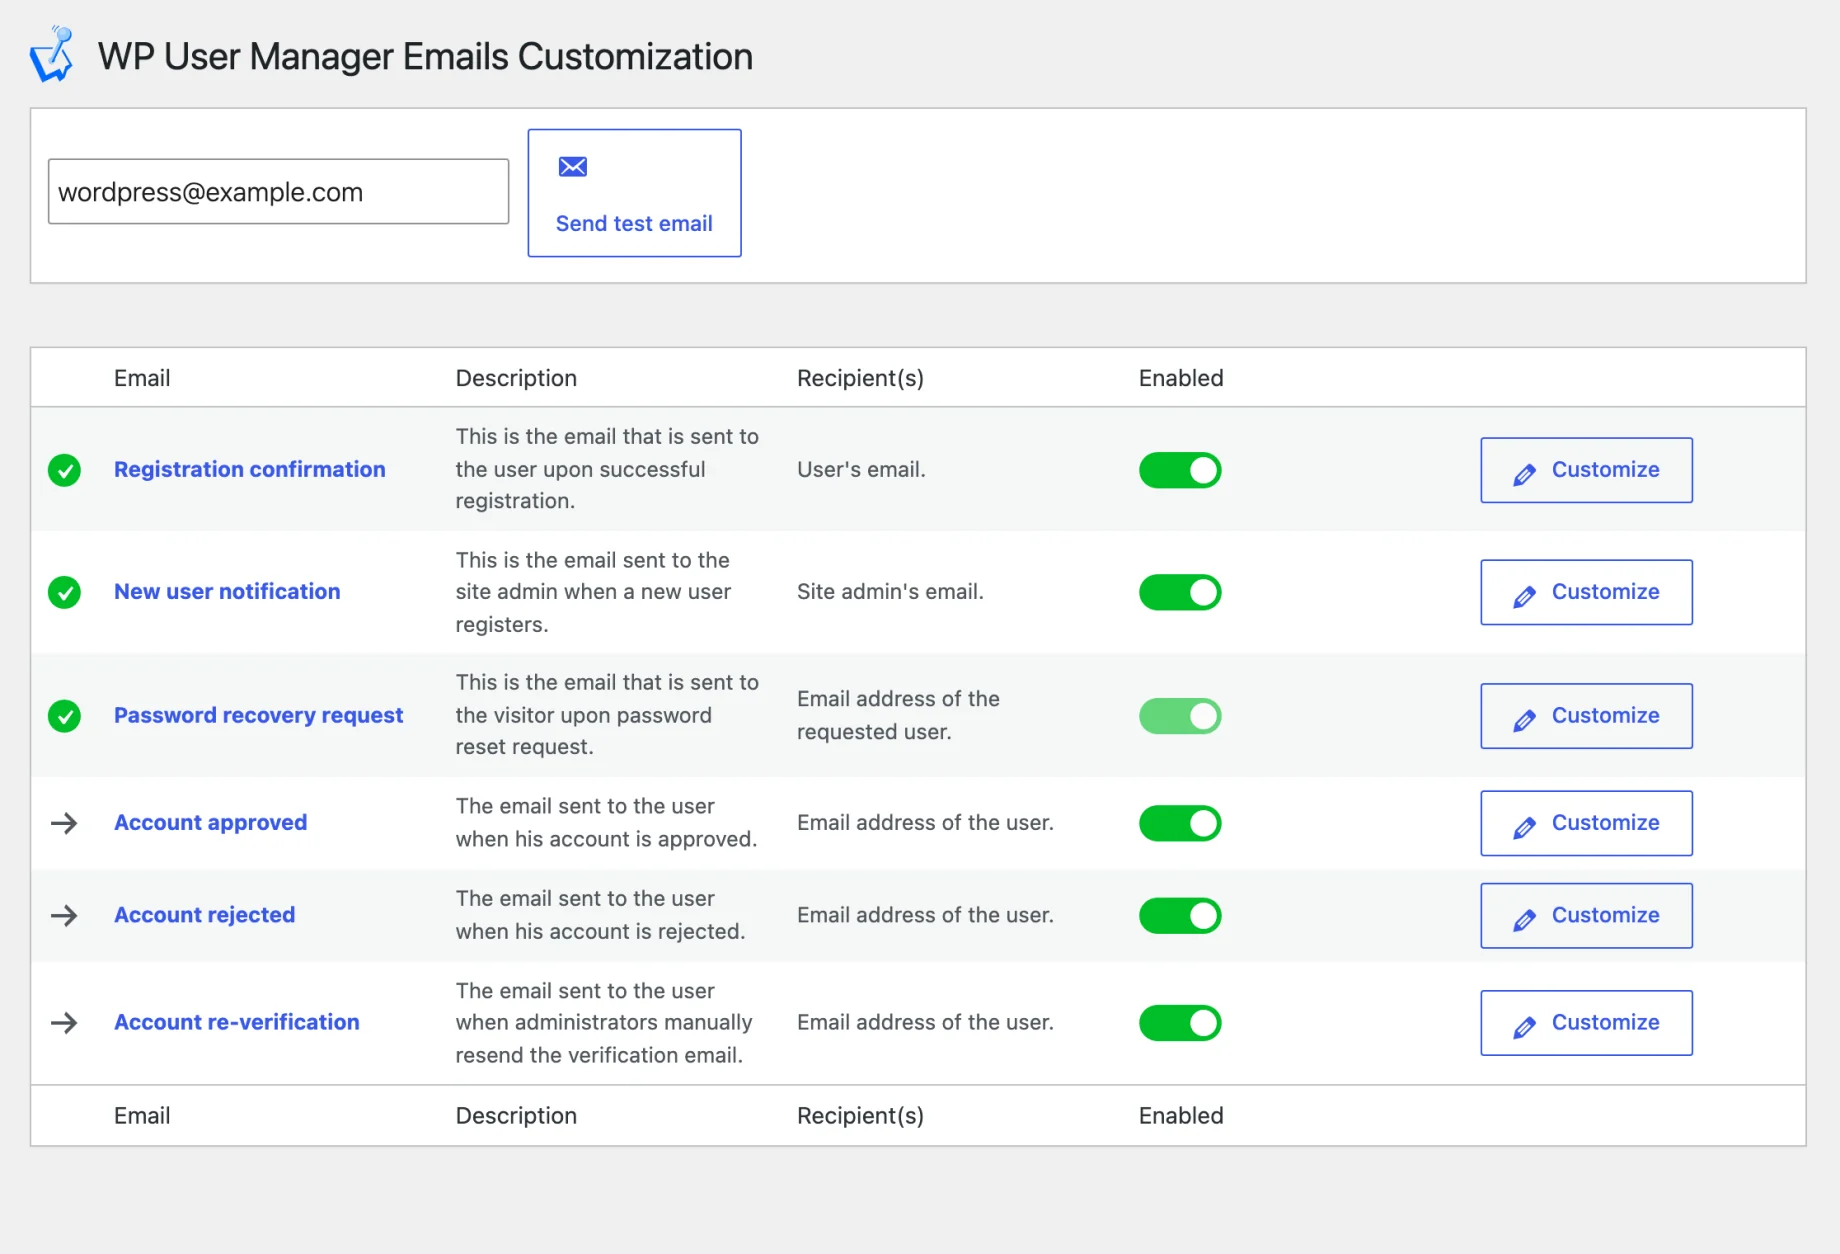
Until the tag is there, the Users screens show a warning: “Email verification is enabled but the {verification_link} text doesn’t appear in the registration confirmation email.” If you use manual approval only, the opposite applies: take the tag out, or the email sends a link that doesn’t help.

Get Started with the Best WordPress Membership Plugin Today
Connect, Manage and Build your Membership Site
The addon adds three emails of its own on the same screen. Account approved and Account rejected go out when you approve or reject someone. Account re-verification is the one sent when you resend a verification link, and already includes the tag. Each one can be reworded, and the custom email notifications feature page covers the editor.
What new members see
With verification on, WP User Manager stops logging people in straight after they register, even if Login After Registration is turned on. Instead, the registration form tells them what happens next, worded for the methods you chose:
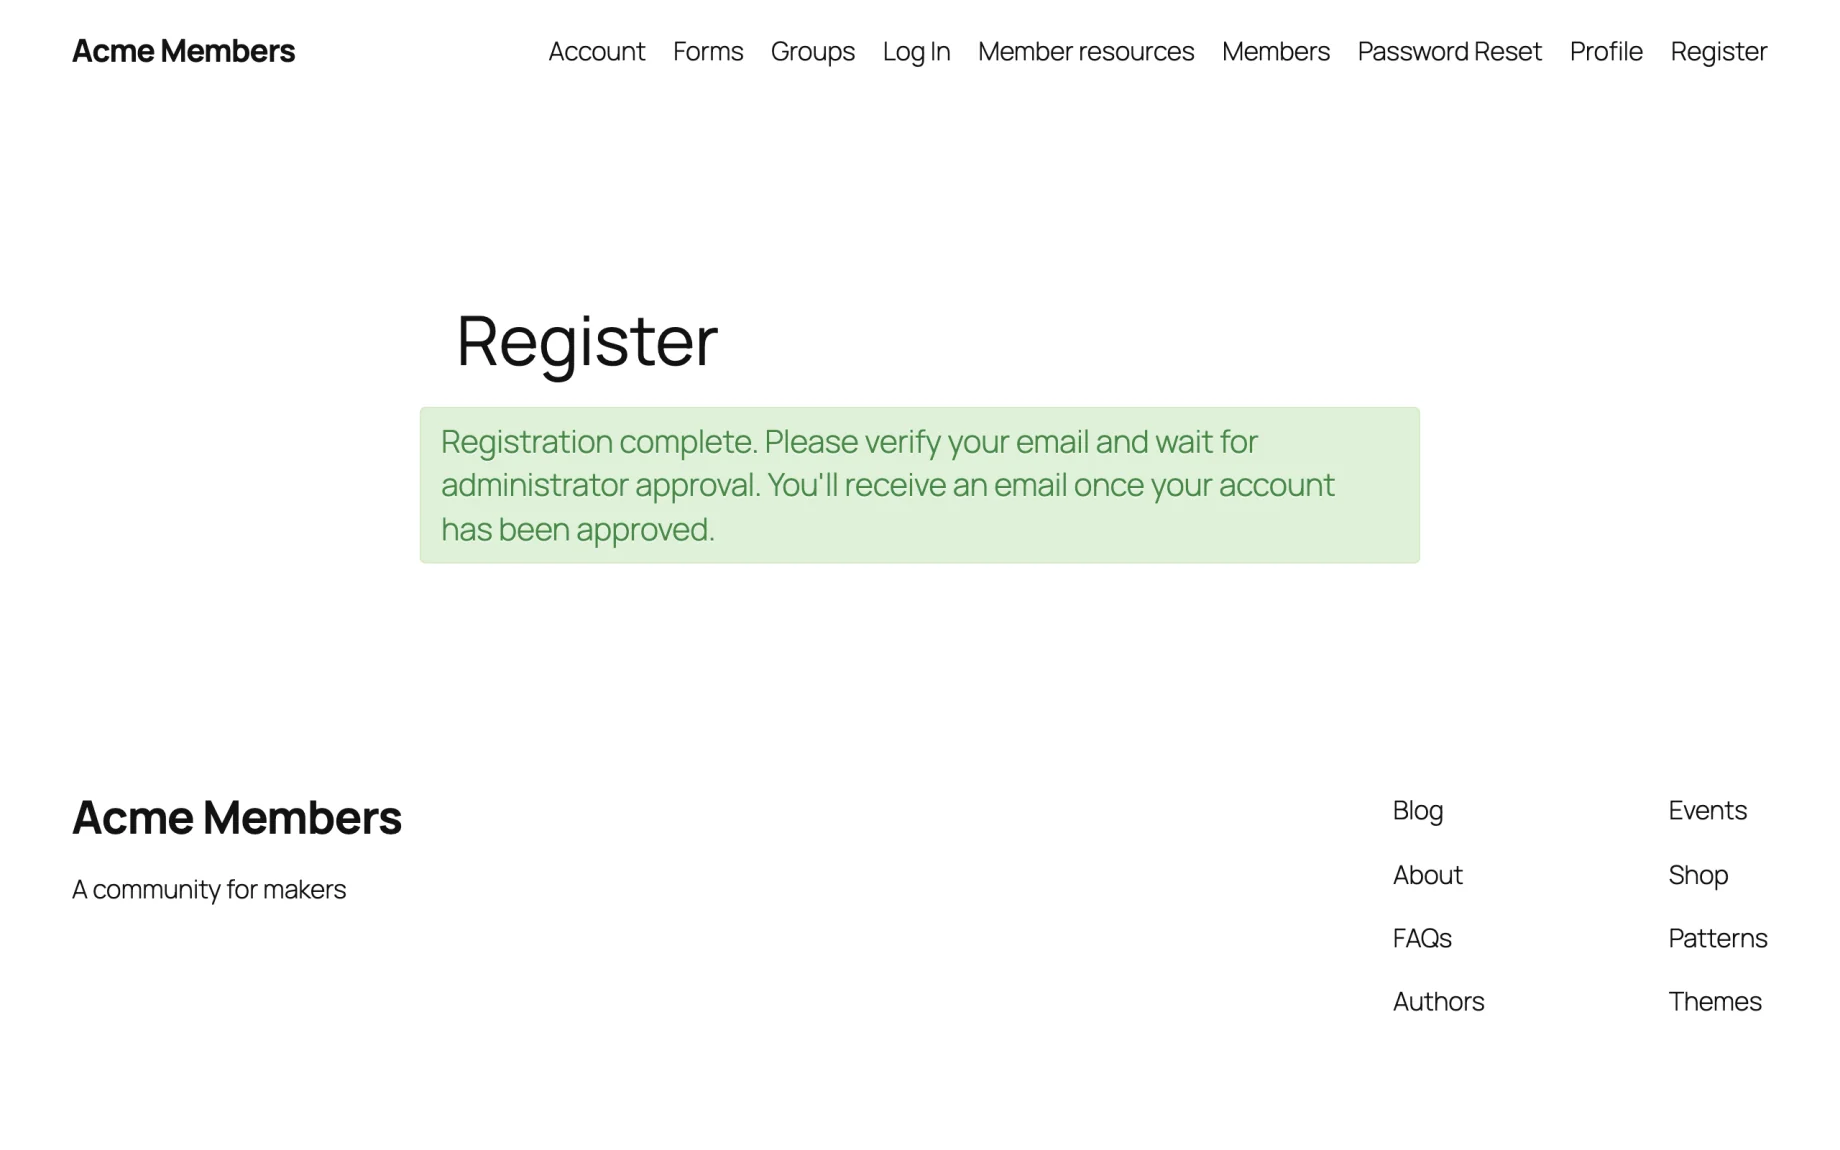
If they try to log in too early, the login form says why: “We have sent you a verification email. Please verify your account first.”, “Your account is currently pending approval.”, or both. When they click the link in their email, they land on your login page with a thank you message:
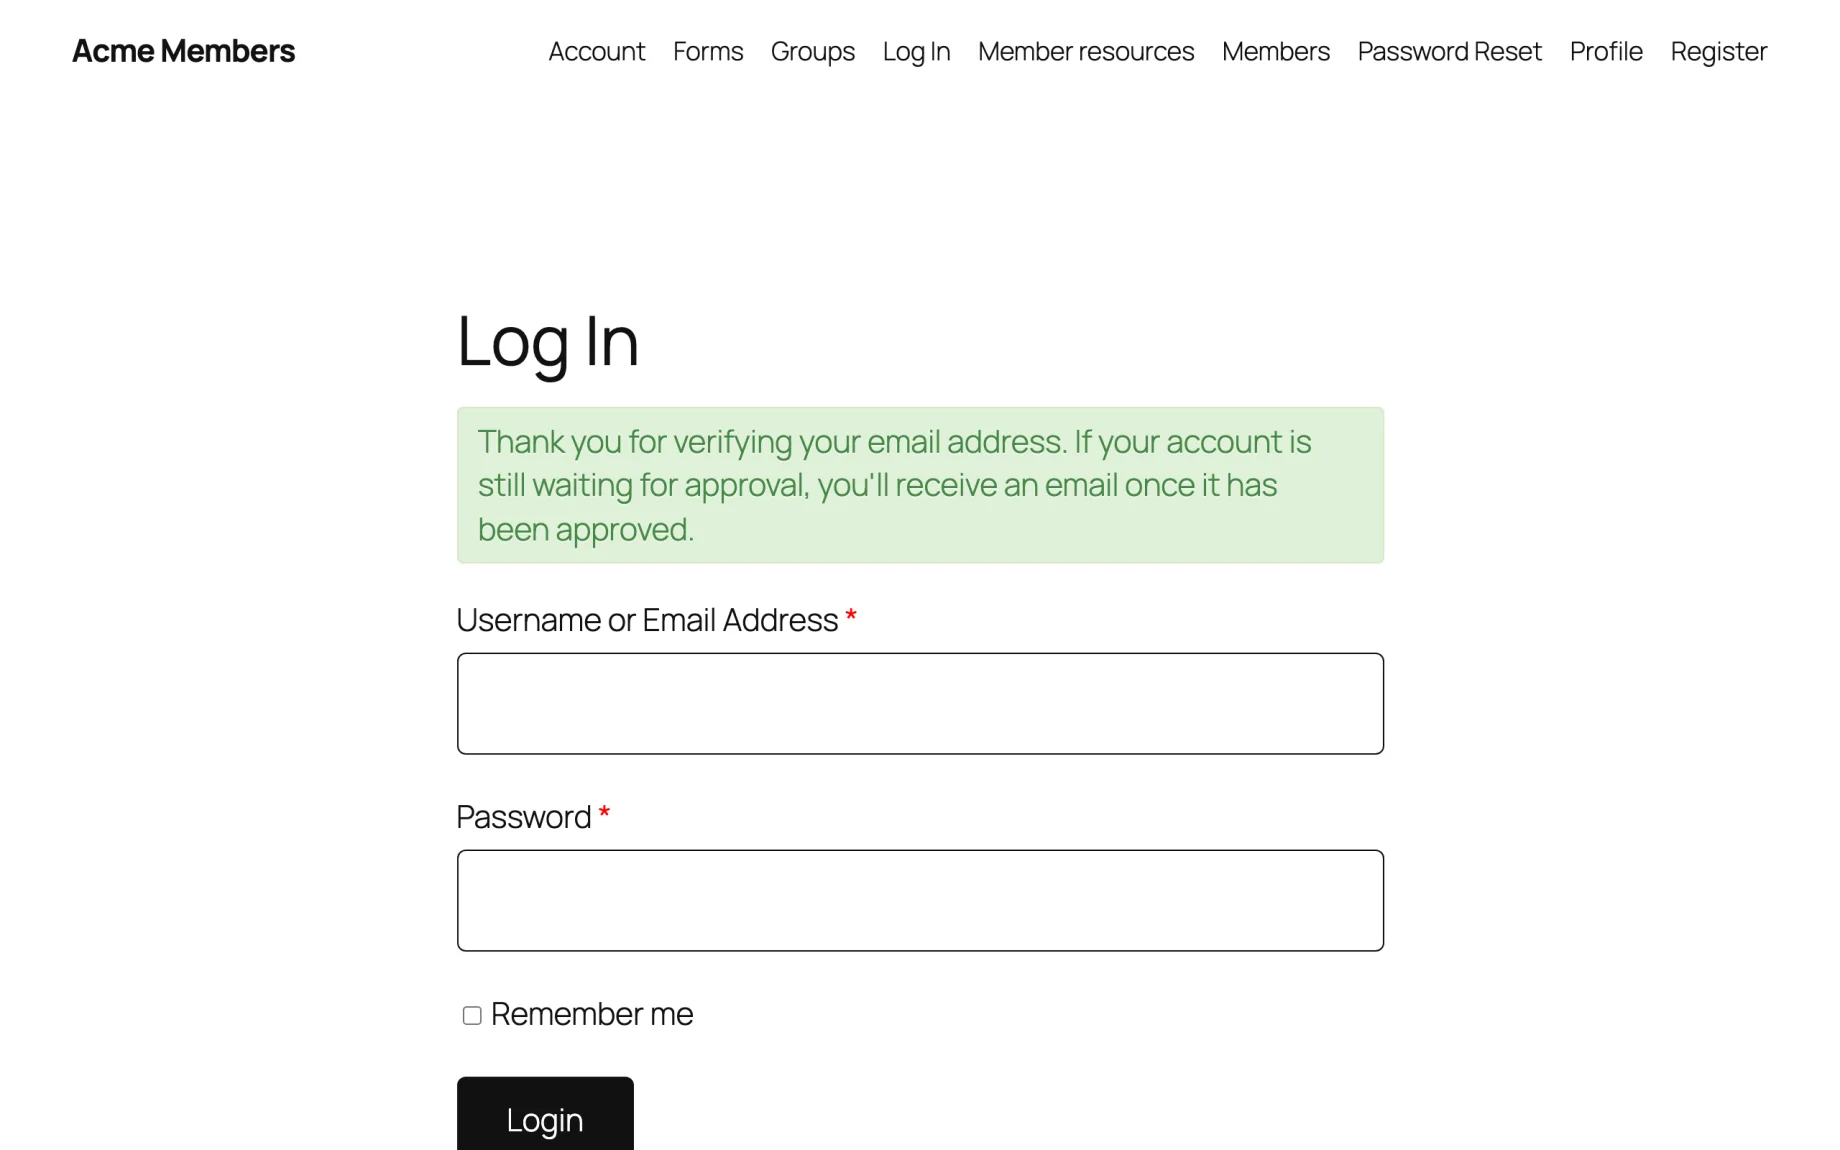
Each link works once. Resending the email creates a new link, and an old or mistyped one shows an error asking the member to use the link in their latest email.
Members who are still waiting are also left out of your member directories, so half-finished signups don’t show up as members.
Step 3: Approve, reject or resend from Manage Signups
Everyone still waiting is listed under Users > Manage Signups. With both methods on, the Status column shows what each person is waiting for: Email not verified, Waiting for approval, or both.
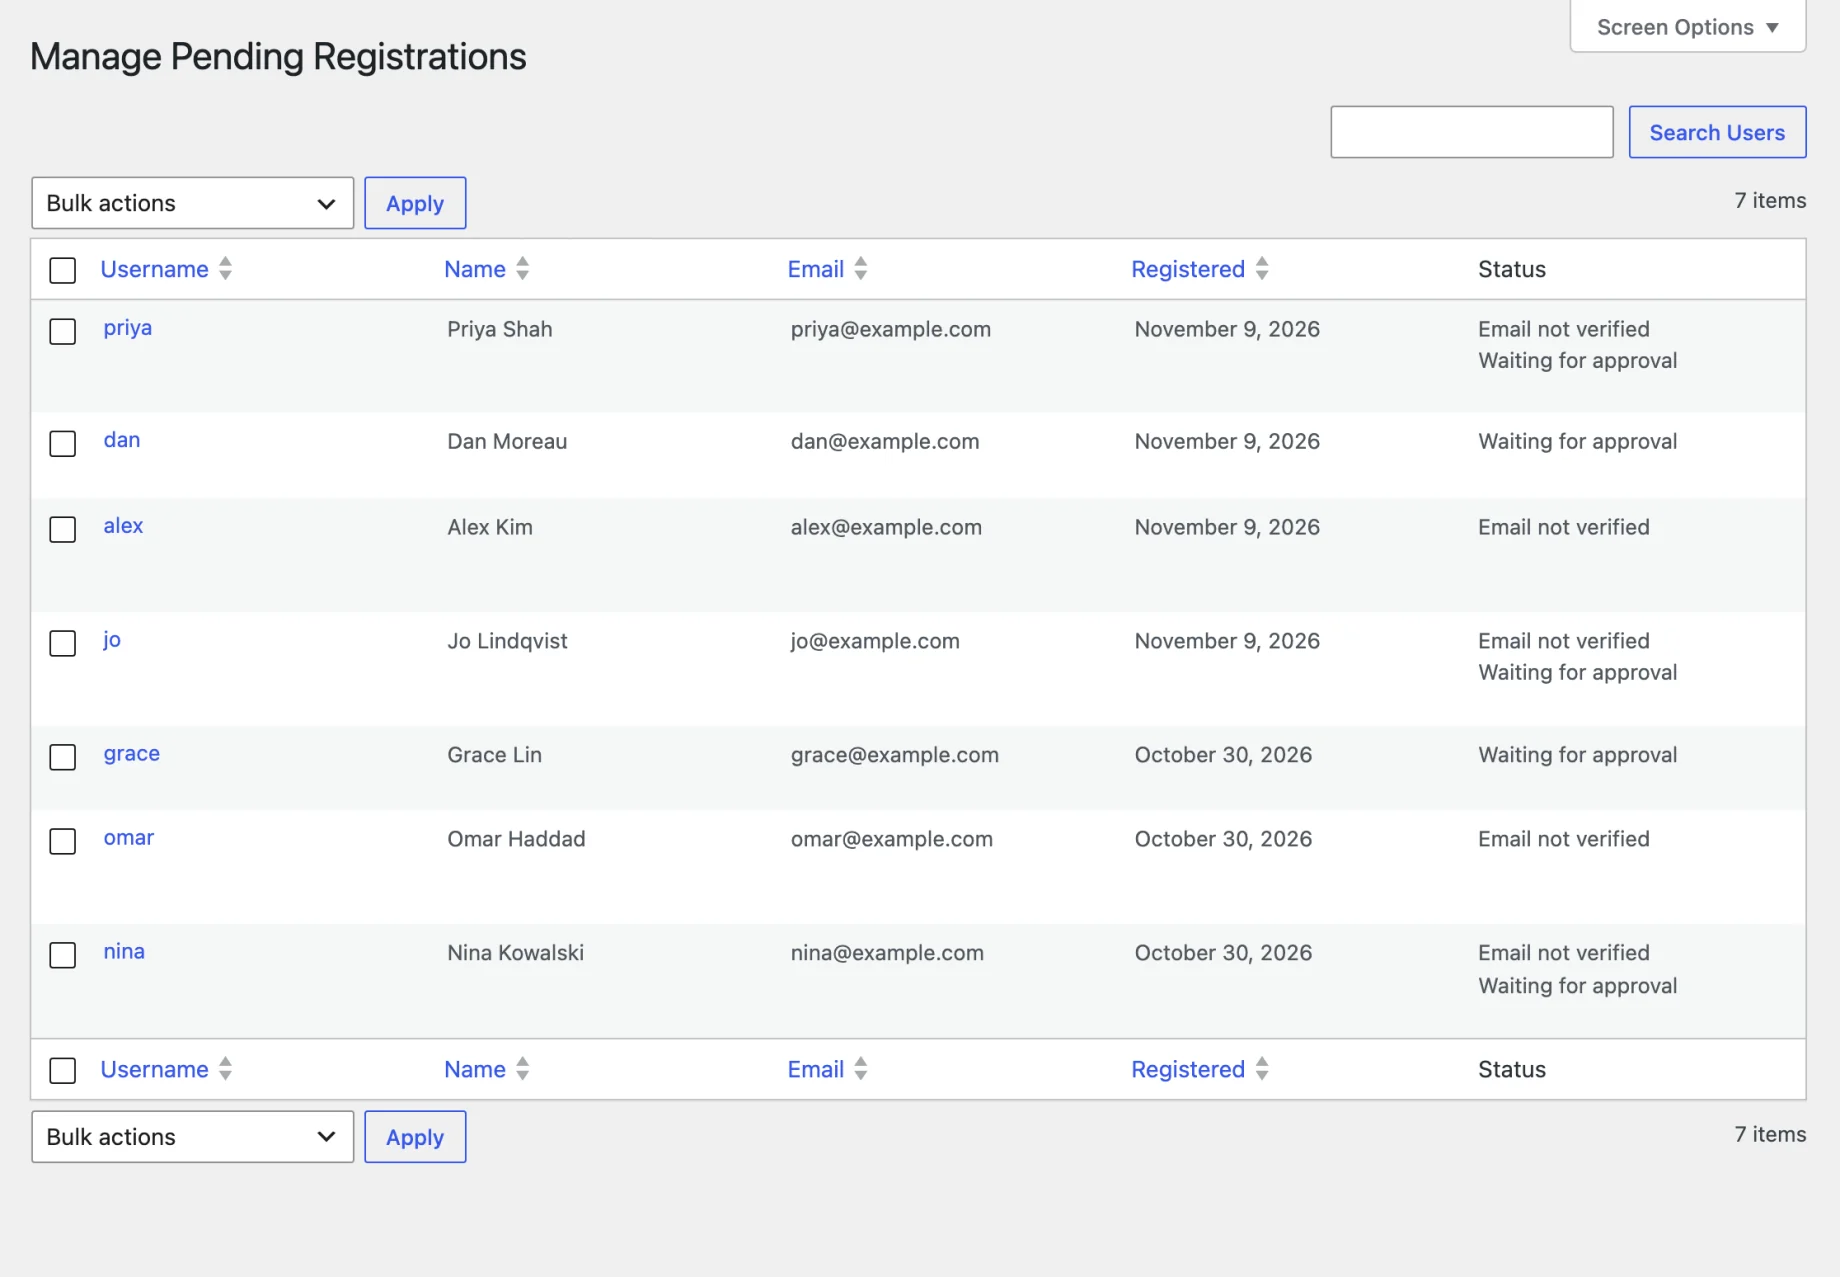
Hover over a username for the actions, or tick several and use Bulk actions:
- Approve lets them in (or, with both methods on, marks your half as done) and sends the Account approved email. With email verification only, Approve is how you let in someone whose email never arrived.
- Reject sends the Account rejected email and deletes the account.
- Resend verification email sends a fresh link.
Managing signups has more on this screen, and developers can add columns to the Manage Signups table, for example to show an answer from your registration form when deciding who to approve.
To ask existing members to verify, select them under Users > All Users and choose Set as Pending Verification from the bulk actions. That doesn’t email them, so with email verification on, send each one a link with Resend verification email here, or turn on Resend Email Verification Email on Login.
Close the other ways in
A few things to check so nobody skips verification:
- Lock wp-login.php. WordPress’s own registration page doesn’t send your verification email. Under Users > Settings > General > Login Settings, turn on Lock Access to wp-login.php so everyone uses your WP User Manager forms.
- Accounts you add yourself. With email verification on, a user you create in wp-admin needs to verify too. They’ll appear in Manage Signups, where you can resend their email.
- Throwaway domains. If the fake signups come from a handful of domains, you can block signups from specific email addresses before they reach the verification step.
Get started with WordPress email verification
Email verification in WordPress takes about ten minutes to set up: install the free WP User Manager plugin, add the User Verification addon (paid, or part of any bundle on the pricing page), choose your method, and put {verification_link} in the registration email. Your user list will only hold people who are who they say they are.

