
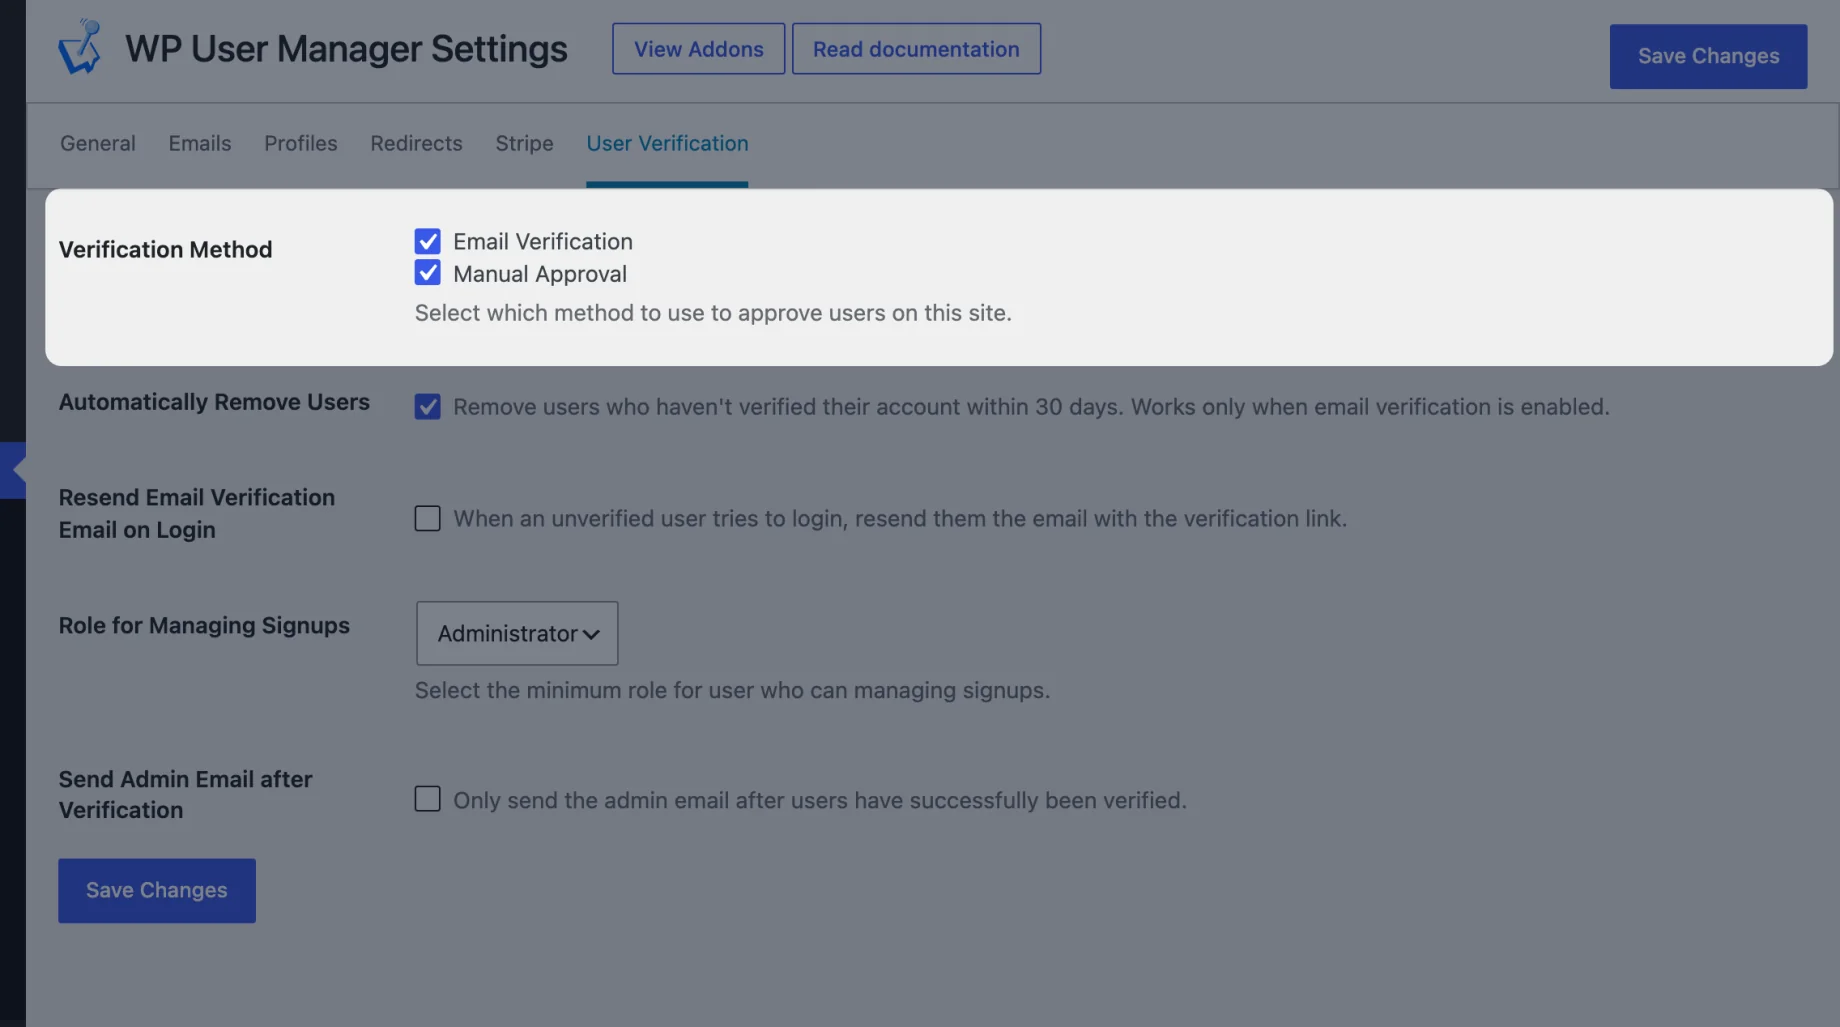
The User Verification addon checks new registrations before they can log in. It has two methods, and you can use either one or both together:
- Email Verification: new users get a link in their registration email and can’t log in until they click it.
- Manual Approval: every registration waits for you, or a team member, to approve or reject it.
With both ticked, users have to verify their email and be approved, in either order, before they can log in.
To choose, go to Users > Settings, open the User Verification tab, tick one or both options under Verification Method and click Save Changes.
Email verification
The verification link isn’t added to your registration email automatically. You need to add the email tag yourself, or users won’t receive a link.
Add the verification link to your registration email
- Go to Users > Emails and click Customize next to Registration confirmation.
- Add the
{verification_link}tag where you want the link, for example after a line such as “Please confirm your email address:”. - Save the email.
If you’ve designed your own email with a button, use {verification_url} instead. It prints just the address, so you can put it behind a button or your own wording.
Until the tag is in the email, the Users screens in your dashboard show a warning. If you use Manual Approval only, remove the tag: the link isn’t needed.
When a user clicks the link, they’re taken to your login page with a message saying their email is verified. Each link works once: resending the email creates a new link, and an old or wrong link shows an error asking the user to use the link in their latest email.
You can also automatically remove users who haven’t verified their email within 30 days.
Manual approval
New registrations wait in Users > Manage Signups until you approve or reject them. By default only Administrators can do this; to let Editors, Authors or Contributors manage signups, change Role for Managing Signups on the User Verification settings tab.
The Manage Signups screen
Users > Manage Signups lists everyone who is still waiting. With both methods on, the Status column shows what each user is waiting for: Email not verified, Waiting for approval, or both.
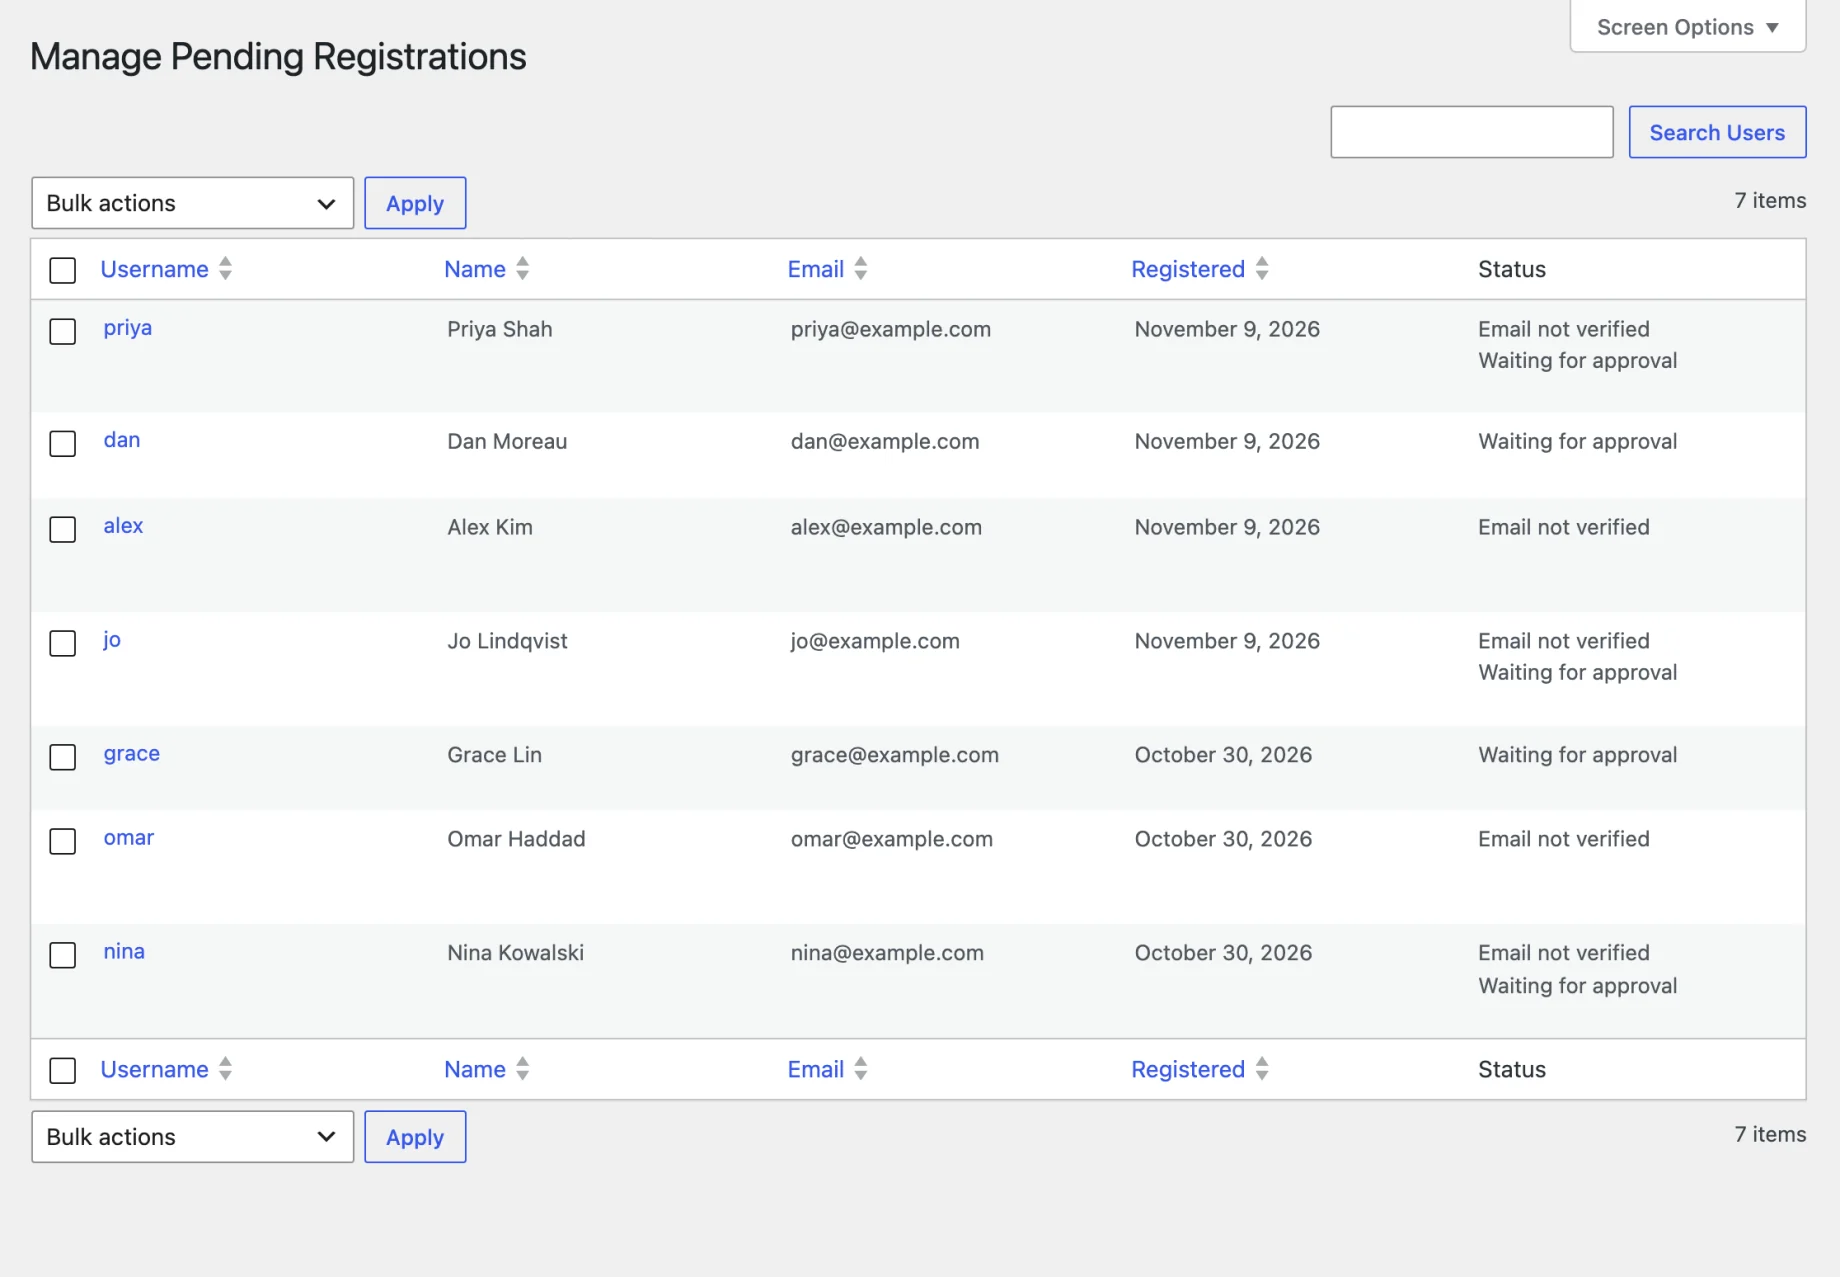
Hover over a username to see the actions, or tick several users and use Bulk actions:
- Approve sends the Account approved email. With Manual Approval on, it approves the user; if they still need to verify their email, they stay in the list until they do. With Email Verification only, it lets the user in without clicking their link, for example if the email never arrived. With Manual Approval on, Approve isn’t shown for users who are only waiting to verify their email.
- Reject sends the Account rejected email and deletes the user’s account.
- Resend verification email sends the Account re-verification email with a new link. It’s shown when Email Verification is on and the user hasn’t verified yet.
Rejecting a user deletes their account.
You can reword all three emails (Account approved, Account rejected and Account re-verification) in Users > Emails.
Asking existing users to verify
To put existing users through verification, go to Users > All Users, tick them, choose Set as Pending Verification from the bulk actions and click Apply. They can’t log in until they’ve completed the methods you have on. This doesn’t email them, so with Email Verification on, send them a link with Resend verification email in Manage Signups, or turn on Resend Email Verification Email on Login so they get one when they next try to log in.
For a full walkthrough, see WordPress email verification for new user signups. Developers can also add columns to the Manage Signups table.

Get Started with the Best WordPress Membership Plugin Today
Connect, Manage and Build your Membership Site