

If your WordPress website hosts users or members, you’ll likely want to organize this information in an accessible way. A WordPress member directory is one excellent way to do this, as it puts all user information in one place.
With the right User Interface (UI) and design, you can present a full directory of your site’s users for others to peruse and connect with. This might not need upkeep either, as you could automate its administration too.
In this post, we’ll discuss why you might need a WordPress member directory, and present the best solution for the job in WP User Manager. From there, you’ll get a step-by-step tutorial on how to create your own WordPress member directory using WP User Manager.
Why You Might Need a WordPress Member Directory on Your Site
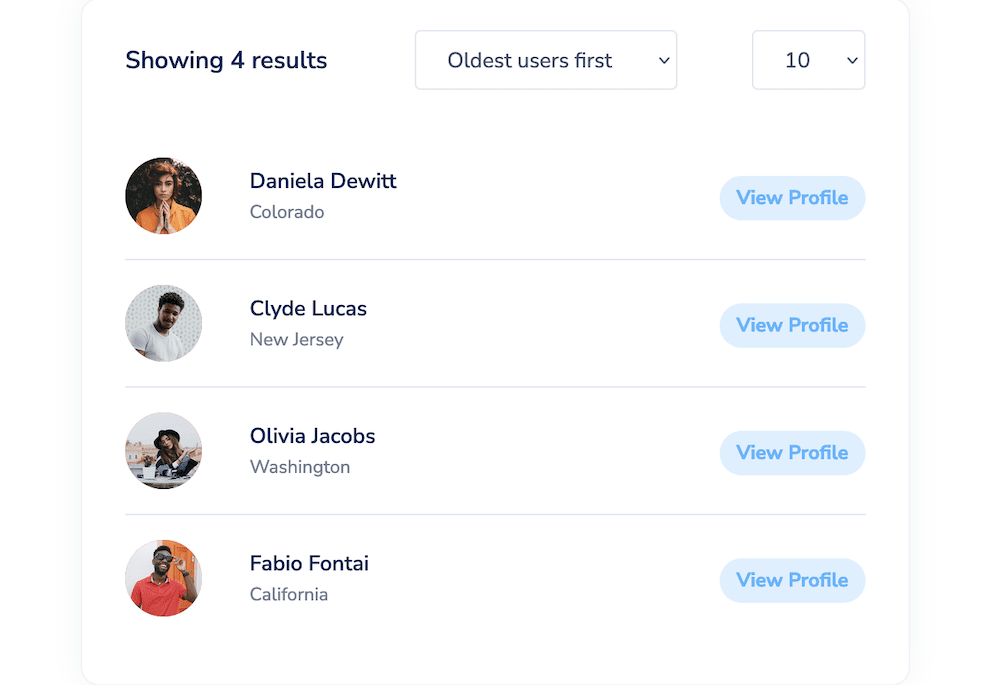
In a nutshell, a WordPress member directory is a list of the users who register on your site. This is often a list of active users, rather than old profiles. As such, it’s an up-to-date way to see every user and member of your site:
For your users, this is an invaluable resource if you encourage connections and want to develop a community. With the right blend of features and functionality (more of which soon,) you’ll be able to almost segment your user base into specific groups with the same interests. From there, users simply have to find each other.
In fact, a WordPress member directory on your site can be incredibly useful for you too. It can help you organize your user information fast, and provide a quick way to see just how many members your site has.
What’s more, a directory can benefit lots of different types of sites. For example, if you have a site that offers online courses, a member directory can help your students find and connect with each other. In contrast, if you run a membership site, a directory can help your members find and network with other members who share similar interests or professions.
How Different Sites and Niches Use a WordPress Member Directory
There isn’t only one way to use a WordPress member directory. In fact, different niches and site types will use this sort of tool in various ways.
For example, if you want to foster a community with your site, a directory will be an essential cog in the wheel. Here, a site will give users as much functionality to connect with each other as possible through the directory itself, groups, private messaging, and more.
This extends to membership sites too. For instance, your members could pay to sign up for premium groups and connection opportunities, which adds monetization to your WordPress member directory.
Get Started with the Best WordPress Membership Plugin Today
Connect, Manage and Build your Membership Site
There are even more formal ways to showcase your members and users. A business directory can curate local professionals and other businesses for others to browse and connect. It could even be a directory of experts for specific niches and industries.
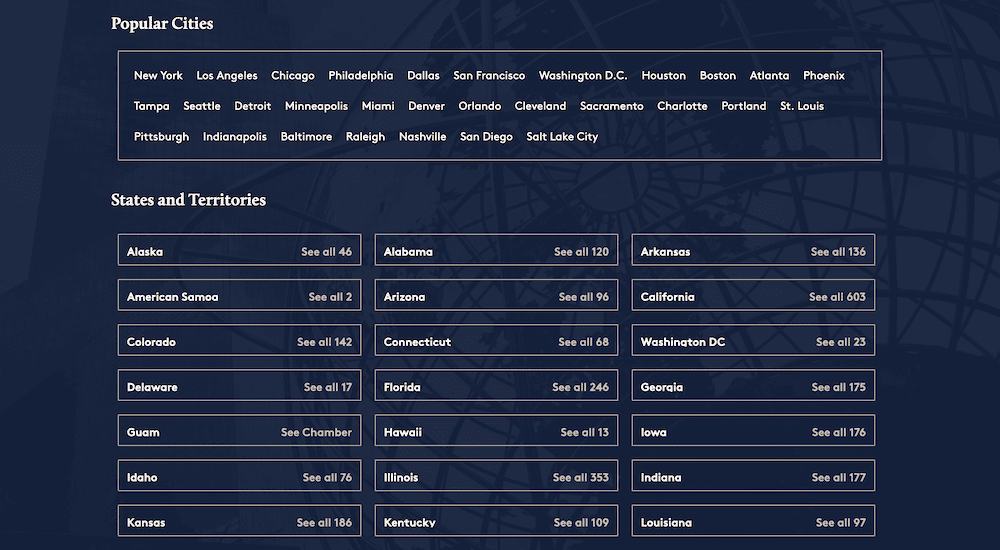
In fact, there’s nothing to stop you combining these facets into one whole. For example, the US Chamber of Commerce gives its business members access to a directory of other users, among other benefits.
However, to implement all of this on your site, you’ll need a plugin. While there are a few on the market, there’s one you’ll want to know about. Let’s look at this next.
Introducing the Best WordPress Member Directory Plugin: WP User Manager
When it comes to creating a WordPress member directory, WP User Manager is an ideal plugin to use. In a nutshell, it’s straightforward to use, offers a lot of customization, and provides a wide range of features and functionality for all manner of user management.

While WP User Manager is excellent in a number of situations, it can do the business when it comes to implementing a member directory too. Here’s what it can offer:
- Front-end user profiles. WP User Manager lets you create beautiful, customizable user profiles for your site’s members. This will make it simple for them to take ownership of their profiles, and connect and share information with each other.
- User registration. You’re also able to create custom registration forms for your site using a back-end drag-and-drop editor. This gives you a way to help users sign up and become members of your community.
- Front-end user submissions. You can also implement front-end user submission forms. This is a great way to encourage user-generated content and further build your site’s community.
- User roles and permissions. To help manage all of the users on your site, you can create custom user roles and assign specific permissions to them. This will help you control what users are able to do on your site, and can be useful to help you develop a community hierarchy.
Of course, WP User Manager includes powerful member directory functionality. You’re able to include avatars, offer filters and search functionality to make it easy for users to find the information they’re looking for, and more.
However, you’re also able to create custom user groups and assign users to them. This can be a powerful way to create sub-communities within your larger site community, and make it easy for users to connect with like-minded individuals. We’ll cover some of these aspects in more detail next.
How to Create Your Own WordPress Member Directory with WP User Manager
Next, let’s dive into how to create your own WordPress member directory using WP User Manager. While there are a few steps to follow, none will be out of reach. However, you’ll need to install the WP User Manager plugin on your site, so let’s start there.
1. Install and Activate WP User Manager
The first step is to install and activate the WP User Manager plugin. This follows the same process as almost every other WordPress plugin. What’s more, you can achieve your goals using the free version of the plugin too. Here are the steps in brief:
- Head to the Plugins > Add New screen within WordPress.
- On the WordPress Plugin Directory screen, search for “WP User Manager.”
- When you find the plugin, click Install Now, then after a few moments, click Activate.
From here, you’ll want to create your member directory, and we’ll look at this next.
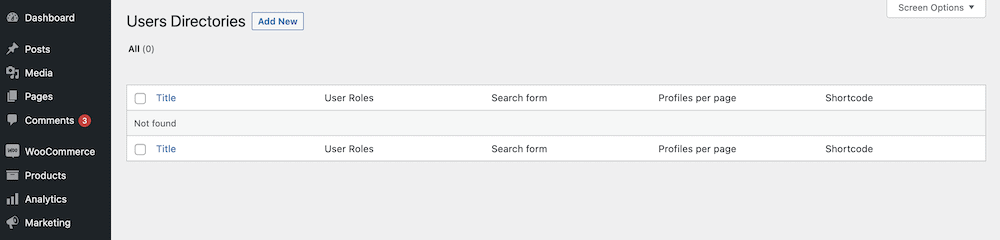
2. Create Your WordPress Member Directory
Within WordPress, you’ll use the Users > Directories screen to create your member directory, then use further options to customize it. However, on your first use, this screen won’t showcase much:
If you click the Add New button, this will bring you to a directory creation screen:
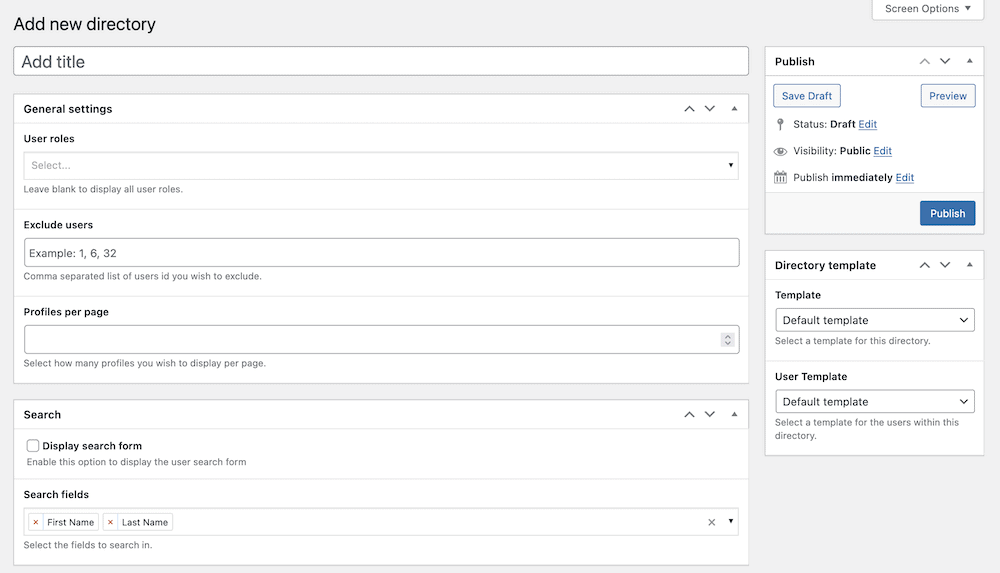
There are lots of options here, but first you should give the directory a title. This isn’t something that the user sees, so it can be for your reference. Also, you won’t need to work on adding users to the directory, or any other tedious aspect, as WP User Manager does this for you.
From here, you’ll have to make some initial customizations. We’ll look at this in the next step.
3. Customize the Settings for Your Directory
Before you move away from the Add New Directory screen, you should take some time to adjust the available options.
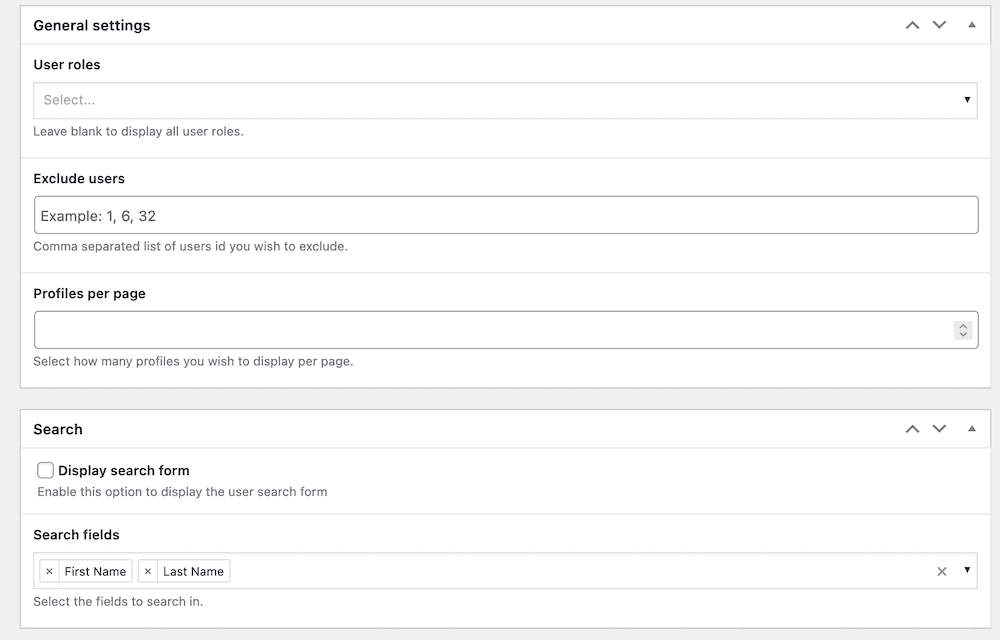
We have a full post in our documentation on what you can achieve here, but let’s summarize the options:
- You can set the user roles that the directory will curate, along with any user IDs you wish to exclude, along with choosing how many profiles show per page.
- There’s full search functionality that will let you display a form and specify the available search fields.
- You can also sort the entries in the directory. This includes the method you’ll use to sort entries, and whether you display an ‘amount’ filter too.
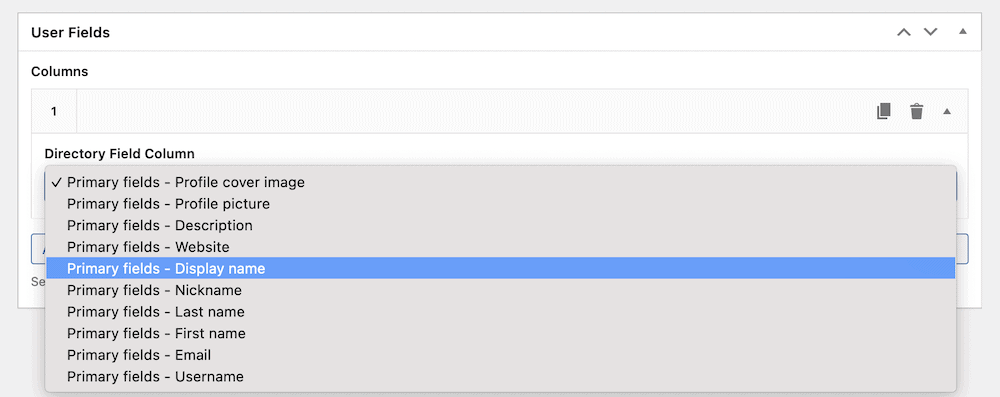
The User Fields section is where you can customize how your member directory looks on the front end. Using the drop-down menus and drag-and-drop editor, you can piece together how the entries will display, and what fields will show. You’re able to add as many columns as you need here, but be mindful of the User Experience (UX) and design of the UI.
When you finish, you’ll click the Publish button to save your new directory:

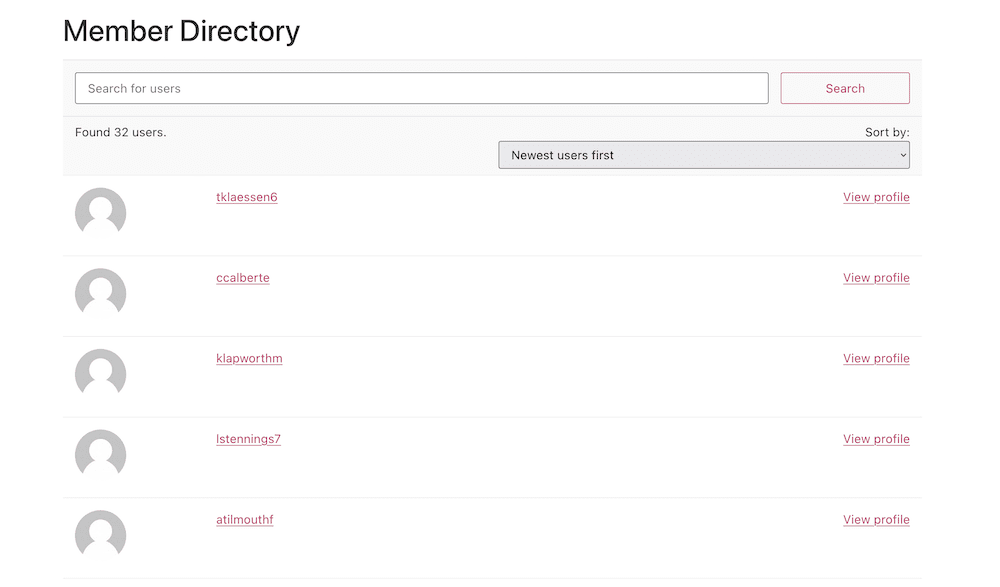
The final step is to display your WordPress member directory on your site. This is super simple, and uses WordPress shortcodes.
4. Add the WordPress Member Directory to Your Site’s Front End
Once you publish a user directory, you’ll see it appear on the general User Directories page along with some other information. However, our focus is on the shortcode that generates:
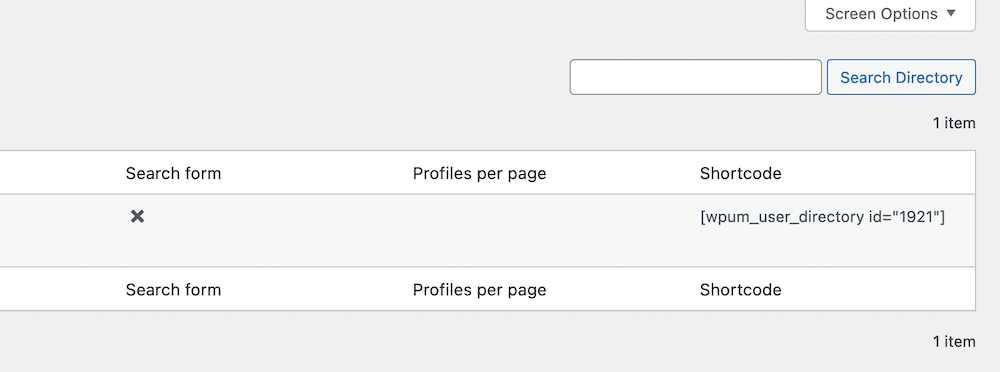
From here, you can paste this shortcode into any WordPress page to display it on the front end:
At this point, you’ll have a WordPress member directory in place, but you might need to extract greater value out of it. Our next section will look at some ways you can do this.
How to Get More Value Out of Your Member Directory
As you’ll now understand, a WordPress member directory is a powerful way to help users connect with each other and create a sense of community. However, creating the directory isn’t enough.
To get the most value out of it, you’ll want to look at some strategies to help optimize your directory further:
- Encourage users to update their profiles. One of the most important aspects of a member directory is the ability for users to update their profiles. As such, ask users to fill out their profiles with as much detail as possible. This will help other users get to know them better and make it easier for them to connect.
- Use the built-in search functionality. Make sure your member directory offers search functionality, so users can find the information they need with ease. This is especially important for large directories with many listings.
- Make sure you spend time on how your directory displays. Within WP User Manager, you can use the User Fields section to add as many columns as you need. Within, you can specify which fields display. This gives you a way to customize your directory and make it unique.
On the whole, WP User Manager can deliver a WordPress member directory that can do all of the above and much more. What’s more, you get even greater functionality with a premium plan.
Wrapping Up
For sites that take in a lot of users, you might want some way to showcase them all. A WordPress member directory is one approach that offers plenty of benefits. Primarily, the opportunity to connect is great, and a directory is one of the best ways to help users find each other.
When it comes to implementing a WordPress member directory, WP User Manager is the best plugin for the job. It includes ways to add gorgeous directories and groups, alongside the typical core functionality. Users will have their own profiles that take all manner of customization, and from there, they can use the member directory to locate other users of your site.
Does this article inspire you to create a WordPress member directory? Share your thoughts in the comments section below!